Have you checked the latest releases of Telerik UI for WPF (R1 2022) and Telerik UI for WinUI (1.0)? I have and here is what I notice—the Map control of both suites now supports smooth zooming! If you are as eager as me to explore it, get your glasses ( or ) and read on.
The Meaning of Smoothness
Let us assume that we are developing an interactive cartographic application. The user is presented a map of, say, the U.S., and can zoom in on regions, states and cities by picking items from a list or clicking on areas on the screen. What if a user double-clicks an item and the map suddenly reaches that zoom level without a smooth transition? Not cool, and, sadly, this is still all too common nowadays.
Information visualization strongly needs smooth transitions. Abstract data is typically mapped to 2D graphic representations (e.g., scatterplots, graph diagrams, treemaps). Large data sets lead to large images with much detail. Interaction with these representations is vital to achieve insight.
What should be properly addressed is the importance of being able to view things at different levels of scale, or for short multiscale viewing. And being able to perform such operations the right way.
Decision ‘Precision’
As we learned in the previous section, many tasks on a map control require smoothness for a better user experience. An example of such an operation is zooming.
A particularly important part of zooming is the zoom level. It determines how much of the world is visible on a map. At low zoom levels, a small set of map tiles covers a large geographical area. At higher zoom levels, a larger number of tiles cover a smaller geographical area.
Until now, the RadMap control for both WPF and WinUI provided zooming by levels that are integer values. This means that you always needed to zoom from level 5 to 6, for example. Not the decision for precision that the title of this section suggested, huh?
Relax! The latest releases of Telerik UI for WPF and Telerik UI for WinUI got that covered. Precise zooming options are delivered, and I am ready to walk you through them.
Likeness and Unlikeness
In this section, I will show you what both maps have in common and where the difference is as it comes to precision of zooming.
Starting with the most important—both map components allow for a more precise zooming option through their Zoom property. As you may guess, it is of type double, enabling you to easily zoom in to, say, 5.5 or any other value until you reach the next integer zoom level. A small, but significant difference here—this property is an additional one for WPF. For WinUI, there was a ZoomLevel property which has been removed with the introduction of the new Zoom property.
Both controls enable the end user to zoom in and out of the context of the map via the mouse wheel or through the zoom option of the commands bar panel. Another common addition is the option to control the zoom step of the mouse-wheel zooming and of the slider in the UI—the ZoomStep property. By default, the control will zoom in and out by one level. The key to smoothness is a smaller value of the ZoomStep property. This will affect both the zooming initiated by the mouse wheel and the buttons of the zoom slider.
I promised to talk about what is similar and what is not regarding zooming precision. Stopping here, as I am afraid that I can get carried away. But feel more than welcome to learn all about the zoom related features in the Zooming articles of the RadMap’s documentation for WPF and WinUI.
So much talking and not a single map in this blog? Let me fix that.
Zoom Into the World With WPF
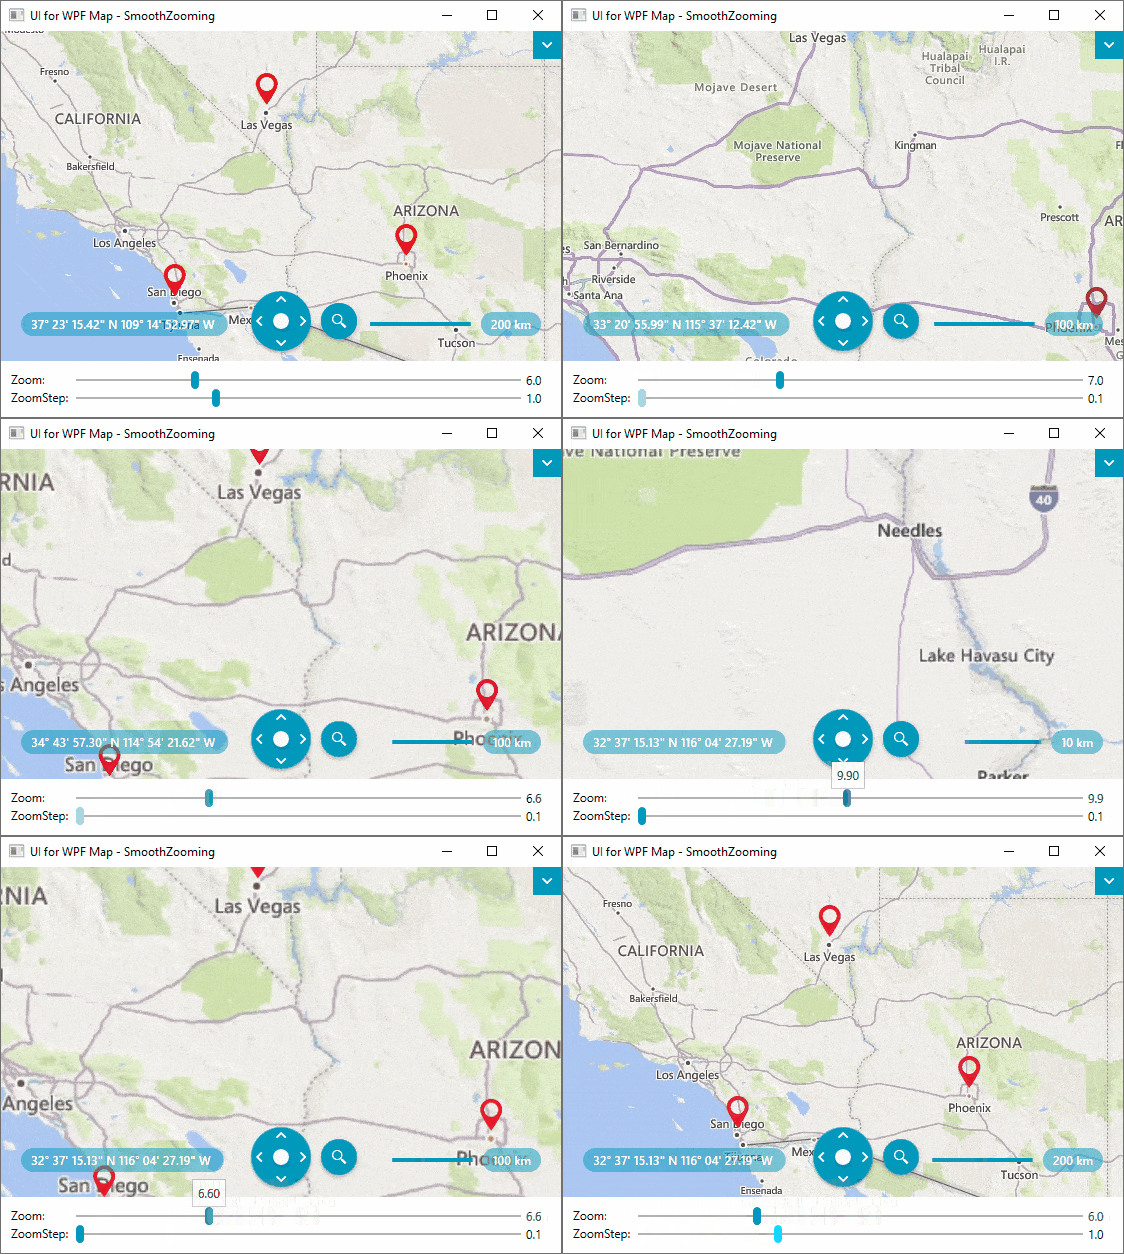
Do you fancy visiting Las Vegas, San Diego and Phoenix (again?), or there is no need for me to ask? Let us first try that with our WPF RadMap control.
A few things for the above GIF settings. We started with the following:
- A 6.0 zoom
- The default 1.0 zoom step
- A VisualizationLayer containing the three pinpoints representing the cities we want to visit
I increased the zoom to 7.0 and sadly two of the cities got lost from the viewport of my map. Then I tuned in the zoom step to be smaller—0.1—and I started zooming out to find the perfect zoom for my map and the points of interest on it.
The rest was just for the enjoyment of my eyes. To fully taste the smoothness of the zooming.
Since I already know the best zoom settings to my taste for the POIs that I chose, I am ready to share it with you:
<telerik:RadMap x:Name="radMap" Zoom="6.5" ZoomStep="0.1" Center="34.68918810838,-114.832387568751"/>Now I want to give the world a whirl with the WinUI RadMap, too, don’t you?
Zoom Into the World With WinUI
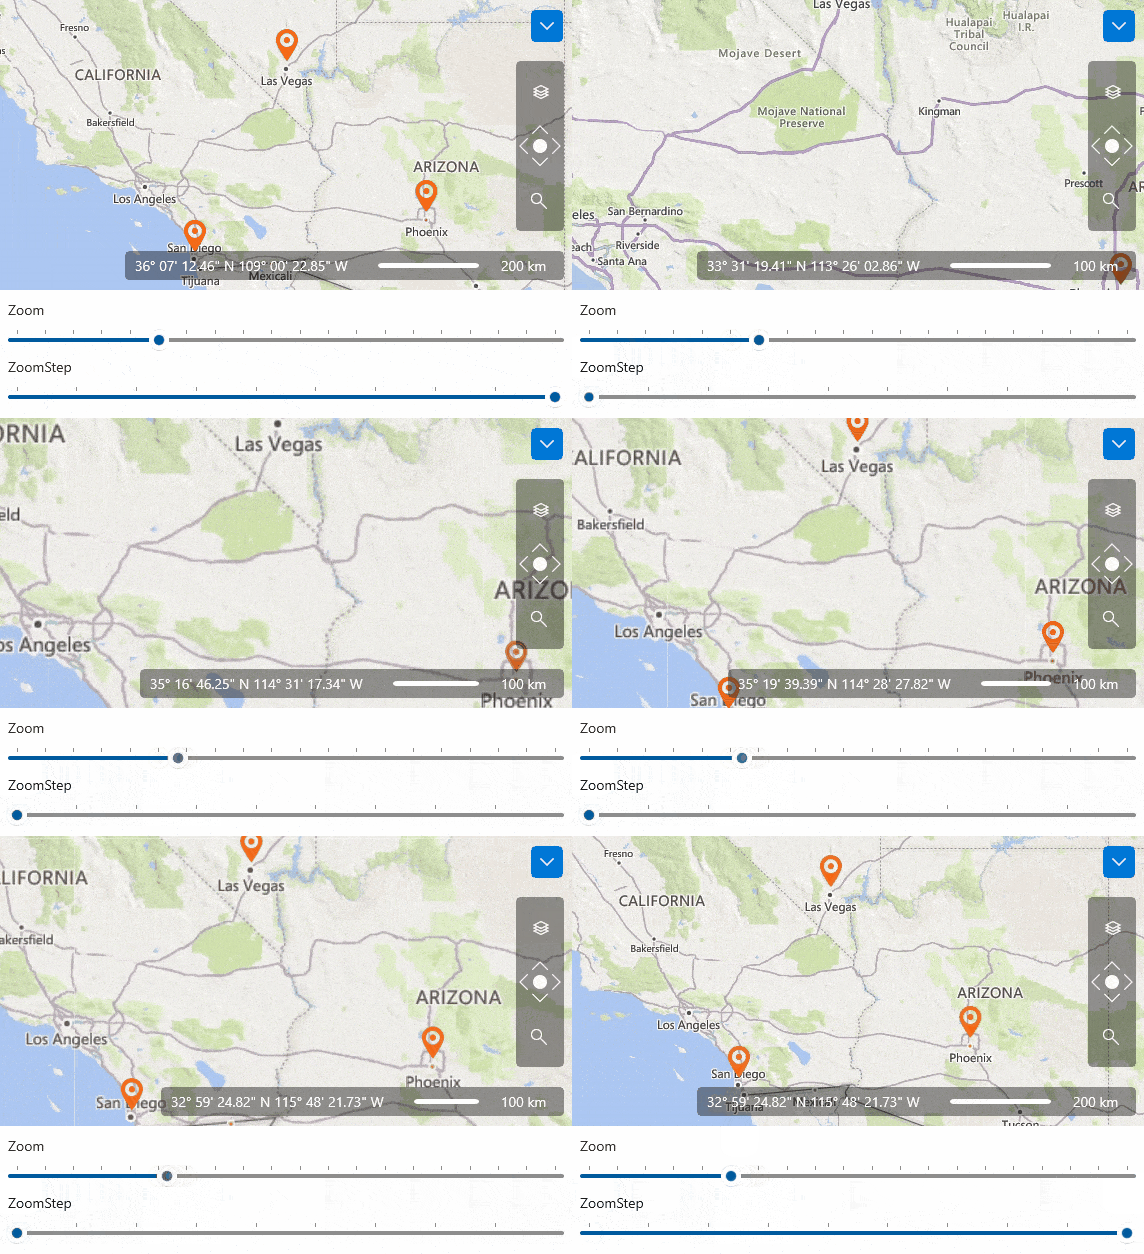
I will simply copy-paste the above setup from the WPF world into a fresh WinUI app. Of course, I will need some small adjustments to get it running. For example, updating the namespaces with the ones for WinUI (Telerik.UI.Xaml.Controls.DataVisualization and Telerik.UI.Xaml.Controls.DataVisualization.Map will be needed). And (very important ⚠️), adding the Generic.xaml to the App’s MergedDictionaries:
<Application.Resources> <ResourceDictionary> <ResourceDictionary.MergedDictionaries> <XamlControlsResources xmlns="using:Microsoft.UI.Xaml.Controls" /> <ResourceDictionary Source="ms-appx:///Telerik.WinUI.Controls/Themes/Generic.xaml"/> </ResourceDictionary.MergedDictionaries> </ResourceDictionary></Application.Resources>I am ready, so let us hit F5 and check the result together.
Pretty, pretty, pretty.
If you want to dig deeper, you can try the GetBestView() method of the map’s visualization layer to find the LocationRectangle that is the best for your map’s viewport. Once you get that, you call the SetView() method of the map with the useFractionZoom parameter set to true. This way, you will receive the most optimal (according to the methods and their algorithms) view zoomed to the most precise level for your viewport. It is worth a try, but I will leave it all to you this time—I do not want to spoil you.
It is now time for a wrap.
A Minute for Feedback
That is how long it mostly takes. So, if you have a minute, feel free to drop us a comment sharing your thoughts below. Or visit our Feedback Portals about UI for WPF and UI for WinUI and let us know if you have any suggestions for more awesome features like the map’s smooth zooming or (why not) controls that will improve your work. Let us shape the feature of both products together.
Also, be sure to try out the latest:

