Have you ever wanted your application to have the filtering options of the most popular shopping sites? Now it’s possible, with the brand-new RadFilterView control. It comes with the latest R3 2021 release of Telerik UI for WinForms.
RadFilterView is a control that allows your users to filter data with ease, using the intuitive UI. It is designed to work with our most popular controls like RadGridView, RadListView, RadTreeView and so on. You can simply set the AssociatedControl property of RadFilterView and, when the user changes some filters, the associated control will be instantly filtered.
this.radFilterView1.AssociatedControl = this.radGridView1;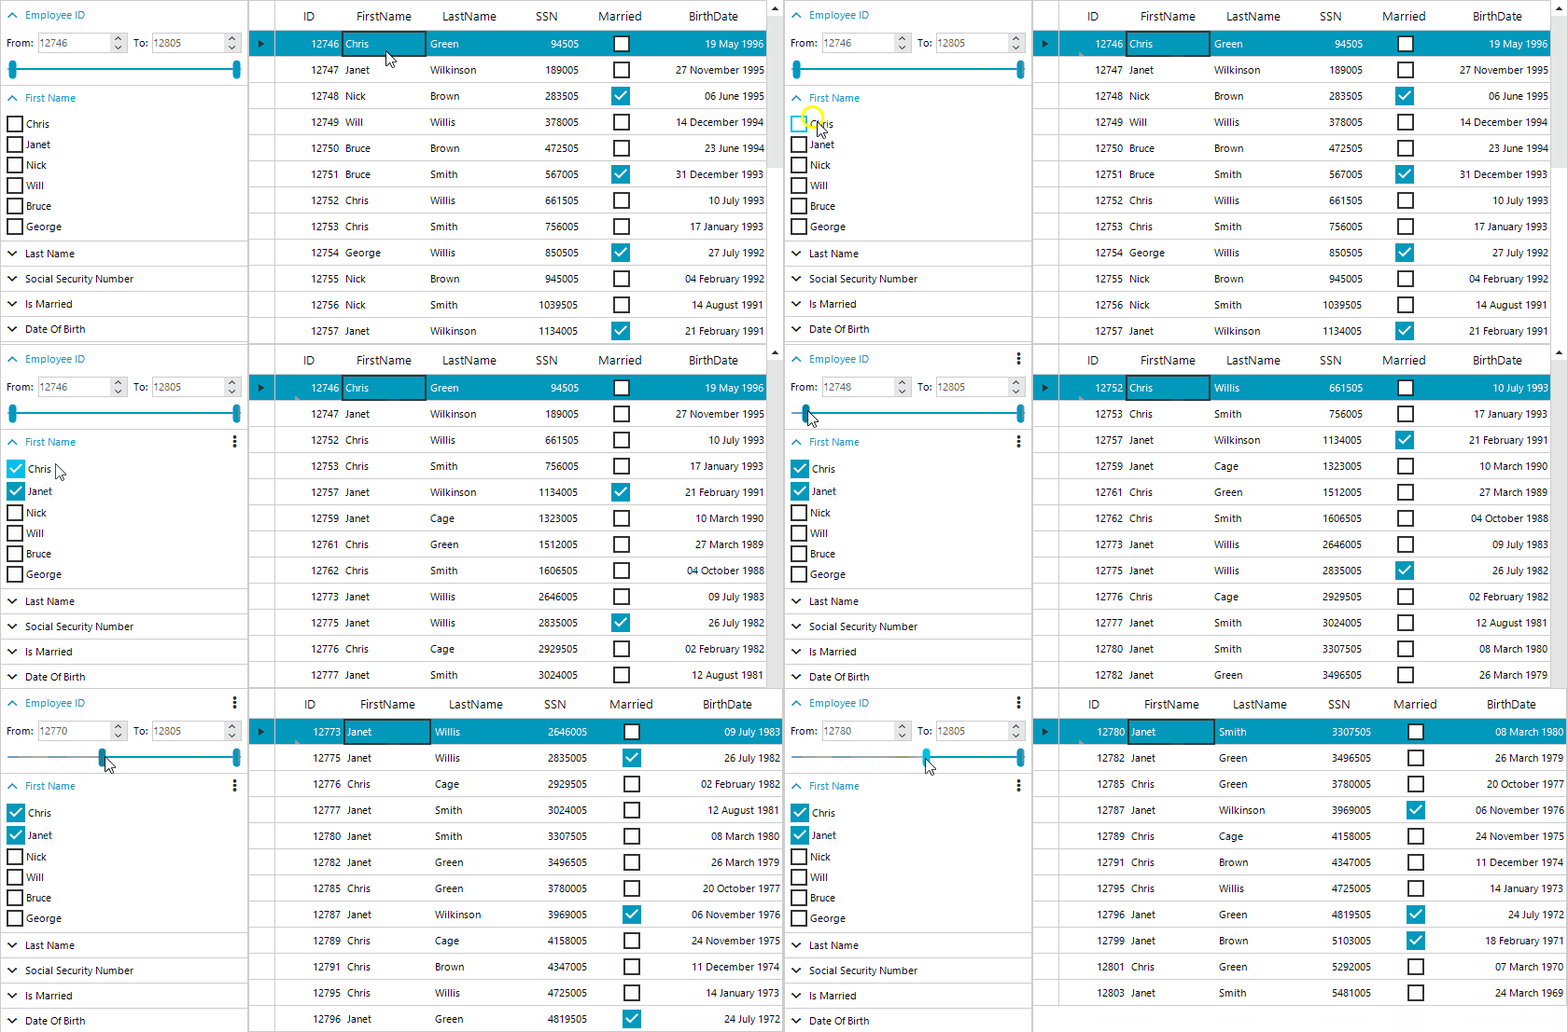
If you do not want to trigger the filtering of the associated control each time the user makes a single change, you can change the FilteringMode property.
this.radFilterView1.FilteringMode = FilteringMode.Programmatically;The control can also work standalone (without an associated control). In this mode, the DataSource property needs to be set, to feed the control with data.
When the user changes a value in any category the FilterChanged event of the control is fired. In the event handler, you can use the collection of FilterDescriptors, which is used to filter most of our data controls, or the RadFilterView.Expression property, which returns an SQL query–like string:
"[FirstName] IN ('Bruce','Chris') AND [SSN] >= 2882255 AND [Married] = True"
Categories
How does it work? When the DataSource is set, the filter view control creates a category for each column of the corresponding data. Then goes through each record and stores the values. Based on the data type of the column, the control creates distinct types of categories:
-
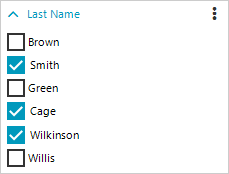
Text (string) data: The category creates a list of checkbox items with all the unique values. You can switch between single and multiple choice.
![text-category text-category - Of six checkbox filters for last names, three are selected]()
-
Numeric data: This category shows numeric inputs (RadSpinEditorElements) and restricts the user to change the values between the minimum and maximum values found in the data source. There is also a RadTrackbarElement (slider) added below the spin editors for even better control of the values.
![numeric-category numeric-category - slider shows from/to range with the numbers in boxes that allow incrementing/decrementing]()
-
Boolean data: It is an ancestor of the text category and shows two checkboxes with true and false values.
![bool-category boolean-category - Discontinued with true or false checkboxes]()
-
DateTime: This category uses two date inputs (RadDateTimePickerElements). And just like the numeric inputs, the users are restricted to changing the dates in the range between the minimum and maximum values in the DataSource.
![datetime-category datetime-category - Date of birth with From/To range with dates]()
-
Indicators: The purpose of filter indicators is to allow users to easily identify the categories with changed values (for example, the text category with some checked checkboxes or the numeric category with changed min value). This is extremely useful when the user has collapsed some categories and sees only the header text. The indicator also allows the filter of the current category or all filters in the control to be cleared.
![indicator indicator - clear filter, clear all filters]()
Working With Categories
The categories provide a variety of options where you can replace the whole category with a custom one, customize the category or just change the values.
Now let’s have a look at a filter view bound to text data. Here is how the default created text category looks:
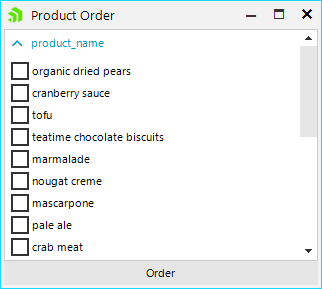
As you can see, the category header text is not user-friendly as it is the same as the source column name. The category display name can be changed in the CategoryCreating or CategoryCreated events.
private void RadFilterView1_CategoryCreated(object sender, FilterViewCategoryCreatedEventArgs e){ if (e.Category.PropertyName == "product_name") { e.Category.DisplayName = "Product Name"; }}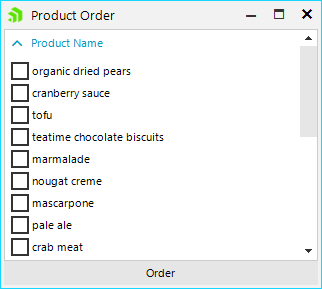
Another thing that can be seen is that the values are in the same order as they appear in the data source. When we have a large set of text values it would be much easier for the users to navigate through alphabetically sorted data. The correct place to reorder the values is the CategoryCreating event. Here you can even replace the whole category. Here is a code sample of how to sort the values.
private void RadFilterView1_CategoryCreating(object sender, FilterViewCategoryCreatingEventArgs e){ List<object> values = e.Values.ToList(); values.Sort(); e.Values = values;}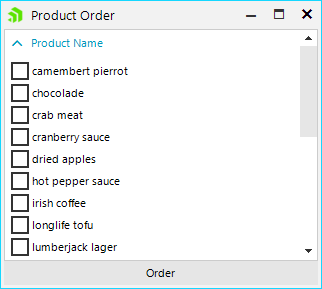
Much better! To make it even more readable, we can capitalize the first letter of each product. This can be done in the ItemCreated event of the text category and change the text of the item (using the ToTitleCase method of the culture TextInfo). The right place to attach to this event is again in the CategoryCreating event.
private void RadFilterView1_CategoryCreating(object sender, FilterViewCategoryCreatingEventArgs e){ List<object> values = e.Values.ToList(); values.Sort(); e.Values = values; FilterViewTextCategoryElement category = e.Category as FilterViewTextCategoryElement; category.ItemCreated += this.Category_ItemCreated;}private void Category_ItemCreated(object sender, FitlerViewTextCategoryItemCreatedEventArgs e){ TextInfo info = CultureInfo.CurrentCulture.TextInfo; string newText = info.ToTitleCase(e.Item.Text); e.Item.Text = newText;}And the final result :
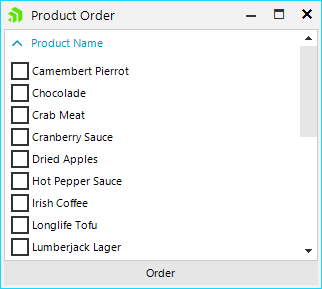
You can find more information about the RadFilterView control in our online documentation.
Share Your Feedback
Feel free to drop us a comment below sharing your thoughts. We would love to hear how all this works for you. You can visit our UI for Winforms Feedback Portal and let us know if you have any suggestions for particular features/controls.
If you haven't tried the Telerik UI for WinForms, you should check out our free trial or, better yet—go through all our UI suites in the DevCraft bundle!
