Wondering how to achieve the same look for your Xamarin Forms application on both Android and iOS? Learn how to implement Material Design in your Xamarin Forms apps and make this easy.
As we know, when we are working with design in Xamarin Forms, the controls are rendered to the native controls defined by each platform. That’s why we sometimes declare a container as simple as an Entry, and when we visualize it in Android it looks different than iOS. And that is really amazing ! But what happens if we have a client that requires their application to look the same on both Android and iOS?
For this there is Material Design, which is a design system responsible for making our controls have the same visualization in each platform.
To be able to implement it in Xamarin, we have Xamarin.Forms Material Visual, which is used to apply the designs defined in Material Design.
⚠ Important To Know
On Android:
Material Visual requires a minimum version of 5.0 (API 21) or greater
TargetFramework of version 9.0 (API 28)
First of All… What Do I Need?
➖ Add from NuGet Package the plugin: Xamarin.Forms.Visual.Material

➖ Let’s initialize Material Visual on each platform
Add the following lines after the Xamarin.Forms.Forms.Init method:

On Android: In your MainActivity.cs:
global::Xamarin.Forms.FormsMaterial.Init(this, savedInstanceState);

On iOS: In your AppDelegate.cs:
global::Xamarin.Forms.FormsMaterial.Init();
Let’s Start!
Let’s Learn the Controls Supported by Material Visual
It’s important to know the controls that are actually supported by Visual. These controls are made by Material renderers, which apply the Material Design rules.
| ➖ ActivityIndicator | ➖ Editor |
| ➖ Button | ➖ Entry |
| ➖ CheckBox | ➖ Frame |
| ➖ DatePicker | ➖ Picker |
| ➖ ProgressBar | ➖ Slider |
| ➖ Stepper | ➖ TimePicker |
Applying Material Visual
It’s so easy to use – you just have to add the Visualproperty to your controls.
On your XAML:
<ContentPage Visual="Material">
         ...
    </ContentPage>
Also you can apply it in your C# file:
    ContentPage cp =  new  ContentPage();
    cp.Visual  =  VisualMarker.Material  or  VisualMarker.MatchParent  orVisualMarker.Default
Visual property gets the following values:
Default: Render the view using the default renderer.
Material: Render the view with the direct parents renderer.
MatchParent: Render the view using the Material renderer.
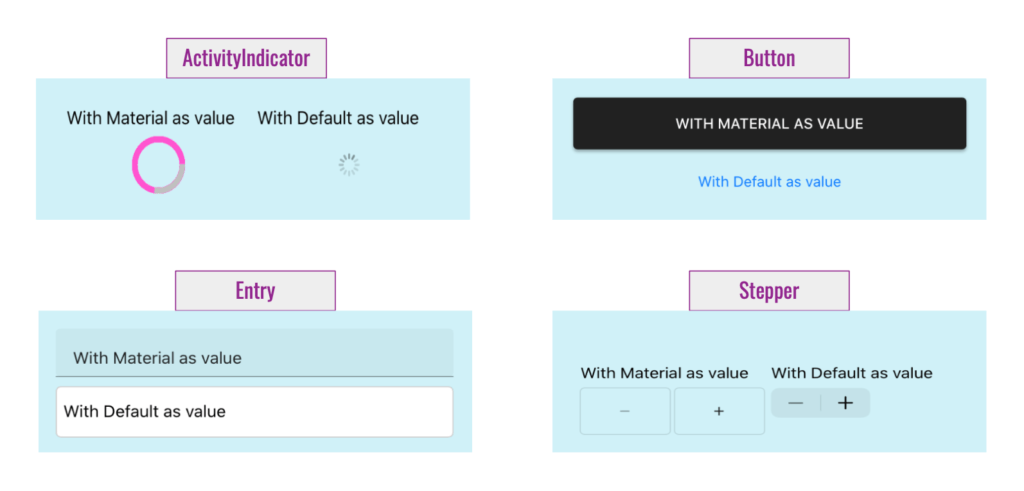
And now let’s see some examples of my favorite controls that Visual bring to us!
Thanks for reading!!!
References:https://docs.microsoft.com/en-us/xamarin/xamarin-forms/user-interface/visual/