At this point in the Kendo UI and Angular Unite series our to-do app is looking great using Kendo UI components & custom Angular animations. However, each to-do item could benefit by having a time assigned. Let's see how we can easily accomplish this with the Kendo UI TimePicker!
Hello and howdy! Welcome back to Angular and Kendo UI Unite! I'm Alyssa Nicoll the Angular Developer Advocate for Kendo UI at Progress. If you are new to this series, I highly suggest you start with the first post here, or check out the video series these posts are based on! In this post, we're actually going to add a TimePicker to our todo list, so that you can not only add in todos but you can assign a time for them to get done by.
Follow along with the code found here.
To start off, we're going to go ahead and open up our terminal, and install the Angular Kendo date inputs.
Installing Kendo UI Date Inputs
ng add @progress/kendo-angular-dateinputs
Installing these inputs will go ahead and give us access to all of the date inputs that we would ever want to use from Kendo UI. However, today, we are only going to use the TimePicker. We are actually done now with the terminal window, and can close that.
Inside of our template in the button, next to the item, the title, of the todo item, we want to add in a Kendo TimePicker. And we want to bind the value of our todos.
Add timepicker to Template
<kendo-timepicker [(value)]="todo.due"> </kendo-timepicker>
We are going to set the value to todo.due, which we still need to create.
Now, if we go into our component, we see that our todos do not have due yet. Now is the time to fix this! We need to give each item a due time: due: new Date(2019, 3, 10, 2, 30, 0).
We’ll just vary the time a bit on each one, by changing the values inside of the Date().
Update todos Array with due
  todos = [
    {
      item: 'Take dog to vet',
      due: new Date(2019, 3, 10, 2, 30, 0)
    },
    {
      item: 'Get oil change',
      due: new Date(2019, 3, 10, 2, 30, 0)
    },
    {
      item: 'Finish super hard puzzle',
      due: new Date(2019, 3, 10, 2, 30, 0)
    },
    {
      item: 'Pack for Denver',
      due: new Date(2019, 3, 10, 3, 30, 0)
    },
    {
      item: 'Create to-do app',
      due: new Date(2019, 3, 10, 1, 30, 0)
    }
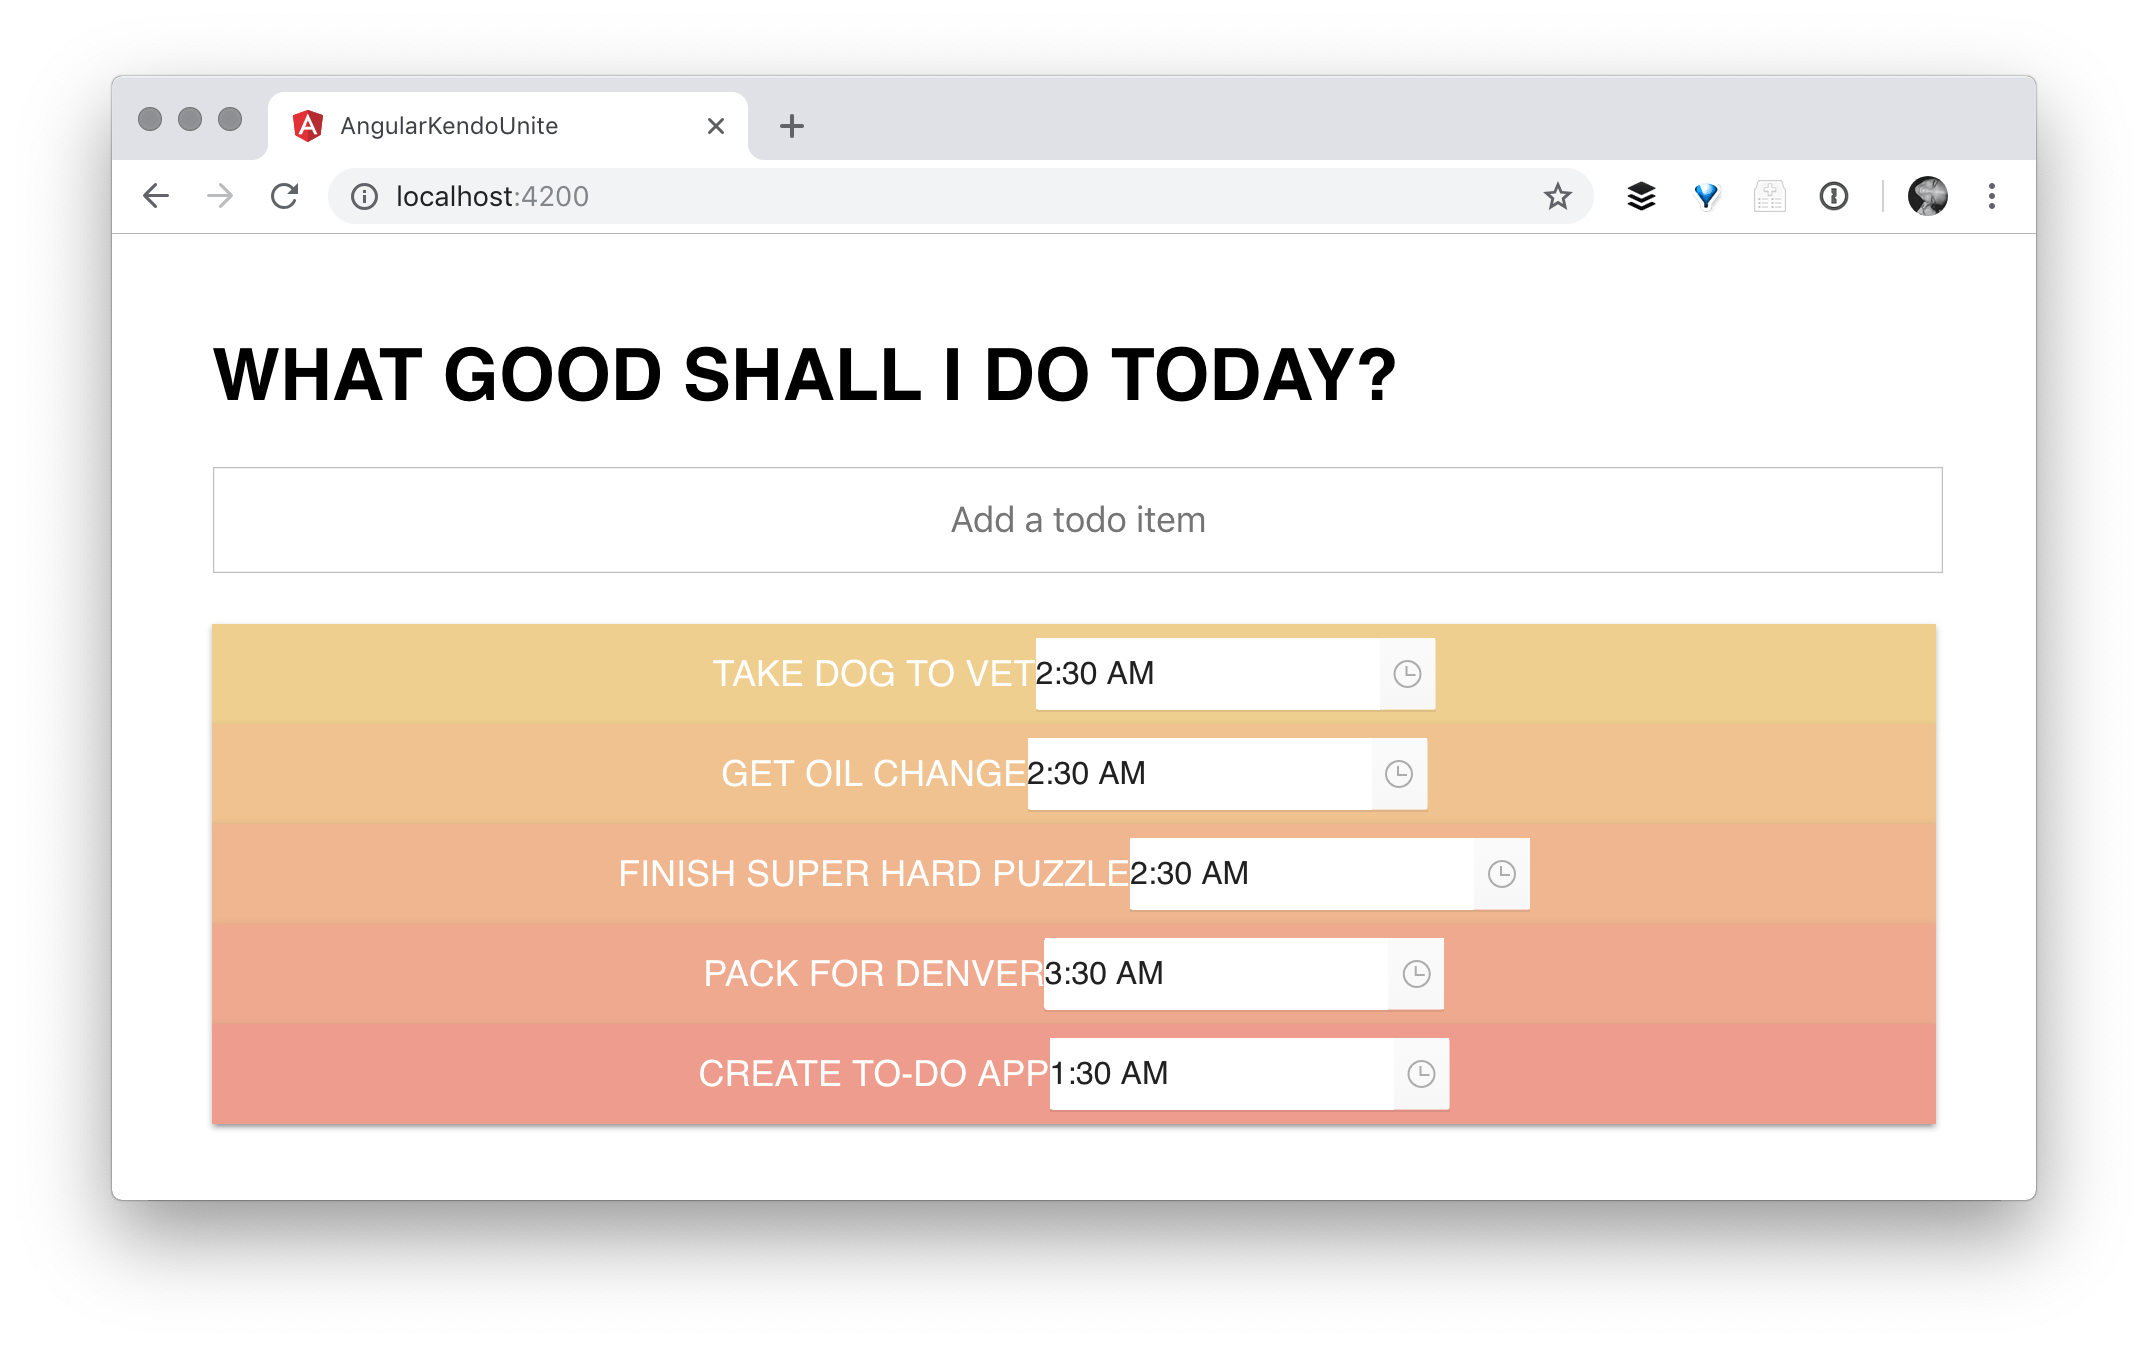
So, each of the items now has a "due" which is set to new date. Now if we save this and actually head over to the CSS, we'll see that this is where justify-content: space-between; comes in handy.
Without justify-content: space-between;

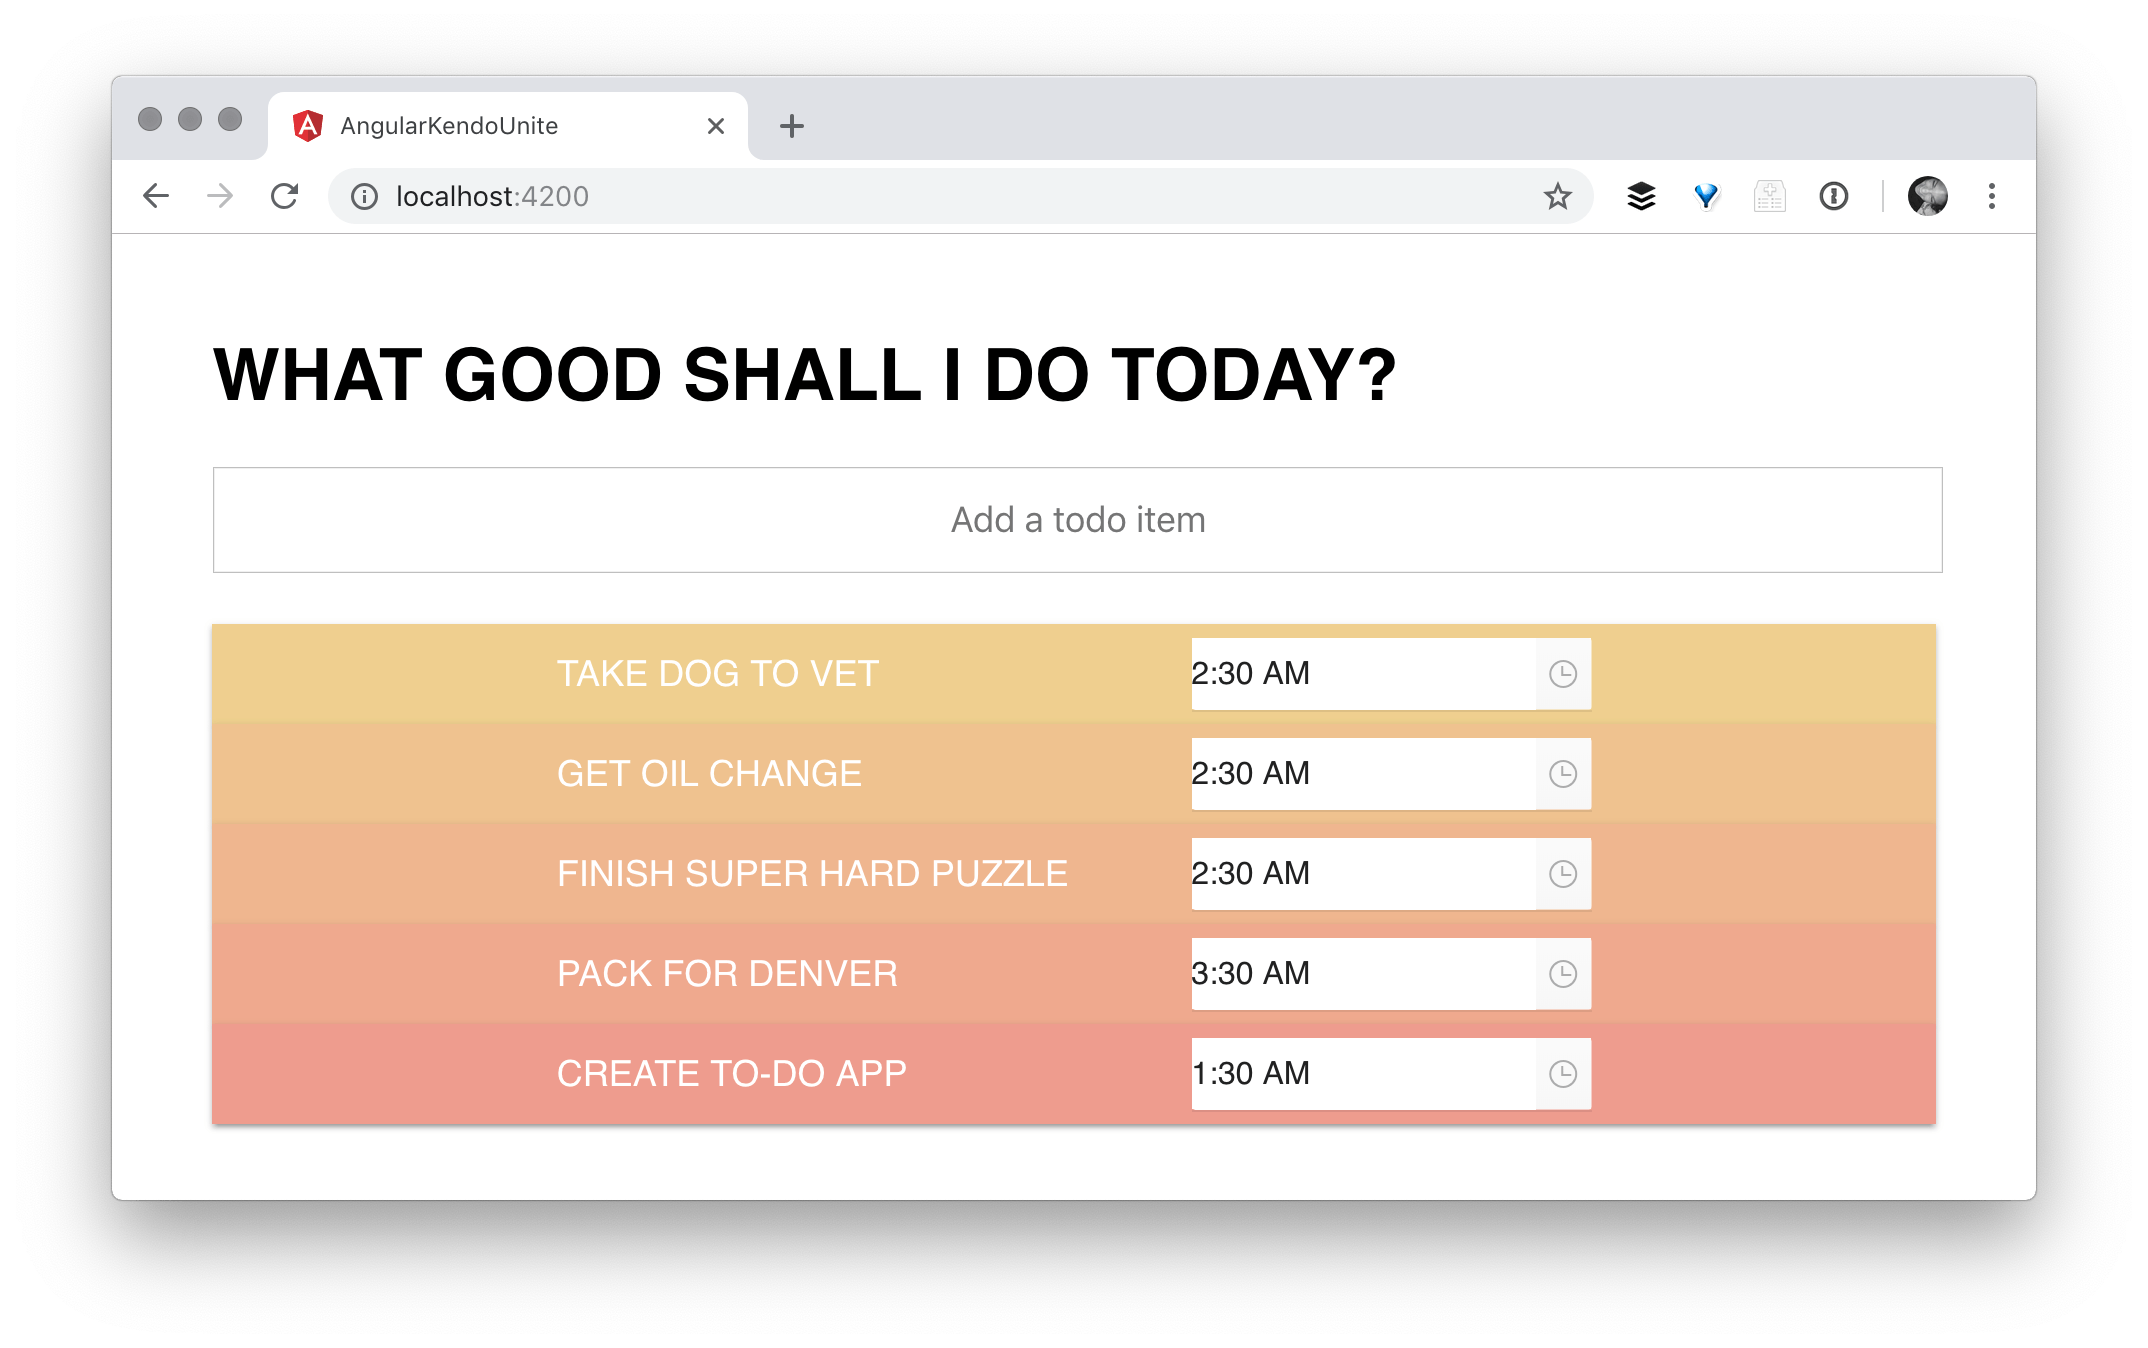
With justify-content: space-between;

This time, we see our items over here on the left-hand side, then the TimePicker over there on the right-hand side. I've actually created some custom styles to make our TimePicker look a little bit better on our todo items, since we have such a custom look and feel in our todo app.
So if you scroll all the way down to the bottom of the todo.component.scss file, you'll see these TimePicker customizing styles - it's mainly me getting rid of the background.
Customize the styles of our timepicker (after showing what the default styles look like)
// time picker customizing styles

.kendo-timepicker {
  height: 30px;
}
.k-timepicker:hover,
.k-timepicker:hover .k-select,
.k-timepicker .k-picker-wrap,
.k-dateinput .k-dateinput-wrap,
.k-timepicker .k-select {
  background: none;
  border: none;
}
.k-timepicker:hover .k-select {
  background-image: none;
}
.k-dateinput-wrap .k-input,
.k-timepicker .k-select {
  color: white;
}
.k-dateinput-wrap input:focus, .k-timepicker .k-state-focused {
  box-shadow: none;
}
.k-dateinput-wrap input::selection {
  background-color: transparent;
}
I’ll uncomment them now and go back over and refresh, you'll see that it just kind of blends in a little bit better with each one.

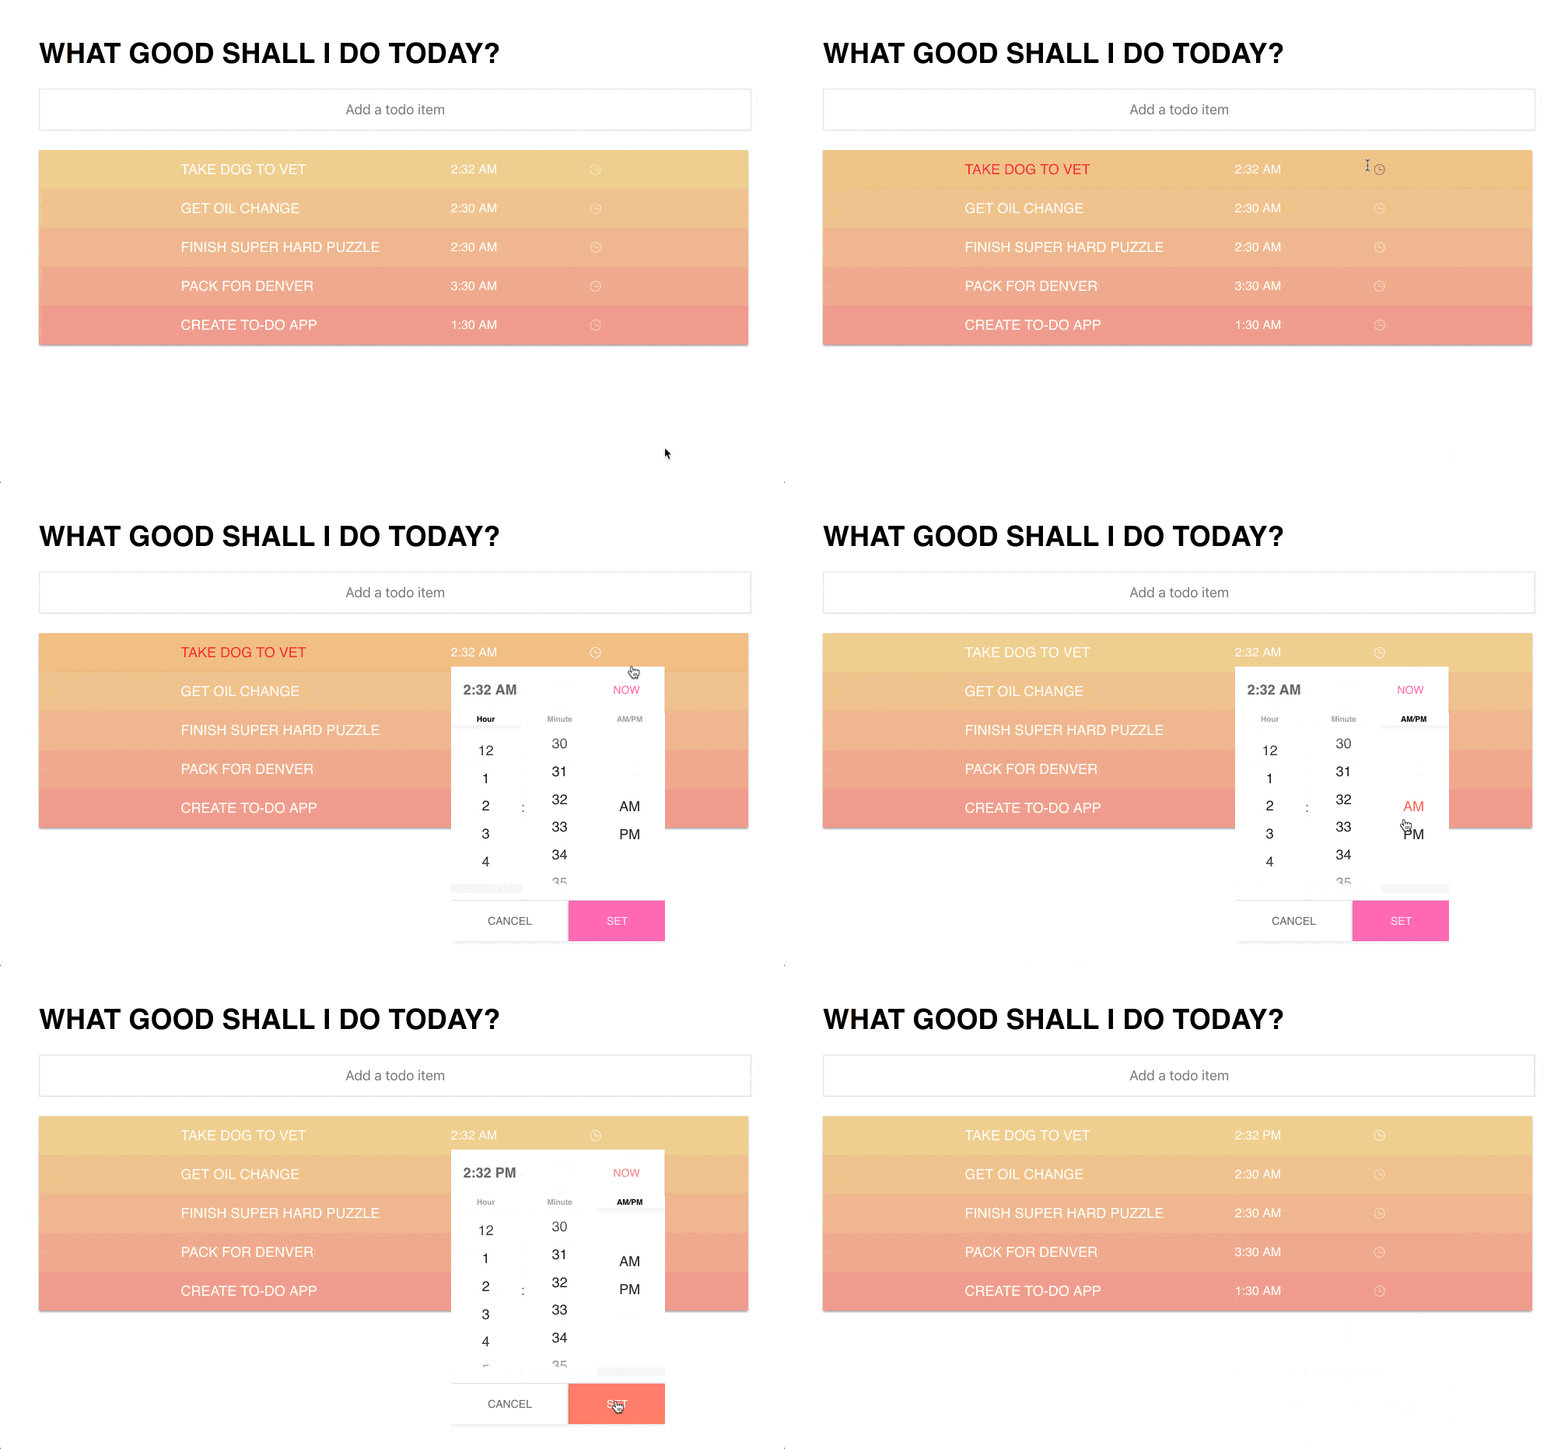
Yay! So we have our TimePicker showing, super simple, super easy, and now its bound to a due property. The next step is actually going to be adding an item in.
When we add a new item, it's not going to have a due time, initially. Let's go ahead and make sure it does.
The first thing we're going to do is go back over to our component, and at the top of it, top of the class here, we're going to create an initial due time, or initDueTime. We're making that of type date, and I'm setting it equal to a new date and time.
public initDueTime: Date = new Date(2019, 3, 10, 10, 30, 0);
Then we're going to go ahead and use this initial due time down here where we're creating or adding a new todo to the list.
Create initDueTime and Use when Creating New todos
public initDueTime: Date = new Date(2019, 3, 10, 10, 30, 0);
...
this.todos = [{ item: input.value, due: this.initDueTime }, ...this.todos];
Next to our item input value, we want to go ahead and create a due key, and we're going to set that equal to this.initDueTime.
Now, when we go and create a brand new item, it should have initial due time. Every time. Perfect!

This was a super simple and easy way to add something like a due time to our todo list. I absolutely love this picker, I think it's super cute, and I also love that it's so customizable, as you saw with the lines of CSS that I wrote earlier to customize it. I literally was just modifying, primarily, again, the background, the border, the background image, and the color, just so that it matches what we have going on here in our UI. Most importantly, I love that no important tags were needed in the creation of this custom Kendo UI TimePicker!
I hope you have fun using more of the date inputs and I hope the TimePicker really comes in handy. Happy coding everyone!
If you're new to Kendo UI for Angular, you can learn more here or just jump into a free 30 day trial today.


