We introduce two new Telerik UI for Xamarin Visual Studio Item Templates. Powerful and easy to use, these templates allow you to quickly add beautiful feedback and login UI to your Xamarin.Forms application.
The Telerik UI for Xamarin Visual Studio Item Templates are powerful, easy to use, predefined item templates for Visual Studio included in our UI for Xamarin suite. These templates jump start and simplify development for commonly used application UI.
Today, I’m excited to announce several new templates in the latest 2018 R3 update, available in the Feedback Screen and Login Screen template types. Let’s take a quick look at some of the previously available templates and then explore the new ones.
Item Templates
Telerik UI for Xamarin already had a number of Visual Studio Item Templates, like Stocks View and Activity View, that can be quickly added to your Xamarin.Forms project to boost your productivity and deliver a top-notch application.
Introducing Feedback and Login Screens
With the release of Telerik UI for Xamarin R3 2018, the Feedback Screen and Login Screen types join the list of our Xamarin.Forms Item Templates.
These new screens allow you to focus your efforts on your business logic and let us handle the heavy lifting for feedback and login user interfaces. Let’s take a closer look at each new template type.
Feedback Screen
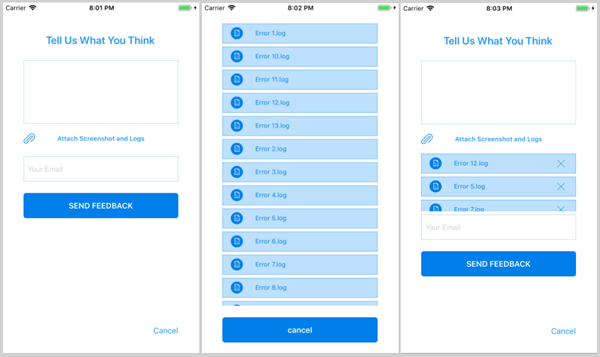
This screen allows you to add a ‘Contact Us’ type of page to your application with almost no effort. It contains the following:
- Data entry fields to enter a feedback message and email address
- An integrated file picker UI
- Operational buttons wired up to view model commands
Selecting the ‘attach screenshot and logs’ button opens the custom file picker overlay. The file loading logic uses the app's 'Local Folder' option using Microsoft's Xamarin.Essentials, however you can customize this to fit your needs.
Login Screen
This screen has several features to choose from, à la carte style. The views have been efficiently implemented on top of a single ContentPage. This approach means that you don’t need to rearrange any of your app navigation to accommodate additional pages for each view.
Let me take you though the available Login Screen options.
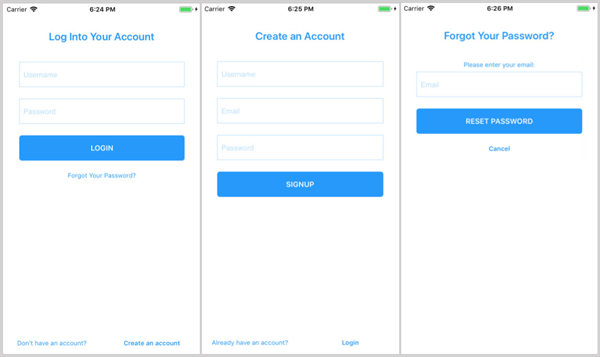
Login Screen Simple
This is the base setup for all the Login Screen options, it has three views; Login, Create an Account and Forgot Password.
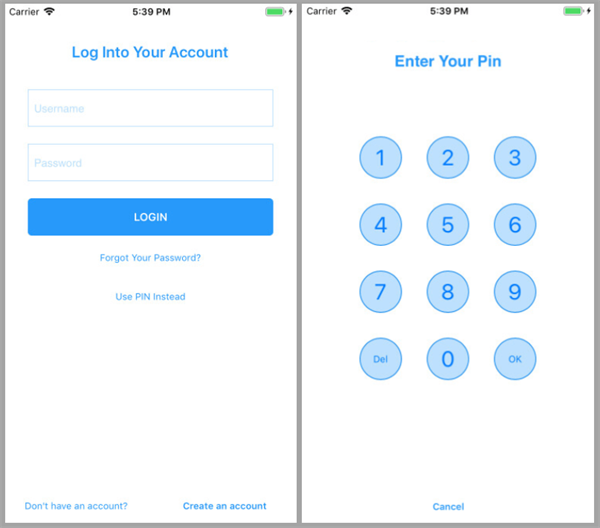
Login Screen with PIN
This option adds an additional view for the user to enter a PIN code.
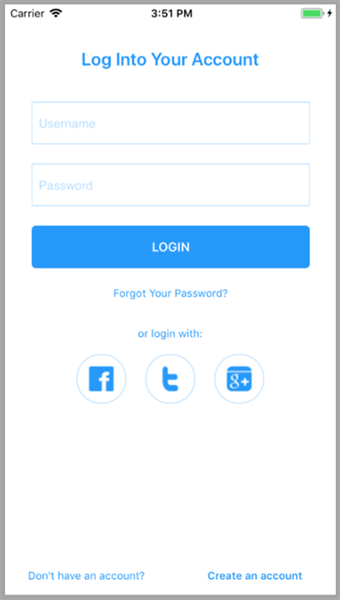
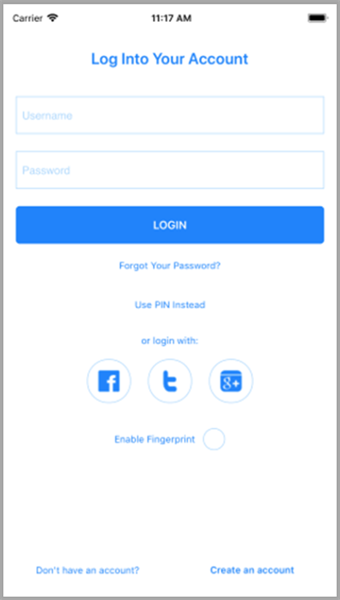
Login Screen with Social
This option adds three social network buttons for your app to provide additional login choices to the user:
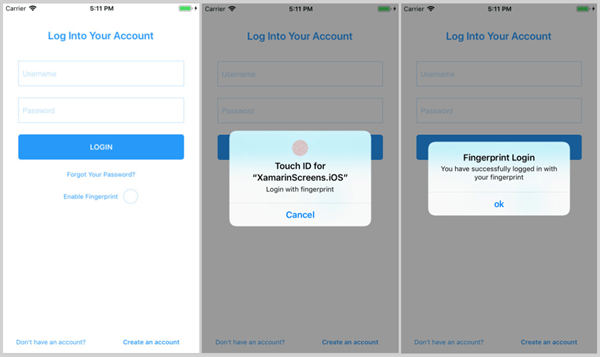
Login Screen with Fingerprint
This option adds biometric capabilities, using the Plugin.Fingerprint, which provides an easy to use API to determine successful or failed authentication.
If the user chooses to enable it, they’ll be able to use their biometrics on iOS, Android and Windows 10 (e.g. Face ID and Windows Hello) to authenticate themselves in your application.
Login Screen Complete
In the situation where you want a specific combination of the features, we’ve provided the LoginScreenComplete option.
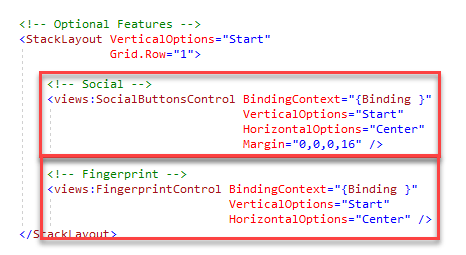
In this special case, the extra features like the biometrics checkbox and social network buttons, are modular ContentViews that can be easily removed from the view.
Now that you've seen the options, how easy it to add these to your project? It's literally two clicks away. Let's take a look at an example of adding a Login Screen Simple.
Using an Item Template
Using an Item Template is very simple and can be done in one of two ways:
- Visual Studio -> File -> New Item -> select a template
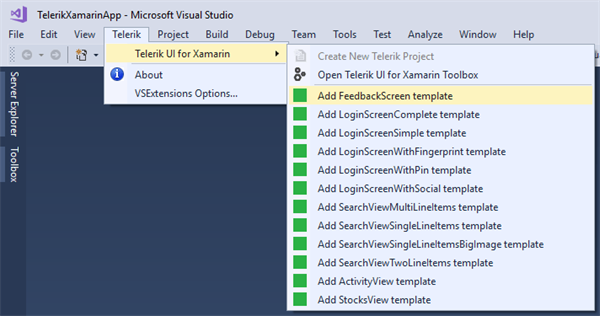
- Telerik menu -> UI for Xamarin -> select a template
Here’s a screenshot of the Telerik menu listing the available Item Templates.
You can get to the Telerik menu by right clicking on the Xamarin.Forms project in the Solution Explorer.
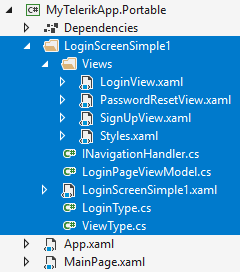
After you make a choice, you’ll have an opportunity to name it and then you’ll see a folder added to your project using that name. For example, here's a LoginScreenSimple template added with the "LoginScreenSimple1."
That folder will contain one ContentPage and a subfolder with the different views. The subfolder also contains a Styles.xaml file, which contains the styles and color resources for all the screens. This way, you can easily find and modify things like theme colors to meet your application’s design guidelines.
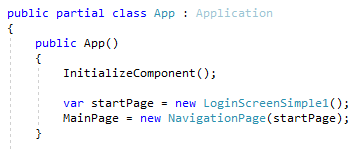
Lastly, as I mentioned earlier, there is no complicated NavigationPage setup. The ContentViews are neatly swapped out in the same ContentPage using the navigation handler. The only thing you need to do is put the ContentPage where it makes sense for your application.
For example, as the first page:
Wrapping Up
These are available for you to download now. Just install Telerik UI for Xamarin and you can get started with the new templates today.
Our mission is to provide you with world class tools and components so that you can be a developer superhero. These Item Templates are just one of the tools at your disposal when using Telerik UI for Xamarin in your projects.
If you have any questions, you can get help from the amazing support team by submitting a support ticket, posting in the UI for Xamarin forums or contacting me directly on Twitter.
