The async pipe can make a huge difference in your change detection strategy for your Angular app. If it’s been confusing to you so far, come work through this step-by-step explanation. We’ll understand it together!
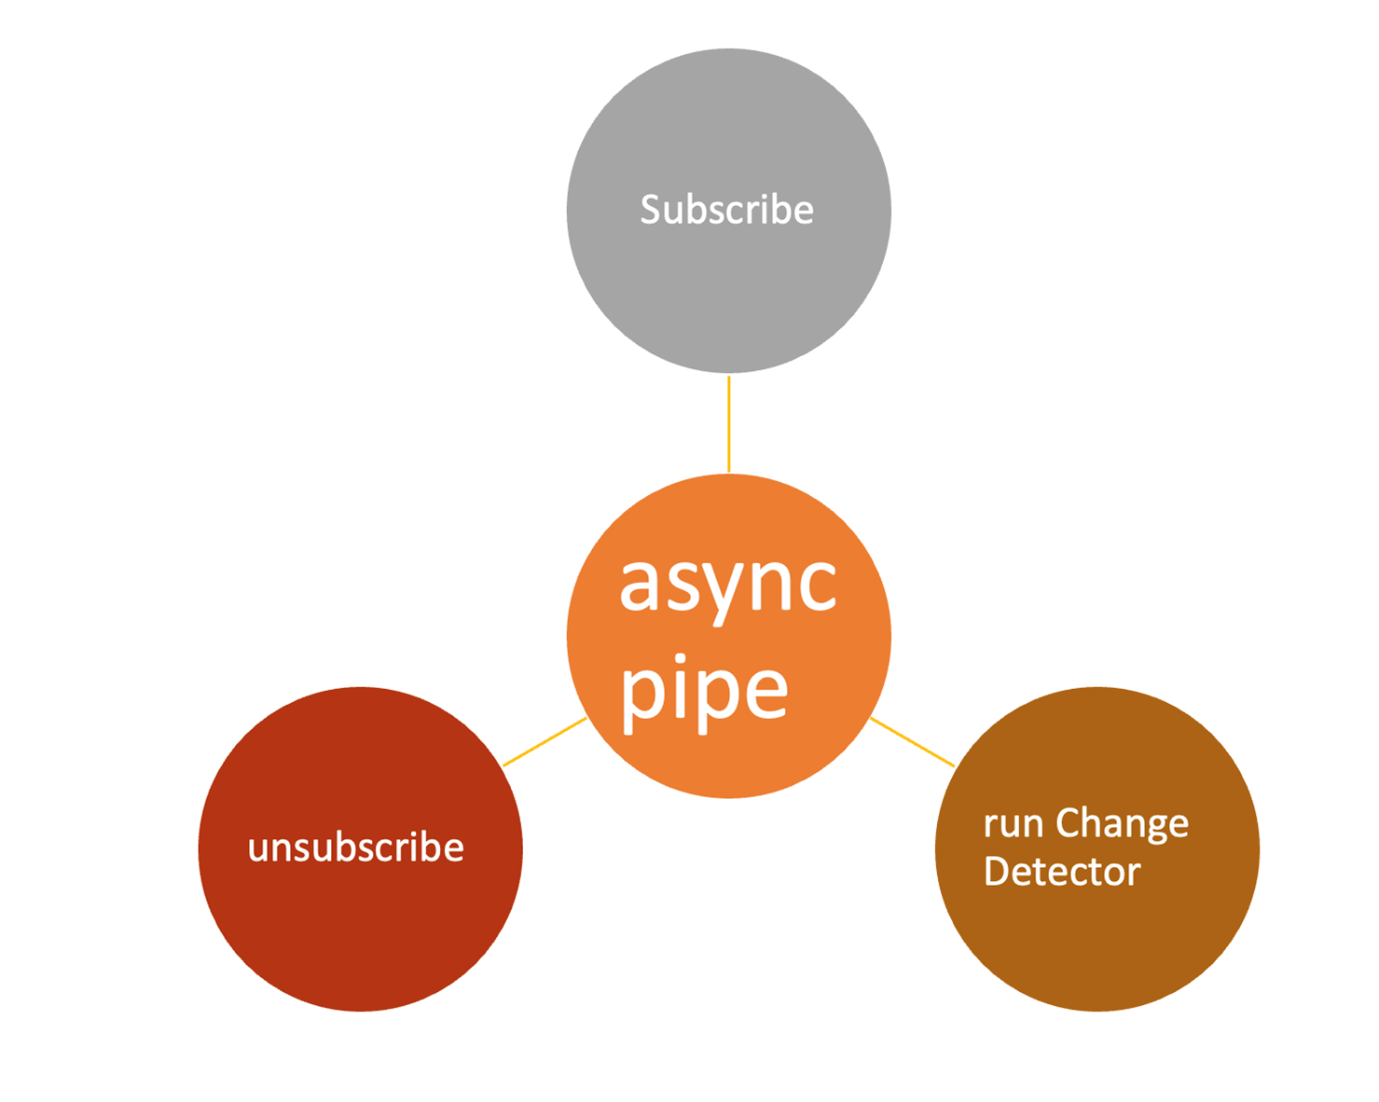
In Angular, the async pipe is a pipe that essentially does these three tasks:
- It subscribes to an observable or a promise and returns the last emitted value.
- Whenever a new value is emitted, it marks the component to be checked. That means Angular will run Change Detector for that component in the next cycle.
- It unsubscribes from the observable when the component gets destroyed.
Also, as a best practice, it is advisable to try to use a component on onPush change detection strategy with async pipe to subscribe to observables.
If you are a beginner in Angular, perhaps the above explanation of the async pipe is overwhelming. So in this article, we will try to understand the async pipe step-by-step using code examples. Just create a new Angular project and follow along; at the end of the post, you should have a practical understanding of the async pipe.
Create a Service
Let’s start with creating a Product interface and a service.
export interface IProduct {

     Id : string;
     Title : string;
     Price : number;
     inStock : boolean;

}
After creating the IProduct interface, next create an array of IProduct inside the Angular service to perform read and write operations.
import { Injectable } from '@angular/core';
import { IProduct } from './product.entity';

@Injectable({
  providedIn: 'root'
})
export class AppService {

  Products : IProduct[] = [
    {
      Id:"1",
      Title:"Pen",
      Price: 100,
      inStock: true
    },
    {
      Id:"2",
      Title:"Pencil",
      Price: 200,
      inStock: false
    },
    {
      Id:"3",
      Title:"Book",
      Price: 500,
      inStock: true
    }
  ]

  constructor() { }
}
Remember that in real applications, you get data from an API; however, here, we are mimicking Read and Write operations in the local array to focus on the async pipe.
To perform read and write operations, let’s wrap the Products array inside a BehaviorSubject and emit a new array each time a new item is pushed to the Products array.
To do this, add code in the service as listed below:
  Products$ : BehaviorSubject<IProduct[]>;
  constructor() {
    this.Products$ = new BehaviorSubject<IProduct[]>(this.Products);
   }

   AddProduct(p: IProduct): void{
    this.Products.push(p);
    this.Products$.next(this.Products);
   }
Let’s walk through through the code:
- BehaviorSubject is a type of Subject that emits a default or last emitted value. We are using
BehaviorSubjectto emit the defaultProductsarray initially. - In the
AddProductmethod, we pass a product and push it to the array. - In the
AddProductmethod, after pushing an item to the Products array, we are emitting the updatedProductsarray.
As of now, the service is ready. Next we will create two components—one to add a product and one to display all products on a table.
Adding a Product
Create a component called the AddProduct component and add a reactive form to accept product information.
  productForm: FormGroup;
  constructor(private fb: FormBuilder, private appService: AppService) {
    this.productForm = this.fb.group({
      Id: ["", Validators.required],
      Title: ["", Validators.required],
      Price: [],
      inStock: []
    })
  }
We are using FormBuilder service to create the FormGroup and on the template of the component using productForm with HTML form as shown below:
<form (ngSubmit)='addProduct()' [formGroup]='productForm'>
    <input formControlName='Id' type="text" class="form-control" placeholder="Enter ID" />
    <input formControlName='Title' type="text" class="form-control" placeholder="Enter Title" />
    <input formControlName='Price' type="text" class="form-control" placeholder="Enter Price" />
    <input formControlName='inStock' type="text" class="form-control" placeholder="Enter Stock " />
    <button [disabled]='productForm.invalid' class="btn btn-default">Add Product</button>
</form>
And in the AddProduct function, we will check whether the form is valid. If yes, we call the service to push one product to the Products array. The AddProduct function should look like below:
  addProduct() {
    if (this.productForm.valid) {
      this.appService.AddProduct(this.productForm.value);
    }
  }
So far, we have created a component that contains a reactive form to enter product information and call the service to insert a new product in the Products array. The above code should be straightforward if you have worked on Angular.
Listing the Products
After adding a component to the list of products, follow the usual steps:
- Set the Change Detection strategy of the component to Default.
- Inject AppService in the component.
- Use the subscribe method to fetch the data from the observable.
@Component({
  selector: 'app-list-products',
  templateUrl: './list-products.component.html',
  styleUrls: ['./list-products.component.css'],
  changeDetection: ChangeDetectionStrategy.Default
})
export class ListProductsComponent implements OnInit, OnDestroy {

  products: IProduct[] = []
  productSubscription?: Subscription
  constructor(private appService: AppService) { }

  productObserver = {
    next: (data: IProduct[]) => { this.products = data; },
    error: (error: any) => { console.log(error) },
    complete: () => { console.log('product stream completed ') }
  }
  ngOnInit(): void {
    this.productSubscription = this.appService.Products$.subscribe(this.productObserver)
  }

  ngOnDestroy(): void {
    if (this.productSubscription) {
      this.productSubscription.unsubscribe();
    }
  }
}
Let’s walk through the code:
- The
productsvariable holds the array that returns from the service. - The
productSubscriptionis a variable of RxJS subscription type to assign the subscription returned from subscribing method of the observable. - The
productObserveris an object with next, error and complete callback functions. - The
productObserverobserver is passed to the subscribe method. - In the
ngOnDestrory()life cyclehook, we unsubscribe from the observable.
On the template you can display products in a table as shown below:
<table>
    <thead>
        <tr>
            <th>Id</th>
            <th>Title</th>
            <th>Price</th>
            <th>inStock</th>
        </tr>
    </thead>
    <tbody>
        <tr *ngFor="let p of products">
            <td>{{p.Id}}</td>
            <td>{{p.Title}}</td>
            <td>{{p.Price}}</td>
            <td>{{p.inStock}}</td>
        </tr>
    </tbody>
</table>
Using the Components
We will use these two components as sibling components, as shown below.
<h1>{{title}}</h1>

<app-add-product></app-add-product>

<hr/>
<app-list-products></app-list-products>
A critical point you should notice here is that the AddProduct component and the ListProducts component are unrelated. There are only two ways they can pass data to each other:
- By communicating through the parent component
- By communication using a service
We have already created a service and would use that to pass product information among these two components.
Run the Application
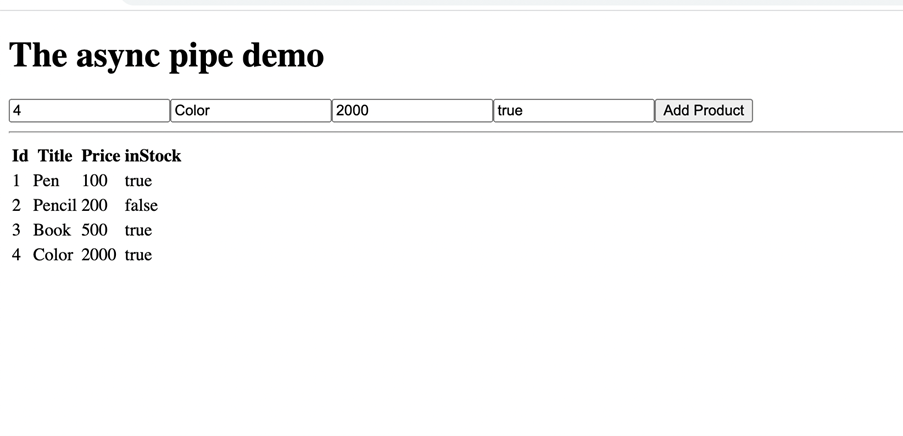
On running the application, you should get the below output.

As you notice, you can add a product by clicking on the Add Product button. This calls a function in the service, which updates the array and emits an updated array from the observable.
The component where products are listed subscribes to the observable, so whenever we add another item, the table updates. So far, so good.
Using onPush Change Detection Strategy
If you recall ListProducts component Change Detection Strategy is set to default. Now let us go ahead and change the strategy to onPush:

And again, go ahead and run the application. What did you find? As you rightly noticed, when you add a product from the AddProduct component, it gets added to the array, and even the updated array is emitted from the service. Still, the
ListProducts component is not getting updated. This happens because the ListProducts component’s change detection strategy is set to onPush.
Changing the Change Detection Strategy to onPush prevents the table from being refreshed with new products.
For a component with an onPush change detection strategy, Angular runs the change detector only when a new reference is passed to the component. However, when an observable emits a new element, it does not give a new reference. Hence, Angular
is not running the change detector, and the updated Products array is not projected in the component.
You can learn more about Angular Change Detector here.
How Can We Fix It?
We can fix this by manually calling the Change Detector. To do that, inject ChangeDetectorRef into the component and call the markForCheck() method.
export class ListProductsComponent implements OnInit, OnDestroy {

  products: IProduct[] = []
  productSubscription?: Subscription
  constructor(private appService: AppService,
    private cd: ChangeDetectorRef) {

   }

  productObserver = {
    next: (data: IProduct[]) => {
       this.products = data;
      this.cd.markForCheck();
    },
    error: (error: any) => { console.log(error) },
    complete: () => { console.log('product stream completed ') }
  }
  ngOnInit(): void {
    this.productSubscription = this.appService.Products$.subscribe(this.productObserver)
  }

  ngOnDestroy(): void {
    if (this.productSubscription) {
      this.productSubscription.unsubscribe();
    }
  }
}
Above, we have performed the following tasks:
- We injected Angular
ChangeDetectorRefto the component. - The
markForCheck()method marks this component and all its parents dirty so that Angular checks for the changes in the next Change Detection cycle.
Now on running the application, you should be able to see the updated products array.
Analysis of the Subscribe Approach
As you have seen, in the component set to onPush, to work with observables, you follow the below steps.
- Subscribe to the observable.
- Run Change Detection Manually.
- Unsubscribe from the observable.

Advantages of the subscribe() approach are:
- Property can be used at multiple places in the template.
- Property can be used at various locations in the component class.
- You can run custom business logic when subscribing to the observable.
Some of the disadvantages are:
- For the
onPushchange detection strategy, you must manually mark the component to run the change detector using themarkForCheckmethod. - You must explicitly unsubscribe from the observables.
This approach may get out of hand when many observables are used in the component. If we miss unsubscribing any observable, it may have potential memory leaks, etc.
The above problems can be solved by using the async pipe.
The Async Pipe
The async pipe is a better and more recommended way of working with observables in a component. Under the hood, the async pipe does these three tasks:
- It subscribes to the observable and emits the last value emitted.
- When a new value is emitted, it marks the component to be checked for the changes.
- The async pipe automatically unsubscribes when the component is destroyed to avoid potential memory leaks.

So basically, the async pipe does all three tasks you were doing manually for the subscribe approach.
Let us modify the ListProducts component to use the async pipe.
@Component({
  selector: 'app-list-products',
  templateUrl: './list-products.component.html',
  styleUrls: ['./list-products.component.css'],
  changeDetection: ChangeDetectionStrategy.OnPush
})
export class ListProductsComponent implements OnInit {

  products?: Observable<IProduct[]>;
  constructor(private appService: AppService) {}
  ngOnInit(): void {
    this.products = this.appService.Products$;
  }
}
We removed all code and assigned the observable returns from the service to the products variable. On the template to render data now, use the async pipe.
<table>
    <thead>
        <tr>
            <th>Id</th>
            <th>Title</th>
            <th>Price</th>
            <th>inStock</th>
        </tr>
    </thead>
    <tbody>
        <tr *ngFor="let p of products | async">
            <td>{{p.Id}}</td>
            <td>{{p.Title}}</td>
            <td>{{p.Price}}</td>
            <td>{{p.inStock}}</td>
        </tr>
    </tbody>
</table>
Using the async pipe keeps code cleaner, and you don’t need to manually run the change detector for the onPush Change Detection strategy. On the application, you see that the ListProducts component is re-rendering whenever a new product
is added.
It is always recommended and best practice to:
- Keep component change detection strategy to onPush
- Use the async pipe to work with observables
I hope you find this post useful and are now ready to use the async pipe in your Angular project.