Angular lets us create two kinds of custom directives—attribute and structure—to control how things are rendered in the DOM or to change the DOM layout. Let’s get started with these tools in Angular!
Angular is a component-based framework that lets us create interactive web frontends for users by composing components together.
In addition to components, Angular also lets us create directives. Directives are classes that let us modify the behavior of how things are displayed in component templates.
Angular lets us create two kinds of custom directives. We can create attribute or structure directives. Attribute directives let us change how things are rendered in the DOM. Structural directives let us change the DOM layout by adding or removing DOM elements.
In this article, we will look at how to create custom directives and use them in our component code.
Attribute Directives
We can create an attribute directive to manipulate the DOM tree. However, we should keep in mind that we should only create directives to manipulate the DOM only when there are no other choices available.
Many things like conditionally displaying items, transition effects, etc. can be done with other parts of the Angular framework.
To start, we run:
ng generate directive hover
to create the files for the hover directive.
Then we should see hover.directive.ts created in the app folder. In app.module.ts, we should see something like:
import { NgModule } from "@angular/core";
import { BrowserModule } from "@angular/platform-browser";

import { AppRoutingModule } from "./app-routing.module";
import { AppComponent } from "./app.component";
import { HoverDirective } from "./hover.directive";

@NgModule({
  declarations: [AppComponent, HoverDirective],
  imports: [BrowserModule, AppRoutingModule],
  providers: [],
  bootstrap: [AppComponent],
})
export class AppModule {}
HoverDirective is in the declarations array in the AppModule, which means that it can be used in the components in the module.
Next, in hover.directive.ts, we write:
import { Directive, ElementRef, HostListener, Input } from "@angular/core";

@Directive({
  selector: "[appHover]",
})
export class HoverDirective {
  @Input() appHover = "";

  constructor(private el: ElementRef) {}

  @HostListener("mouseenter") onMouseEnter() {
    this.highlight(this.appHover);
  }

  @HostListener("mouseleave") onMouseLeave() {
    this.highlight("");
  }

  private highlight(color: string) {
    this.el.nativeElement.style.color = color;
  }
}
The selector property is set to a string that we use to apply the directive. Therefore, we apply the directive with the [appHover] attribute in our component template.
@Input() lets our directive take an argument.
Then we add the HostListener to listen to the mouseenter and mouseleave events on the DOM. The methods will be called when the event is triggered on the element that we applied the directive to.
In onMouseEnter and onMouseLeave, we call the this.highlight method to apply the color CSS style to the element that the directive is applied to.
this.el.nativeElement is the native DOM element that we applied the directive to. So we can set the style.color property to the color string.
We call this.highlight with this.appHover which we will get from the directive’s argument.
Next, in app.component.html, we write:
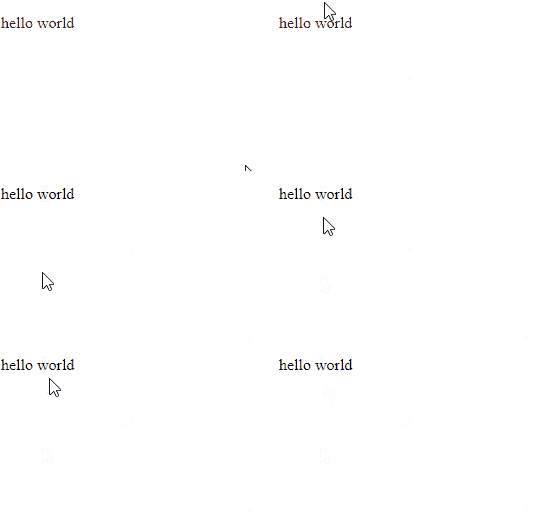
<p [appHover]="'orange'">hello world</p>
to add the appHover directive to the p element. And we set the directive’s argument to the 'orange' string.
Therefore, this.appHover's value is 'orange' for this appHover directive’s instance. As a result, we should see the text color turning orange when we hover over the text.
And when our mouse pointer leaves the text, we’ll see that the text turns back to its default black color.

Structural Directives
Another kind of directive we can add in Angular is structural directives. Structural directives let us change the DOM tree layout by adding or removing elements.
For instance, we run:
ng generate directive if
to create the if directive.
We create the if directive to show something when a condition is true.
After that, we should get something like:
import { NgModule } from "@angular/core";
import { BrowserModule } from "@angular/platform-browser";

import { AppRoutingModule } from "./app-routing.module";
import { AppComponent } from "./app.component";
import { IfDirective } from "./if.directive";

@NgModule({
  declarations: [AppComponent, IfDirective],
  imports: [BrowserModule, AppRoutingModule],
  providers: [],
  bootstrap: [AppComponent],
})
export class AppModule {}
in app.module.ts.
Then in app/if.directive.ts, we write:
import { Directive, Input, TemplateRef, ViewContainerRef } from "@angular/core";

@Directive({
  selector: "[appIf]",
})
export class IfDirective {
  private hasView = false;

  constructor(
    private templateRef: TemplateRef<any>,
    private viewContainer: ViewContainerRef
  ) {}

  @Input() set appIf(condition: boolean) {
    if (condition && !this.hasView) {
      this.viewContainer.createEmbeddedView(this.templateRef);
      this.hasView = true;
    } else if (!condition && this.hasView) {
      this.viewContainer.clear();
      this.hasView = false;
    }
  }
}
to add the appIf setter in our IfDirective class. In it, we check if condition is true.
The condition is set when we apply the directive to the element we want.
If condition is true and this.hasView is false, then we want to display the element that has the appIf directive applied to it since the condition to show the element is true but the element isn’t in the DOM.
To add the element into the DOM in the place where it is referenced in the component template, we call this.viewContainer.createEmbeddedView with this.templateRef.
this.templateRef has the element that we applied the directive to.
viewContainer has the container element for the component.
We then set this.hasView to true so that we know the element is rendered in the DOM.
If condition is false and this.hasView is true, then we set this.hasView to false so that we know the element isn’t in the DOM.
We remove the element with the directive applied to it from the DOM with this.viewContainer.clear();.
Next, in app.component.ts, we write:
import { Component } from "@angular/core";

@Component({
  selector: "app-root",
  templateUrl: "./app.component.html",
  styleUrls: ["./app.component.css"],
})
export class AppComponent {
  condition: boolean = true;
}
to add the condition boolean instance variable.
Then we write:
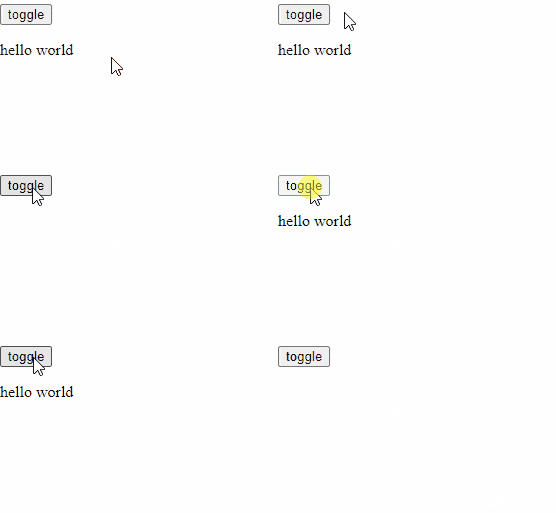
<button (click)="condition = !condition">toggle</button>

<p *appIf="condition">hello world</p>
in app.component.html to make the p element display only with condition is true.
We have a button to toggle the condition value between true and false.
Here, condition is the value of the condition parameter in the appIf method.
Therefore, when we click on the toggle button, we see the p element hide and show when condition is false and true, respectively.

Conclusion
Directives are classes that let us modify the behavior of how things are displayed in component templates.
Angular lets us create two kinds of custom directives—attribute or structure directives. Attribute directives let us change how things are rendered in the DOM. Structural directive lets us change DOM layout by adding or removing DOM elements.
We can add and remove elements easily with both kinds of directives.
And we can manipulate styles easily with attribute directives.
Also, we can add event listeners to directive classes to handle events triggered on any DOM element.