See how to quickly and simply implement a webpage to view the records of a database—with filtering, sorting and paging options—with the help of the Data Grid component available in Telerik UI for ASP.NET Core.
Managing data is very important in software development—after all, through data we can measure productivity, profitability, losses and many other statistics.
A common and worthwhile solution to managing all that data is a data grid. But have you tried to build a data grid yourself from scratch? It can seem so simple and then quickly get out of hand, even small components require time to create the necessary HTML, CSS and JavaScript. The good news is we can use a pre-built data grid component!
In this article, we will see how to quickly and simply implement a web page to display the records of a database table, with filtering, sorting, export and pagination options, with the help of the Telerik UI for ASP.NET Core Data Grid.
About the Project
The project will be a web application with ASP.NET Core in .NET 6, using the Entity Framework to create the database table and insert some sample data. Then we will see the multiple built-in options available in the UI for ASP.NET Core Data Grid component
You can access the complete source code of the final project at this link: Source Code.
Prerequisites
- Telerik UI for ASP.NET Core (set up the Telerik NuGet feed or have the components installed locally in order to be able to restore the packages)
- Visual Studio 2022
- .NET 6 SDK
Creating the Web Project
To create the ASP.NET Core project in Visual Studio with Telerik components, you have the option to start from a project template that creates all the necessary configurations for using the components for you or go through the setup step by step on your own. You can follow this great guide produced by Telerik and pick your preferred setup approach: First Steps with Telerik UI for ASP.NET Core.
Let’s name the project “OrderManager.”
Project Dependencies
Next, you need to add the project dependencies—either directly in the project code “OrderManager.csproj” or by downloading EF Core NuGet Packages:
- Microsoft.EntityFrameworkCore
- Microsoft.EntityFrameworkCore.Design
- Microsoft.EntityFrameworkCore.Sqlite
- Microsoft.EntityFrameworkCore.Tools
   <PackageReference Include="Microsoft.EntityFrameworkCore" Version="6.0.3" />
    <PackageReference Include="Microsoft.EntityFrameworkCore.Design" Version="6.0.3">
        <PrivateAssets>all</PrivateAssets>
        <IncludeAssets>runtime; build; native; contentfiles; analyzers; buildtransitive</IncludeAssets>
    </PackageReference>
    <PackageReference Include="Microsoft.EntityFrameworkCore.Sqlite" Version="6.0.3" />
    <PackageReference Include="Microsoft.EntityFrameworkCore.Tools" Version="6.0.3">
        <PrivateAssets>all</PrivateAssets>
        <IncludeAssets>runtime; build; native; contentfiles; analyzers; buildtransitive</IncludeAssets>
    </PackageReference>
Model Classes
As a next step, we will create a new folder “Models” and inside it create the class below:
- OrderViewModel
using System.ComponentModel.DataAnnotations;

namespace OrderManager.Models
{
    public class OrderViewModel
    {
        [Key]
        public int OrderID { get; set; }
        public decimal? Freight { get; set; }
        public DateTime? OrderDate { get; set; }
        public string? ShipCity { get; set; }
        public string? ShipName { get; set; }
    }
}
DBContext
Next, we will create the class that will contain the database configurations.
Create a new folder “Data,” and inside it create the class below:
- ApplicationDbContext
using OrderManager.Models;
using Microsoft.EntityFrameworkCore;

namespace OrderManager.Data
{
    public class ApplicationDbContext : DbContext
    {
        public ApplicationDbContext(DbContextOptions options) : base(options) { }

        protected override void OnConfiguring(DbContextOptionsBuilder options)
            => options.UseSqlite("DataSource = orderDB; Cache=Shared");

        protected override void OnModelCreating(ModelBuilder modelBuilder)
        {
            var seedData = Enumerable.Range(1, 30).Select(i => new OrderViewModel
            {
                OrderID = i,
                Freight = i * 10,
                OrderDate = new DateTime(2022, 04, 25).AddDays(i % 7),
                ShipName = "ShipNameExample" + i,
                ShipCity = "ShipCityExample" + i
            }).ToList();

            modelBuilder.Entity<OrderViewModel>().HasData(
                seedData[0], seedData[1], seedData[2], seedData[3], seedData[4], seedData[5],
                seedData[6], seedData[7], seedData[8], seedData[9], seedData[10], seedData[11],
                seedData[12], seedData[13], seedData[14], seedData[15], seedData[16], seedData[17],
                seedData[18], seedData[19], seedData[20], seedData[21], seedData[22], seedData[23],
                seedData[24], seedData[25], seedData[26], seedData[27], seedData[28], seedData[29]);
        }

        public DbSet<OrderViewModel> Orders { get; set; }
    }
}
The code above:
- Establishes the database settings through the “OnConfiguring” method
- Inserts some sample data into the database via the “OnModelCreating” method when EF Core commands are executed
Running EF Core Commands
Moving on, we need to run the commands from the Visual Studio console or from our machine’s terminal in the project root. The first command will create a migration called InitialModel and the second one will have EF create a database and schema from the migration. More information is available in the MSDN documentation.
This requires .NET CLI tools to be installed. Otherwise the commands will result in an error.
dotnet ef migrations add InitialModeldotnet ef database update
Alternatively, execute the following commands in the Package Manager Console in Visual Studio:
Add-Migration InitialModelUpdate-Database
Services
Next we need to create the service class which contains the methods that communicate with the database through the context class created earlier.
First, let’s create a new folder “Helpers” and inside it a new class “SessionExtensions” with the following code:
using Newtonsoft.Json;

namespace OrderManager.Helpers
{
    public static class SessionExtensions
    {
        public static void SetObjectAsJson(this ISession session, string key, object value) =>
            session.SetString(key, JsonConvert.SerializeObject(value));
    }
}
The code above contains a method that will set an object as JSON, which will be used in the service class.
Then, create a new folder “Services,” and inside it create the class below:
- OrderService
using OrderManager.Data;
using OrderManager.Models;

namespace OrderManager.Services
{
    public class OrderService
    {
        private readonly ApplicationDbContext _dbContext;

        public OrderService(ApplicationDbContext dbContext)
        {
            _dbContext = dbContext;
        }

        public IEnumerable<OrderViewModel> Read() => GetAll();

        public IList<OrderViewModel> GetAll() => _dbContext.Orders.ToList();
    }
}
Controller
Inside the “Controllers” folder create a new controller with the code below:
- OrderController
using Kendo.Mvc.Extensions;
using Kendo.Mvc.UI;
using OrderManager.Services;
using Microsoft.AspNetCore.Mvc;

namespace OrderManager.Controllers
{
    public class OrderController : Controller
    {
        private readonly OrderService _orderService;

        public OrderController(OrderService orderService)
        {
            _orderService = orderService;
        }

        public IActionResult Index()
        {
            return View();
        }

        public ActionResult Orders_Read([DataSourceRequest] DataSourceRequest request)
        {
            var result = _orderService.GetAll();

            var dsResult = result.ToDataSourceResult(request);
            return Json(dsResult);
        }
    }
}
In the Program.cs, add the following lines of code just after the AddKendo() call. They will add the context class (ApplicationDbContext) and Service (OrderService) settings.
builder.Services.AddDbContext<OrderManager.Data.ApplicationDbContext>();
builder.Services.AddScoped<OrderManager.Services.OrderService>();
Creating the Data Preview Page
Next, let’s create a grid with several options enabled such as Sortable, Scrollable and Filterable, as well as a ToolBar with PDF and Excel export options and a search bar.
The grid uses the HTML Helper approach, available in the Telerik UI library for ASP.NET Core. (Please note that there is also an option to use TagHelpers. For more information, you can refer to the code sample in the UI for ASP.NET Core Data Grid TagHelper example.)
So, inside the “Views” folder, create a new “Order” folder and inside it, create a new view with the code below:
- Index
@using OrderManager.Models
        @(Html.Kendo()
            .DataSource<OrderViewModel>()
            .Name("dataSource1")
            .Ajax(t=>t.Read(read => read.Action("Orders_Read", "Order")).PageSize(20))
        )
        @(Html.Kendo().Grid<OrderViewModel>()
            .Name("grid")
            .Columns(columns => {
                columns.Bound(p => p.OrderID).Width(120);
                columns.Bound(p => p.Freight).Width(120);
                columns.Bound(p => p.OrderDate).Format("{0:MM/dd/yyyy}").Width(140);
                columns.Bound(p => p.ShipName);
                columns.Bound(p => p.ShipCity).Width(150);
            })
            .Sortable()
            .Scrollable()
            .Filterable()
            .DataSource("dataSource1")
            .ToolBar(toolbar => {
                toolbar.Excel();
                toolbar.Pdf();
                toolbar.Search();
            })
            .Pdf(pdf=>pdf.ProxyURL(Url.Action("Excel_Export_Save", "Grid")))
            .Excel(excel=>excel.ProxyURL(Url.Action("Excel_Export_Save", "Grid")))
        )
        @(Html.Kendo().Pager()
            .Name("pager")
            .ButtonCount(5)
            .DataSource("dataSource1")
            .PageSizes(true)
            .Refresh(true)
        )
Alternative version of the Grid definition. The Pager and DataSource component could be separate; however, they can also be configured via the Grid options:
@(Html.Kendo().Grid<OrderViewModel>()
            .Name("grid")
            .Columns(columns => {
                columns.Bound(p => p.OrderID).Width(120);
                columns.Bound(p => p.Freight).Width(120);
                columns.Bound(p => p.OrderDate).Format("{0:MM/dd/yyyy}").Width(140);
                columns.Bound(p => p.ShipName);
                columns.Bound(p => p.ShipCity).Width(150);
            })
            .Sortable()
            .Scrollable()
            .Filterable()
            .ToolBar(toolbar => {
                toolbar.Excel();
                toolbar.Pdf();
                toolbar.Search();
            })
            .Pdf(pdf=>pdf.AllPages(true))
            .Excel(excel=>excel.AllPages(true))
            .Pageable(p=>p
                .ButtonCount(5)
                .PageSizes(true)
                .Refresh(true)
            )
            .DataSource(ds=>ds
                .Ajax()
                .Read(r=>r.Action("Orders_Read", "Order"))
            )
        )
In the Views/Shared/_Layout.cshtml file, in the “Menu” component, add the following line of code. It will be used to display a link to the Orders page created earlier.
items.Add().Text("Orders").Action("Index", "Order", new { area = "" });
Displaying the Data
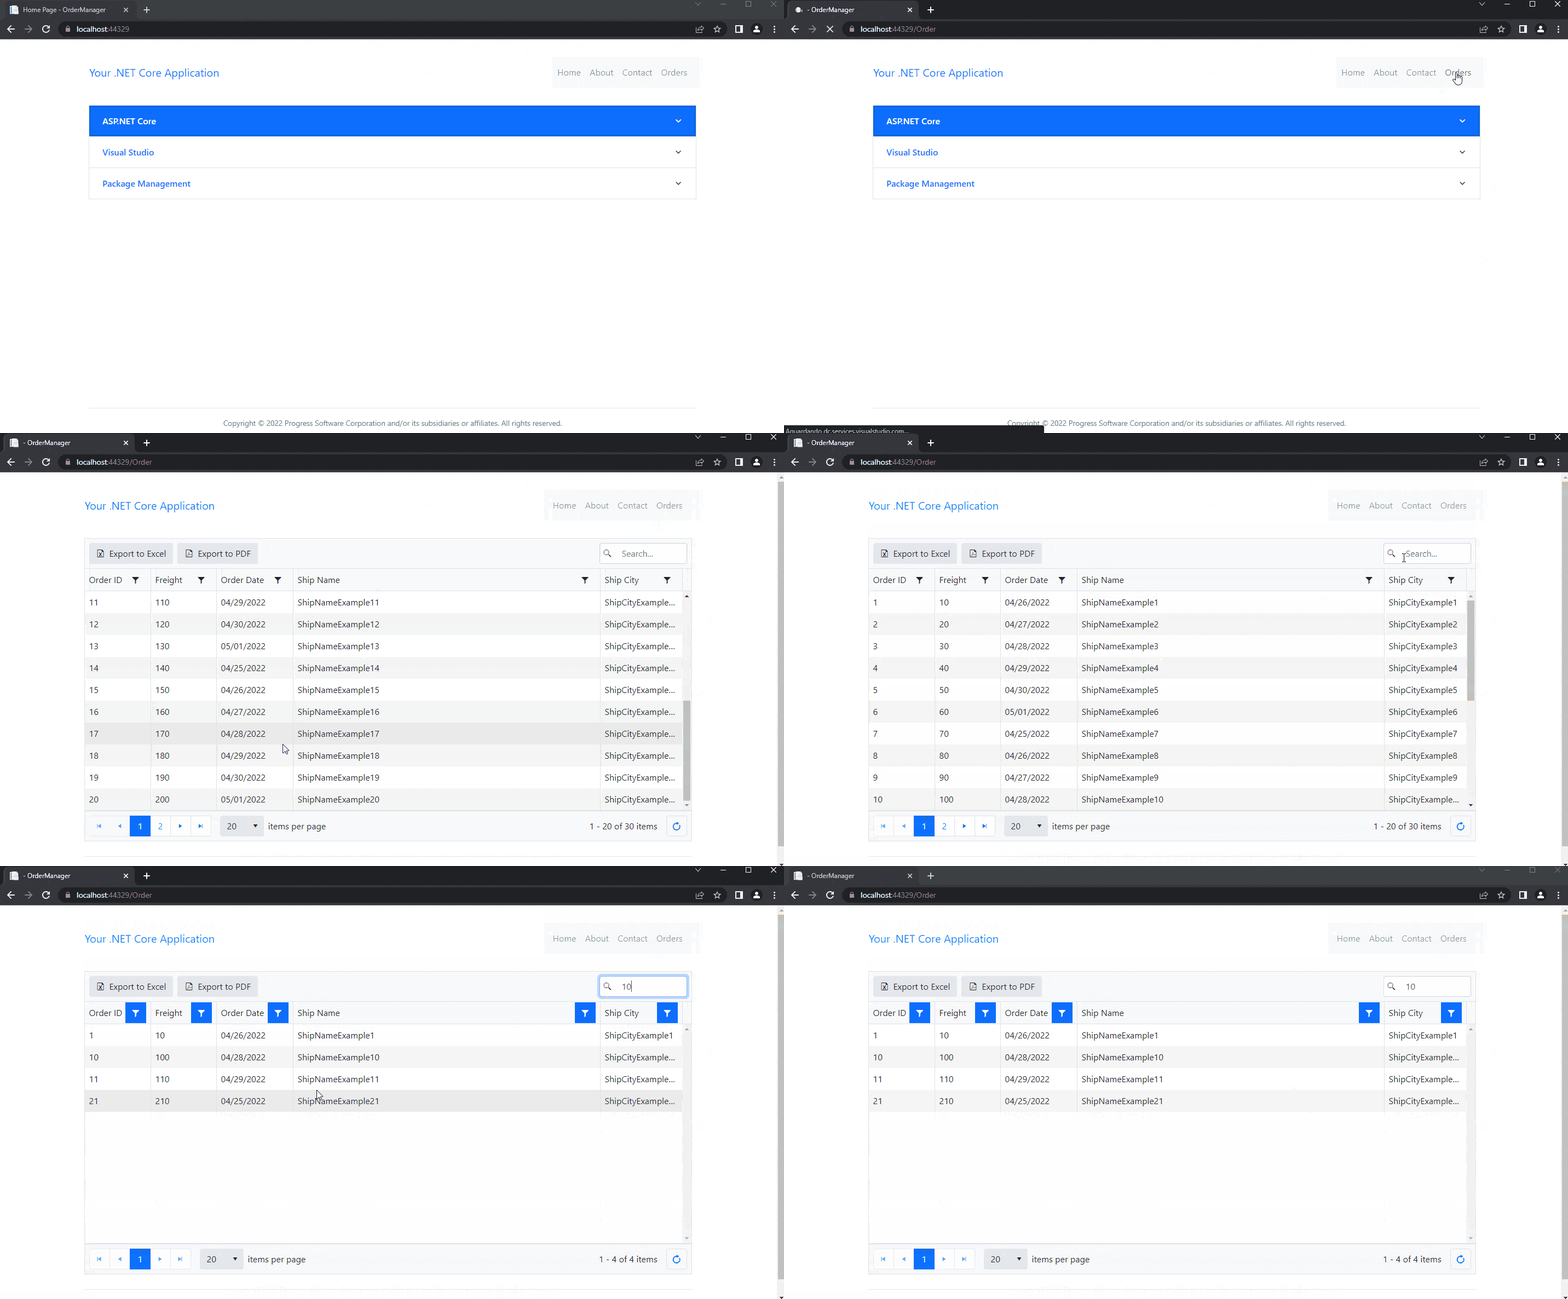
When running the application and accessing the order page, the grid with the records will be displayed. As shown in the GIF below, it is possible to use the pagination component to group the number of items per page.
Image may be NSFW.
Clik here to view.
Filtering and Ordering Data
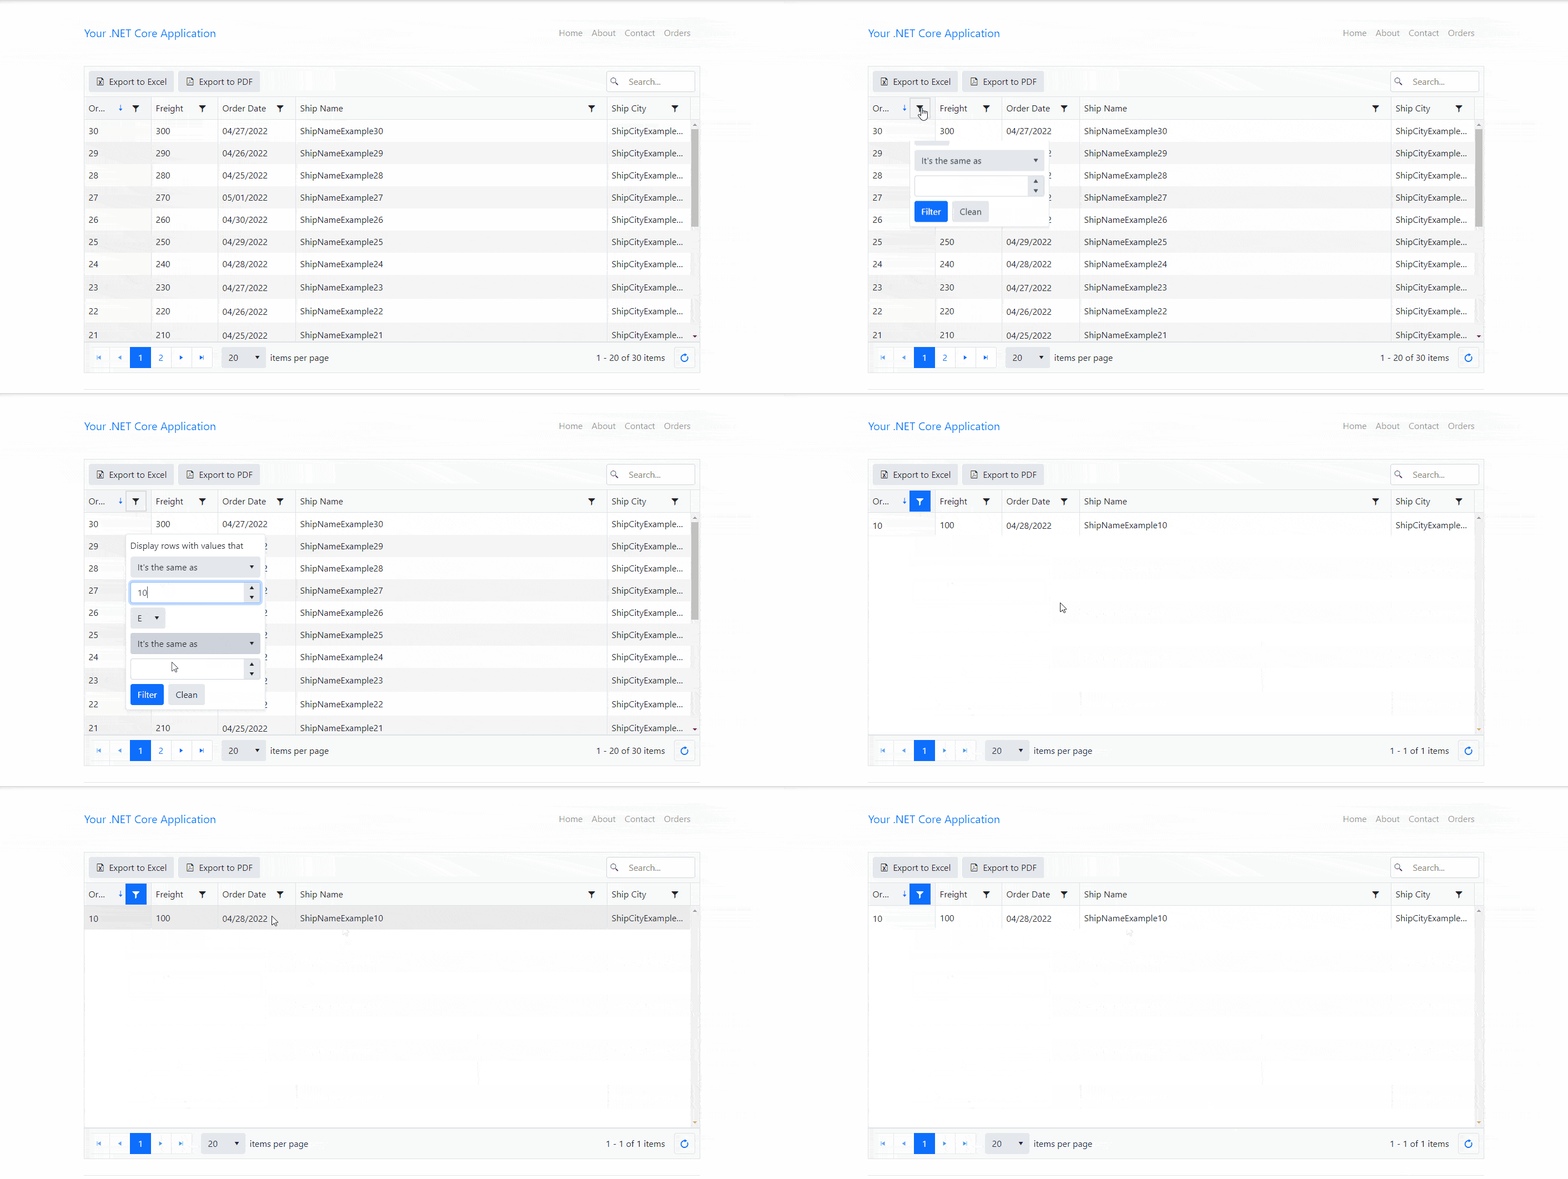
The following GIF shows how easy it is to filter and order data with the built-in filter and ordering function available in the grid enabled via a single property.
Image may be NSFW.
Clik here to view.
Updating the Data
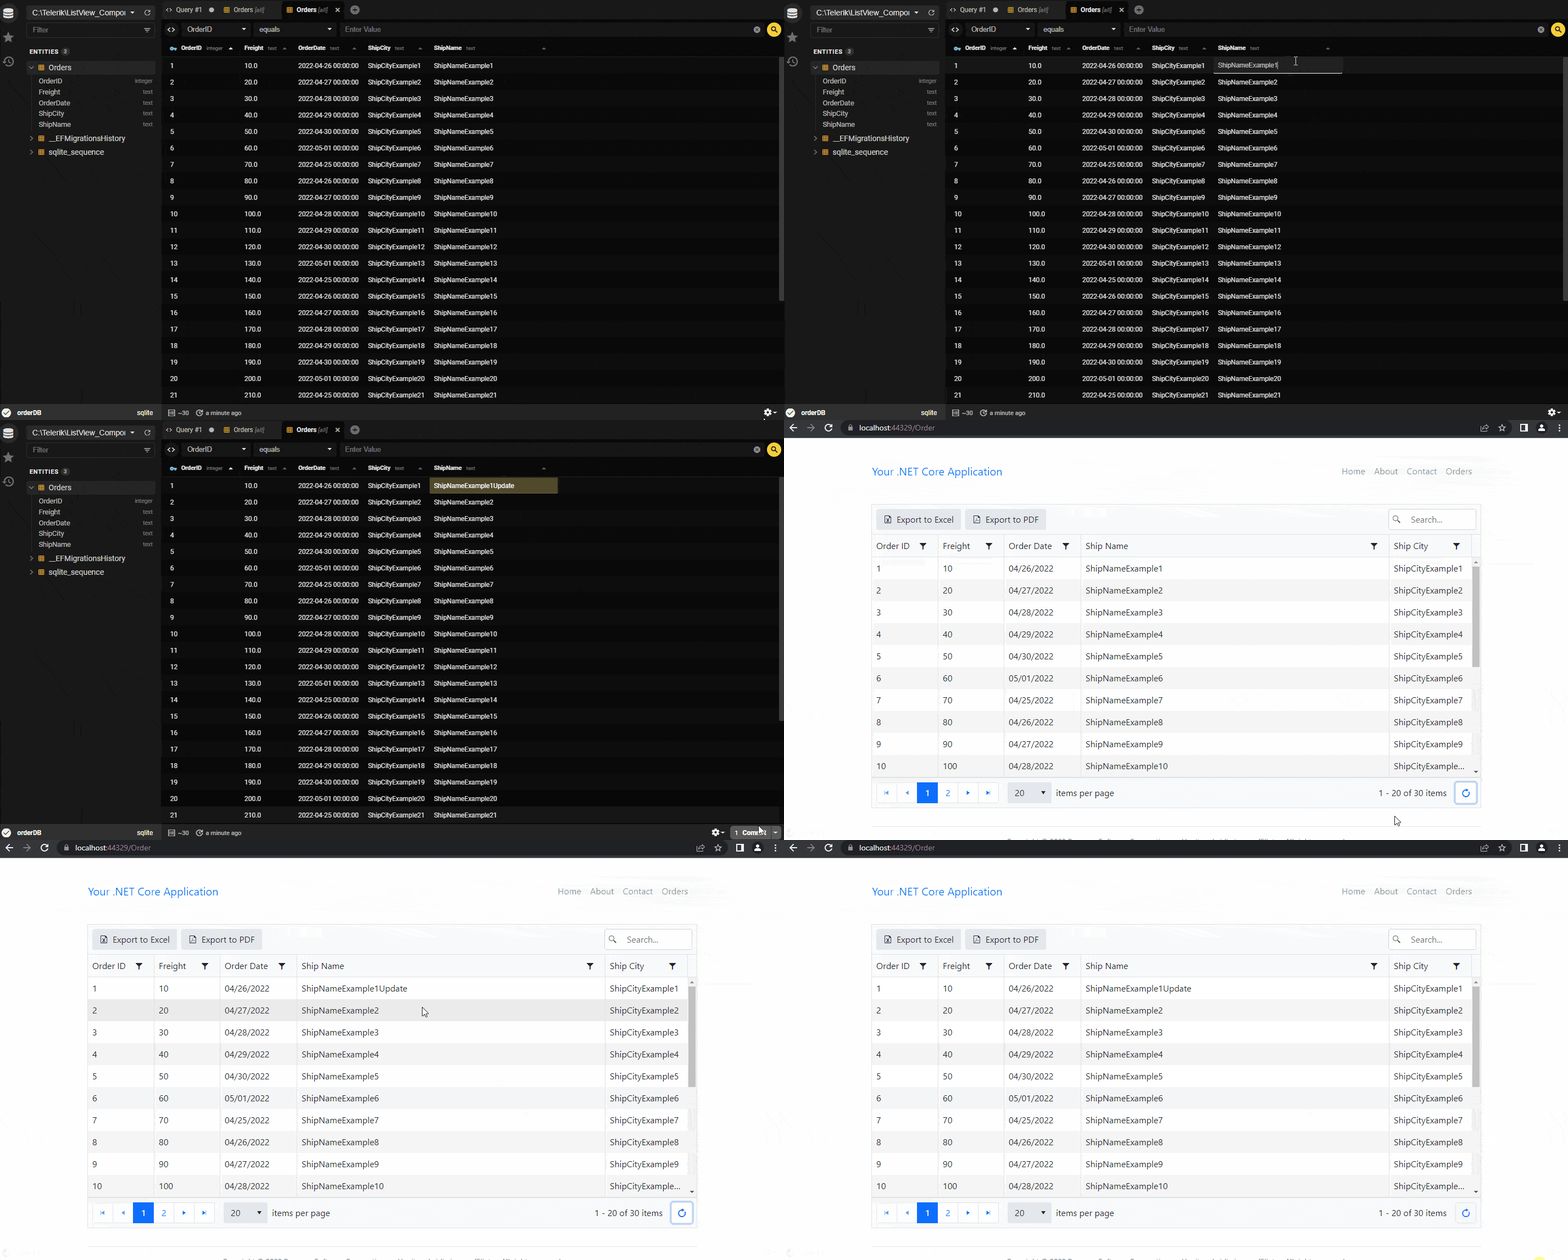
To change the database records, the SQLite Viewer Editor will be used. Then, as shown in the GIF below, the grid will be updated when clicking the update button, without the need to load the entire page.
Image may be NSFW.
Clik here to view.
Exporting Grid Data
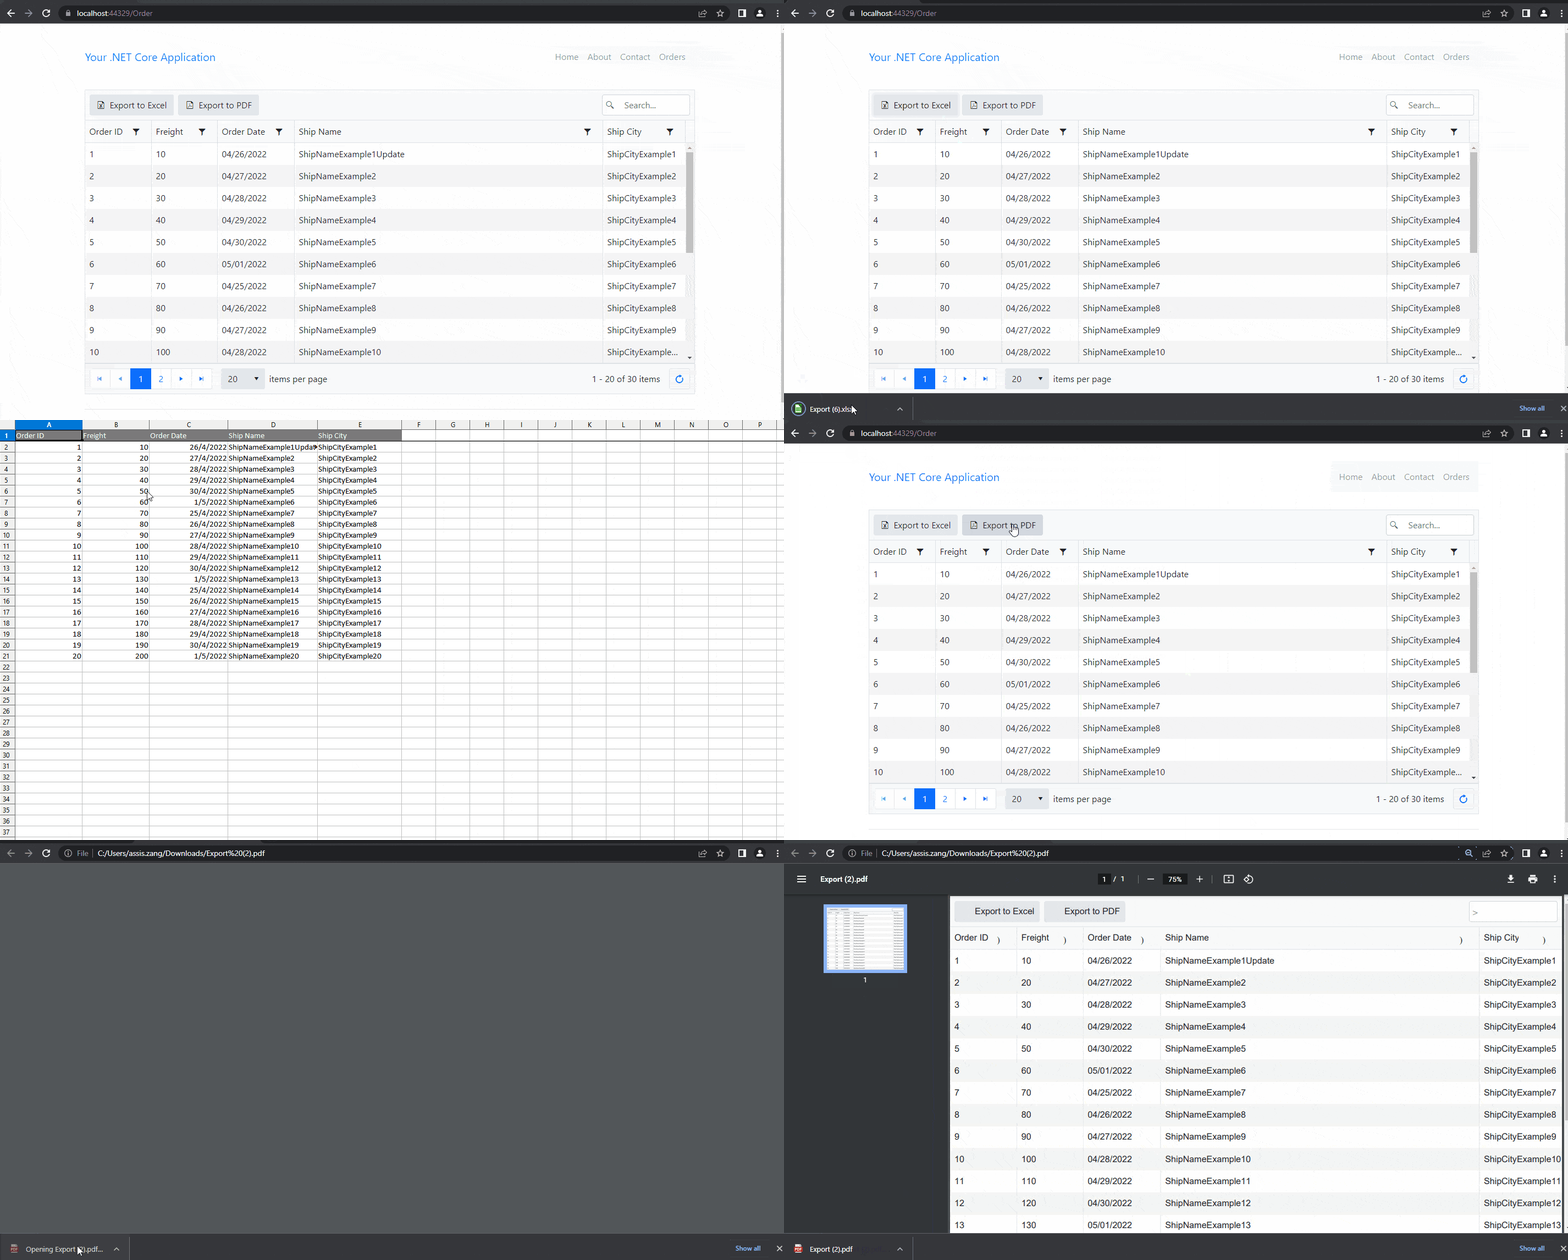
Below is the demo of exporting the data in Excel and PDF.
Image may be NSFW.
Clik here to view.
Conclusion
In this article, we created an application that communicates with a database and displays this data in a grid.
In the example of the article, we took advantage of basic features like filtering, sorting, exporting and data updating functions. While our example was straightforward, the Telerik UI for ASP.NET Core Data Grid supports out of the box very complex scenarios that handle large volumes of data with ease—like virtualization for both rows and columns, plus server grouping with virtualization, easy row drag and drop, range selection and more. I look forward to exploring these features more on my own!