In today’s blog we will be setting up various environments for deploying your Angular app and working with environment variables.
Prerequisites
Developers of all levels, from beginners to experts can read this post—it does not matter if you are familiar with beginner concepts in Angular. Here are a few things you should have to be able to follow through this article’s demonstration:
- An integrated development environment like VS Code
- Node version 11.0 installed on your machine
- Node Package Manager version 6.7 (it usually ships with Node installation)
- Angular CLI version 8.0 or above
- Angular version 12 or above
Other nice-to-have’s include:
- Working knowledge of the Angular framework at a beginner level.
What Are Angular Environments?
When working at a company or for a non-personal project with a team, you will typically find that there are different environments—like a test environment, staging, development environment and production, and there could even be more. For more context,
an Angular environment is nothing but a configuration or a set of rules in a JSON file that tells the Angular build system the files to change when you run ng serve.
Environments are essential to use and test out your code personally (local dev environment), with your team before it actually goes live (staging environment), and then when you eventually go live (production environment). These various environments ensure total independence scoped to the function of the particular environment you are using.
How Angular Supports This
Let us create a new Angular file and see how Angular by default already supports separating our workflow by environment. Run the command below in your terminal inside any folder of choice.
ng new tuts
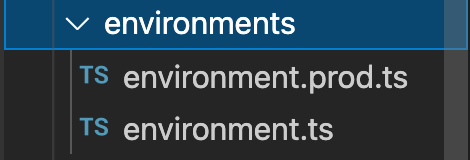
Following the prompts, say no to routing and choose CSS—and you should have a new Angular project created for you. Open the src folder, and you will notice there is already an environment directory by default.

Angular has two environments by default:
- The development environment:
export const environment = {
  production: false
};
Here the production value is false because it is the development environment.
- The production environment:
export const environment = {
  production: true
};
The production we see here is called an environment variable, just as the name implies. We can add other variables to that too with our own defined values. We can define almost anything we want like names, numbers, etc.
export const environment = {
 production: false,
 link:'http://localhost',
 name:'development environment',
 code: 1001,
};
The code block below is for your production environment:
export const environment = {
  production: true,
  link:'http://app-link',
  name:'production environment',
  code: 1004,
};
Setting Up Other Environments
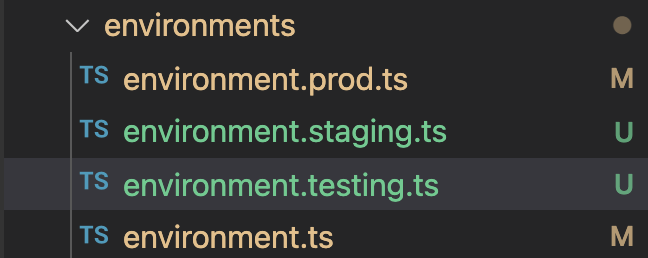
We are looking to add the staging and the testing environments to the dev and prod environments that already exist by default. You can create as many environments as you want to in Angular.

The Staging Environment
Let’s create the staging environment first. Create a new file in your environment folder and call it environment.staging.ts and copy the code block below inside:
export const environment = {
 production: false,
 link:'http://staging',
 name:'staging environment',
 code: 1003,
};
The Testing Environment
Let’s create the testing environment just like we did earlier. Create a new file in your environment folder and call it environment.staging.ts and copy the code block below inside:
export const environment = {
  production: false,
  link:'http://testing',
  name:'testing environment',
  code: 1002,
};
Telling Angular About These New Changes
After creating the environment files and variables, you have to make sure Angular knows that these have been created and so navigate to the Angular.json file and take a look at the architect section and make sure the configuration looks like this:
"configurations": {
  "staging": {
    "fileReplacements": [
    {
      "replace": "src/environments/environment.ts",
      "with": "src/environments/environment.staging.ts"
    }
   ]
  },
"testing": {
  "fileReplacements": [
  {
    "replace": "src/environments/environment.ts",
    "with": "src/environments/environment.testing.ts"
  }
 ]
},
"production": {
  "fileReplacements": [
  {
    "replace": "src/environments/environment.ts",
    "with": "src/environments/environment.prod.ts"
  }
 ],
"optimization": true,
"outputHashing": "all",
"sourceMap": false,
"extractCss": true,
"namedChunks": false,
"extractLicenses": true,
"vendorChunk": false,
"buildOptimizer": true,
"budgets": [
  {
    "type": "initial",
    "maximumWarning": "2mb",
    "maximumError": "5mb"
  },
  {
    "type": "anyComponentStyle",
    "maximumWarning": "6kb",
    "maximumError": "10kb"
  }
 ]
 }
}
You can see the testing and staging options added. The last thing to do is in the Serve section directly below the build. Be sure to make these changes below:
"configurations": {
  "testing": {
    "browserTarget": "tuts:build:testing"
  },
  "staging": {
    "browserTarget": "tuts:build:staging"
  },
    "production": {
      "browserTarget": "tuts:build:production"
    }
  }
Now we are done with the angular.json file, so let’s test it all out.
Testing Out New Angular Environments
To test out a new environment, run this command below:
ng serve --configuration=testing
For staging, use the staging configuration.
Now you can go to localhost:4200 and see that the app is live in your local server in the testing environment.
How Do We Know It Actually Works?
You might think the app running is the same app that runs if you just entered the ng serve command. This is not entirely true, so let’s find proof that they are different.
Open your component.ts file and replace the content with this:
import { Component } from '@angular/core';
import { environment } from '../environments/environment';

@Component({

selector: 'app-root',
templateUrl: './app.component.html',
styleUrls: ['./app.component.css']
})
export class AppComponent {
title = 'tuts';
link = environment.link;
name = environment.name;
code = environment.code;
}
Now we have the variables created, so let’s confirm what environment the app is currently running in. Go to the app.component.html file and replace line 333 with this:
<span>This app is running in the {{ name }} with code {{ code }}.</span>
Now save all files and run the application again with this:
ng serve --configuration=staging
This is what you should see:

Conclusion
In this post, we learned about using various environments in our workflows as developers and how they can all be set up easily in Angular. We also talked about the importance of having various environments and then set up two additional environments with examples to illustrate how it is done.