In this article, we’ll build a simple ecommerce site with Shopify and Next.js hosted on Netlify. We’ll also see how to improve the performance of our site by reducing our build times using a new solution introduced by Netlify called Distributed Persistent Rendering.
In this article, we’ll look at how to build a simple ecommerce website using Shopify and Next.js. The primary aim is to demonstrate how we can use a solution introduced by Netlify called Distributed Persistent Rendering (DPR) to reduce build times.
Suppose you’re building a large site with maybe ten thousand pages that you want to render statically. Imagine the amount of time you’d spent on every build. We’ll see how to use this concept to significantly reduce our build times, resulting in faster development cycles.
This article only covers what is required to understand how DPR works with Next.js. This means we won’t go the extra mile to handle checkout functionalities such as payment. This article also assumes you have a working knowledge of the basics of React and Next.js.
Prerequisites
To follow this tutorial, you need to have the following:
- npm and node.js installed on your PC
- A text editor
- Terminal
- A Netlify account
A Quick Introduction to Shopify
Shopify is an online selling platform with a monthly subscription, and it’s a cloud-based software as a service shopping cart solution that lets business owners set up their ecommerce websites and sell products with ease.
Shopify provides a headless CMS platform for developers to use their APIs to create custom ecommerce websites. Using headless commerce separates your backend infrastructure from the frontend consumer interactions without design or development restrictions.
Set Up a Shopify Account
We need to create a store where we’ll add our products and manage all aspects of our store. To do that, we need a Shopify account. Visit this URL to register for a free trial.
After completing your registration, create a store. Fill out your details and all the necessary information as required. After creating the store, you will be taken to the store admin page to customize and add products.
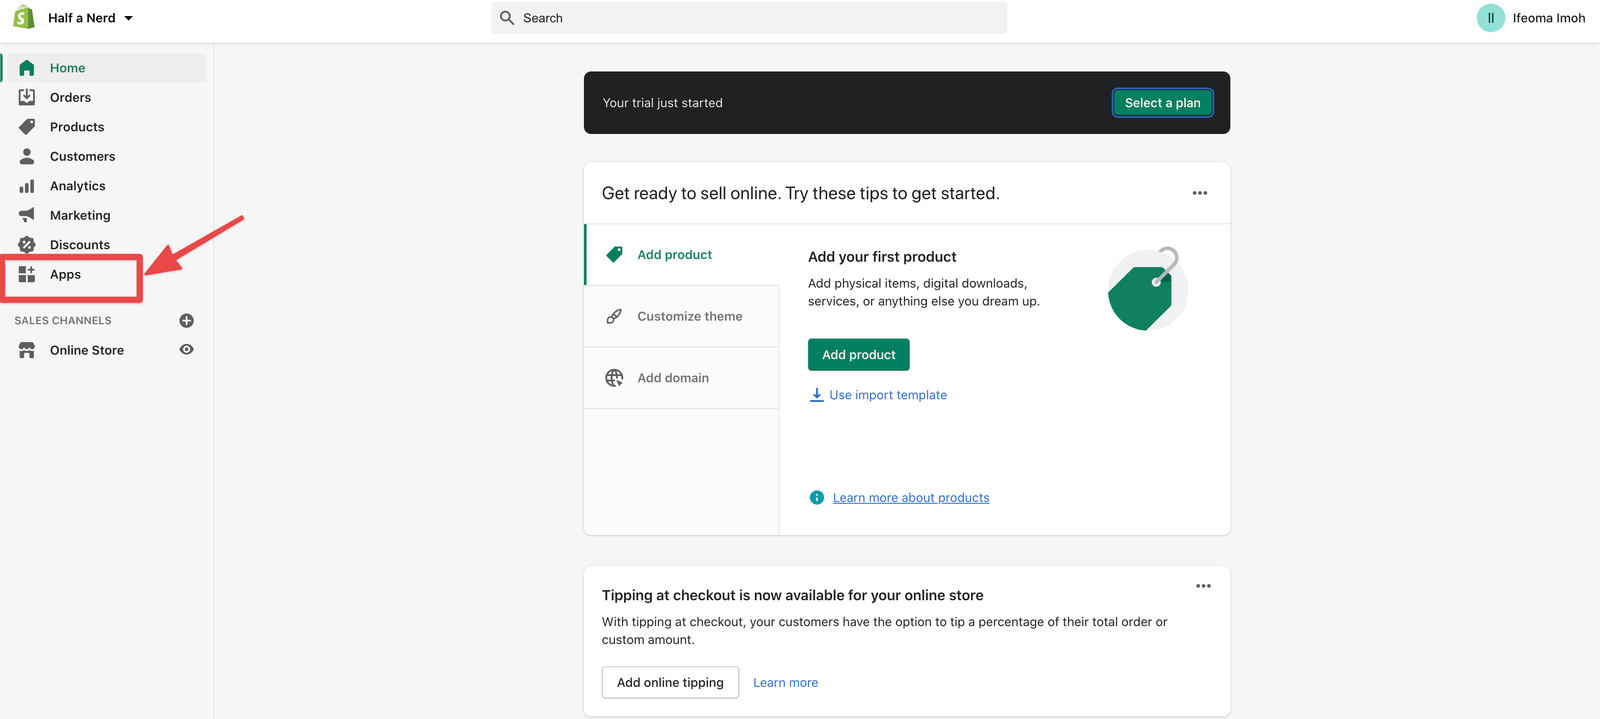
Click on the Apps link on the side menu, and you will be taken to the Apps page.
Activate Storefront API
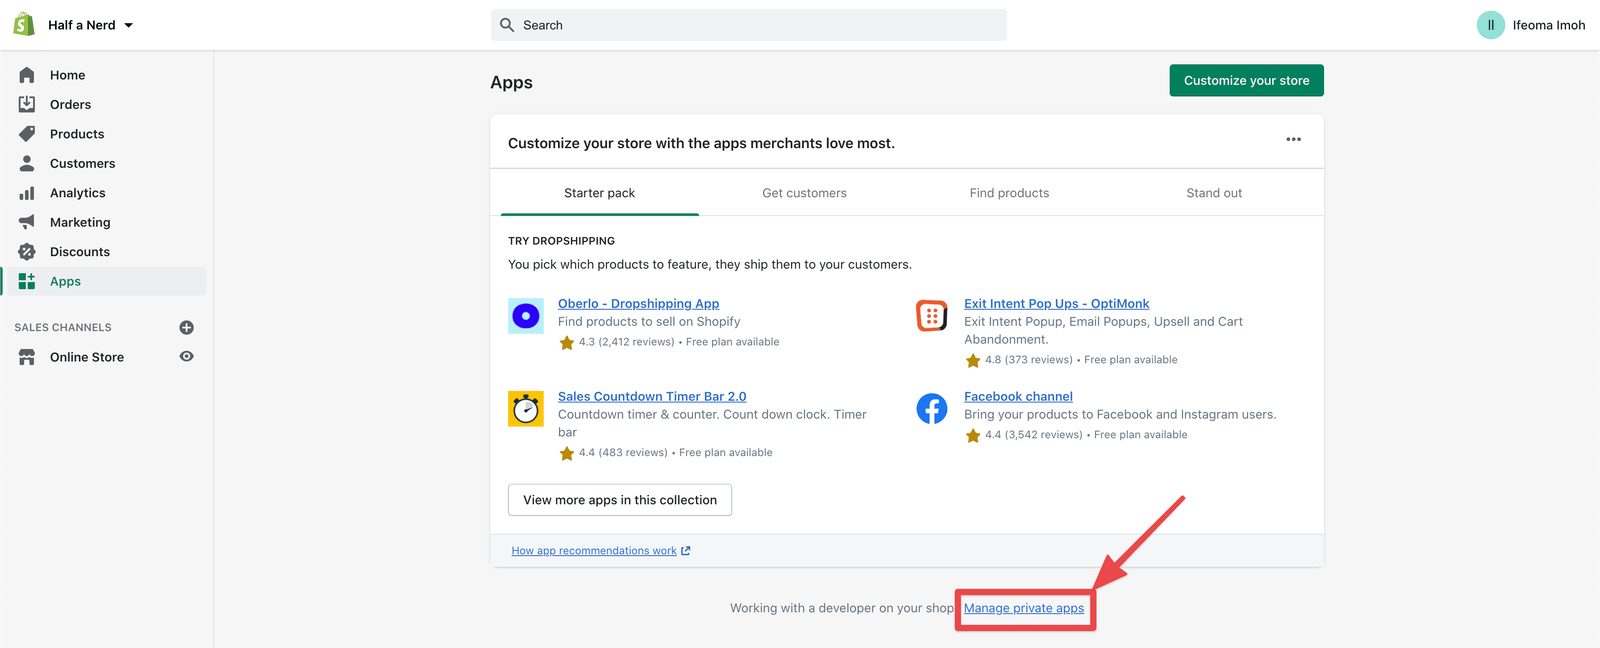
On the Apps page, click on the Manage private apps link at the bottom of the page.
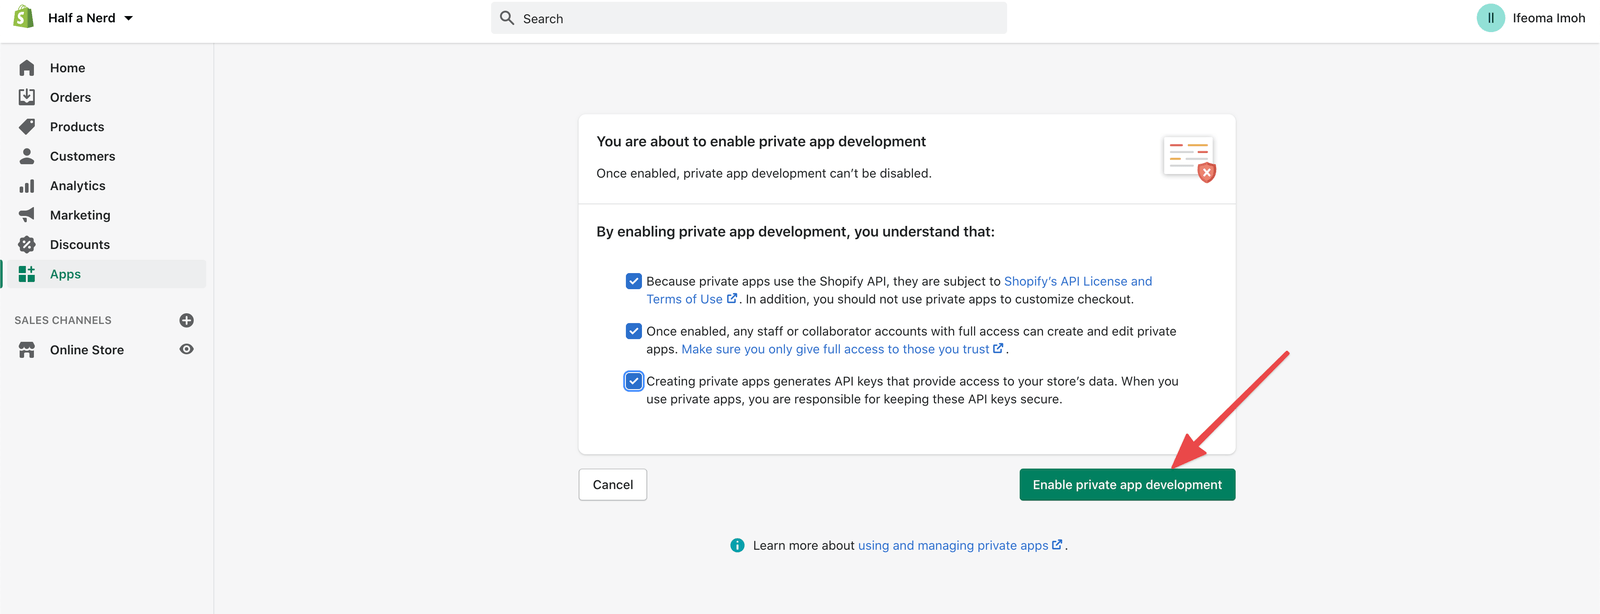
Follow the required prompts and enable Private app development. Activating private apps will allow us to use Shopify’s APIs to access data directly on our store and add functionality to our Shopify admin.
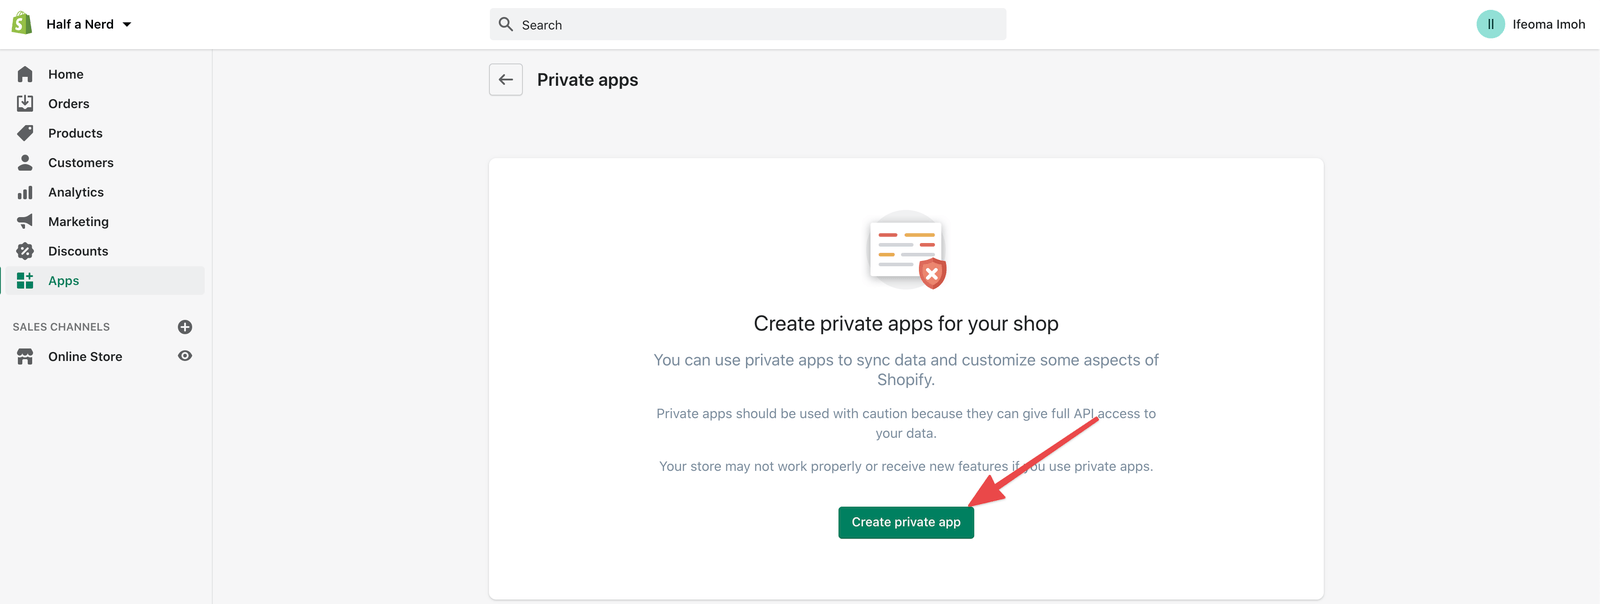
Click on the Create private app link, and you’ll be taken to the “Create private app” page, where you can fill in your details. Also, select Allow this app to access your storefront data using the Storefront API. Select which data types you want to expose to the API and click the save button to generate your storefront access token. Copy your token and paste it somewhere safe; you’ll use it later. When you’re done, click save.
You can add some products to your store by clicking on the Products link on the side menu, and you will be directed to the products page. Click on the Add product button on the top right, add your product details, and save. You will see a Product status tab—set it to Active and save again. You can repeat this for all the products you wish to add to your site. That’s all we need from Shopify for now. Let’s go ahead and build our Next.js application.
Set Up a Next.js Project
I created a starter project where I have some things for this project already set up. This starter project contains a simple Next.js app with the basic CSS styles we’ll be using for this project. I have also installed react-icons and the JavaScript Shopify-buy SDK we will be using for this project. We’ll be using the JS Buy SDK to integrate ecommerce into our website.
To clone this starter branch, type the following command in your terminal.
git clone https://github.com/ifeoma-imoh/shopify-store-starter.git
After successfully cloning the project, run the following commands in your terminal to install the required dependencies and start-up your development server.
npm install
npm run dev
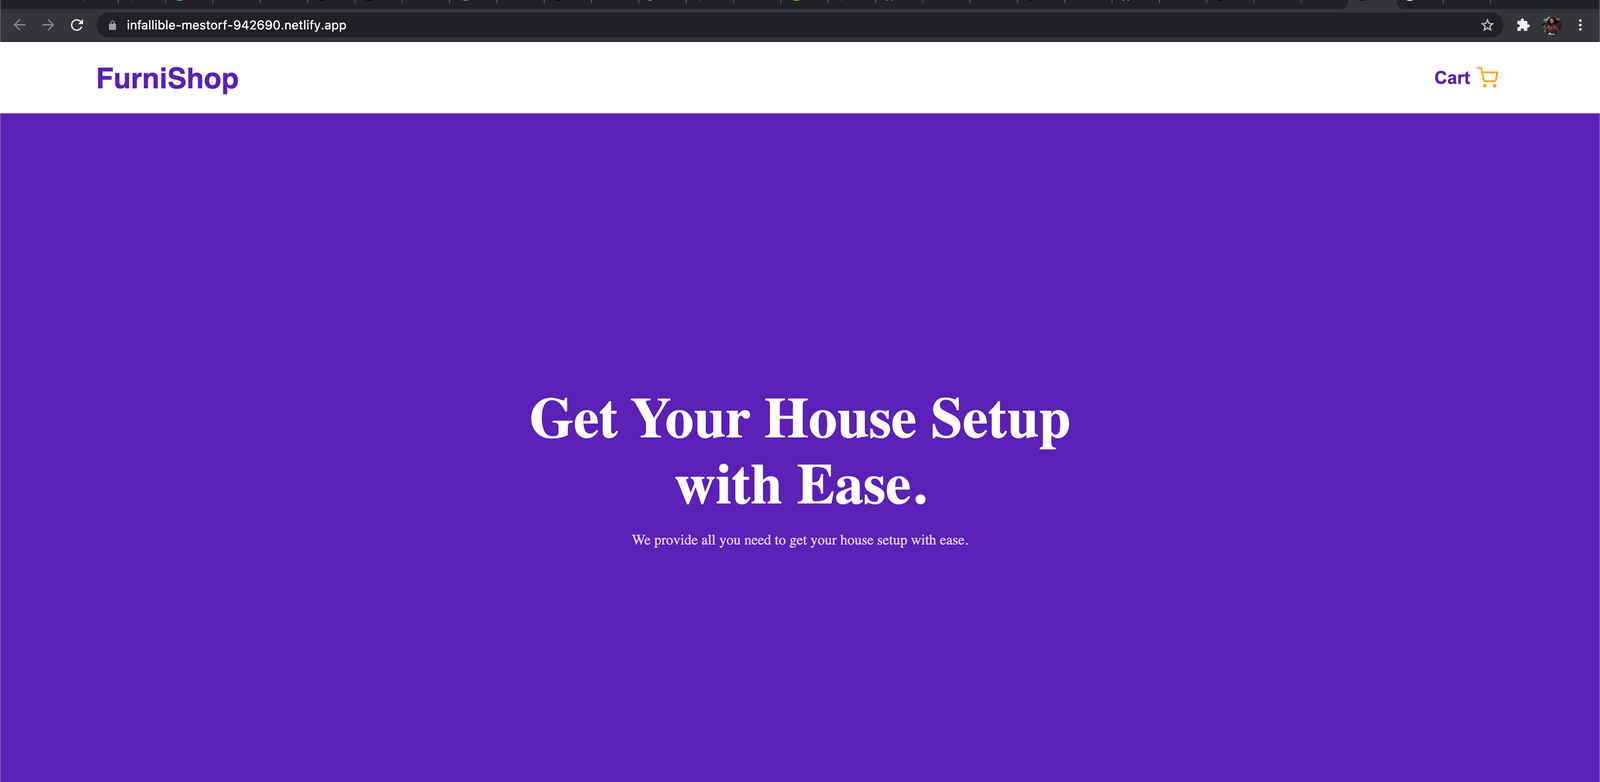
Open http://localhost:3000 from your browser, and you should see the words, Let’s get started! If you cloned the project, the styles are already there.
You don’t need to bother about it unless you want to adjust or update the styles.
Configure Shopify Client
Next, we need to create a file to configure our Shopify-buy package to get data for the Shopify store easily. At the root of your project, create a utils folder. Inside the utils folder, create a shopifyStore.js file and add the following to the file:
import Client from "shopify-buy";
export const client = Client.buildClient({
  storefrontAccessToken: process.env.SHOPIFY_STORE_FRONT_ACCCESS_TOKEN,
  domain: process.env.SHOPIFY_STORE_DOMAIN
})
From the code snippet above, we’re importing and configuring the Shopify-buy package. We are exporting a variable called client, which is created by calling Shopify’s buildClient API. buildClient takes a config object where we are setting our domain and storefrontAccessToken.
Follow these steps to access your storefrontAccessToken and domain:
- Log in to your Shopify store admin dashboard.
- Click on the Apps link on the sidebar.
- Click on Manage private apps at the bottom of the page.
- Select your app, scroll to the bottom of the page and copy the storefront access token.
- Copy your domain from your Shopify admin URL. It looks like the one in the image below.

At the root of your project, create a .env.local file and add the following to it:
NEXT_PUBLIC_SHOPIFY_STORE_FRONT_ACCESS_TOKEN=add-your-token-here
NEXT_PUBLIC_SHOPIFY_STORE_DOMAIN=Replace-this-text-with-your-domain-url
Replace the texts in the snippet above with your Storefront access token and Domain URL.
Set Up State Management
Let’s set up the state management we will be using for our project. Create a context folder at the root of your project, then create a shopContext.js file inside the folder and add this code to the file.
import React, { Component } from "react";
import { client } from "../utils/shopifyStore";
const ShopContext = React.createContext();

class ShopProvider extends Component {
  state = {
    products: [],
    product: {},
    checkout: {},
    isCartOpen: false,
  };
  componentDidMount() {
    if (localStorage.checkout_id) {
      this.fetchCheckout(localStorage.checkout_id);
    } else {
      this.createCheckout();
    }
  }
  createCheckout = async () => {
    const checkout = await client.checkout.create();
    localStorage.setItem("checkout_id", checkout.id);
    this.setState({ checkout: checkout });
  };
  fetchCheckout = async (checkoutId) => {
    client.checkout.fetch(checkoutId).then((checkout) => {
      this.setState({ checkout: checkout });
    });
  };
  addItemTocheckout = async (variantId, quantity) => {
    const lineItemToAdd = [
      {
        variantId,
        quantity: parseInt(quantity, 10),
      },
    ];
    const checkout = await client.checkout.addLineItems(
      this.state.checkout.id,
      lineItemToAdd
    );
    this.setState({ checkout: checkout });
    console.log("added", checkout);
  };
  closeCart = () => {
    this.setState({ isCartOpen: false });
  };
  openCart = () => {
    this.setState({ isCartOpen: true });
  };
  render() {
    return (
      <ShopContext.Provider
        value={{
          ...this.state,
          closeCart: this.closeCart,
          openCart: this.openCart,
          addItemTocheckout: this.addItemTocheckout,
        }}
      >
        {this.props.children}
      </ShopContext.Provider>
    );
  }
}
const ShopConsumer = ShopContext.Consumer;
export { ShopConsumer, ShopContext };
export default ShopProvider;
I’m using a class-based component in the code snippet above, which is just a matter of choice. A functional component should give the same result. Notice we’re importing the Shopify-buy configuration we set up earlier.
We created a state to store all our initial values, and we also created a createCheckout function that will be called whenever the page loads. The createCheckout function creates an empty checkout instance that will be updated
later when we call addItemsToCheckout.
Create Shared Components
At the root of your project, create an src folder, and inside that folder, create a components folder. Add these four files to the directory: Header.js, Footer.js, Hero.js, Cart.js.
Add the following code inside the Header.js file.
import React, { useContext } from "react";
import Link from "next/link";
import { FiShoppingCart } from "react-icons/fi";
import { ShopContext } from "../../context/shopContext";

const Header = () => {
  const { openCart } = useContext(ShopContext);
  return (
    <header className="header">
      <Link href="/">
        <a className="logo">FurniShop</a>
      </Link>
      <button onClick={() => openCart()}>
        Cart
        <FiShoppingCart className="icon" />
      </button>
    </header>
  );
};
export default Header;
The code snippet above is just a basic layout for the header section.
Open your Footer.js file and add the following code:
const Footer = () => {
  return <div className="footer">Copyright @2021</div>;
};
export default Footer;
Add the following code to the Hero.js file:
const Hero = () => {
  return (
   <div className="hero">
      <div className="hero_content">
        <h1>Get Your House Set up with Ease.</h1>
        <p>We provide all you need to setup your house with ease.</p>
      </div>
   </div>
  );
};
export default Hero;
The hero section for our project contains a simple title and a paragraph explaining our application’s details.
Add the following to your Cart.js file:
import React, { useContext } from "react";
import { ShopContext } from "../../context/shopContext";
import Image from "next/image";

const Cart = () => {
  const { isCartOpen, checkout, closeCart } = useContext(ShopContext);
  return (
    <div className={isCartOpen ? "cart active" : "cart"}>
      <div onClick={() => closeCart()} className="overlay" />
      <div className="side-content">
        <div className="cart-content-container">
          {checkout.lineItems &&
            checkout.lineItems.map((item) => (
              <div key={item.id}>
                <Image
                  width={300}
                  height={300}
                  src={item.variant.image.src}
                  alt={item.title}
                />
                <div className="item-content">
                  <div className="title">{item.title}</div>
                  <div className="quantity">{item.quantity}</div>
                  <div className="details-con">
                    <div className="price">₦{item.variant.price}</div>
                  </div>
                </div>
              </div>
            ))}
        </div>
        <a href={checkout.webUrl}>checkout</a>
      </div>
    </div>
  );
};
export default Cart;
The Cart component above contains a simple sidebar that shows off the list of products in the cart. We are looping over the data we’re getting and displaying the details of the products, including quantity.
We’re using a conditional statement to open and close the cart that depends on the value (true or false) of the isCartOpen function.
To complete the setup, update the _app.js file with the following:
import "../styles/globals.css";
import ShopProvider from "../context/shopContext";
import Footer from "../src/components/Footer";
import Header from "../src/components/Header";
import Cart from "../src/components/Cart";

function MyApp({ Component, pageProps }) {
  return (
    <ShopProvider>
      <Header />
      <Cart />
      <Component {...pageProps} />
      <Footer />
    </ShopProvider>
  );
}
export default MyApp;
We are wrapping our entire application with the ShopProvider component to make the context data available throughout the project.
Let’s create the component which we’ll use to display a list of our featured products. In the components folder, create a file called FeaturedProducts.js and add the following code to it:
import Link from "next/link";
import React, { useContext } from "react";
import { ShopContext } from "../../context/shopContext";
import Image from "next/image";

const FeaturedProducts = ({ products }) => {
  const { addItemToheckout, openCart } = useContext(ShopContext);
  return (
    <div className="featured-produts">
      <h2>Featured Products</h2>
      <div className="grid">
        {products.map((product) => (
          <Link href={`/products/${product.id}`} key={product.id}>
            <a>
              <div className="card">
                <Image
                  src={product.images[0].src}
                  width="300px"
                  height="300px"
                  alt={product.title}
                />
                <div className="title">{product.title}</div>
                <div className="details">
                  <div className="price">₦{product.variants[0].price}</div>
                  <button
                    onClick={() => {
                      addItemToheckout(product.variants[0].id, 1);
                      openCart();
                    }}
                  >
                    Add To Cart
                  </button>
                </div>
              </div>
            </a>
          </Link>
        ))}
      </div>
    </div>
  );
};
export default FeaturedProducts;
In the code snippet above, the FeaturedProducts component receives products as props from the index.js file where we rendered it. We are iterating over the products and displaying them. Next, we destructured
the
addItemToCheckout and openCart functions from ShopContext.
We will be using the addItemToCheckout to add products to the checkout list and openCart to open the cart. We will also receive the product data from the context and iterate on it to display the product list. In addition,
we are linking each product to the product details page so that when a product is clicked, the user is directed to that details page.
Add Shopify Domain to Next.Config File
Because the images for our products are hosted on a third-party domain (Shopify’s CDN), we must provide Shopify’s domain in our next.config.js file to gain access to the image optimization benefits of using the Next.js Image component.
Add the following to your next.config.js file:
module.exports = {
  images: {
    domains: ['cdn.shopify.com'],
  },
}
Create Pages
Let’s create the components for setting up the Home page and single products page. Open the index.js file in the pages folder and paste the following:
import FeaturedProducts from "../src/components/FeaturedProducts";
import Hero from "../src/components/Hero";
import { client } from "../utils/shopifyStore";
export default function Home(props) {
  return (
    <div>
      <Hero />
      <FeaturedProducts products={props.products} />
    </div>
  );
}
export const getStaticProps = async (context) => {
  const products = await client.product.fetchAll();
  // Fetch products
  const infos = await client.shop.fetchInfo();
  // Fetch shop Info if you think about SEO and title and ... to your page
  const policies = await client.shop.fetchPolicies();
  // fetch shop policy if you have any
  return {
    props: {
      infos: JSON.parse(JSON.stringify(infos)),
      policies: JSON.parse(JSON.stringify(policies)),
      products: JSON.parse(JSON.stringify(products)),
    },
  };
};
In the code above, we import our client variable in the getStaticProps() function to call our Shopify API. We’re returning the results inside a props object that will be passed into the FeaturedProducts component. One of the beauties of Next.js is that using the getStaticProps() function, our data will be pre-rendered (HTML will be generated and pre-rendered) before our page loads.
Let’s create a dynamic page for individual products that will be fetched dynamically based on the route that we provide. Inside the pages directory, create a folder named products.
Create a file called [id].js under pages/products and add the following code inside it:
import React, { useContext } from "react";
import { useRouter } from "next/router";
import { client } from "../../utils/shopifyStore";
import { ShopContext } from "../../context/shopContext";
import Image from "next/image";

const SingleProduct = ({ product }) => {
  const router = useRouter();
  const { addItemTocheckout, openCart } = useContext(ShopContext);
  if (router.isFallback) {
    return <div>Loading....</div>;
  }
  return (
    <>
      <div className="single-product">
        <Image
          src={product.images[0].src}
          width="300px"
          height="300px"
          alt={product.title}
        />
        <div className="content">
          <div className="details">
            <div className="price">₦{product.variants[0].price}</div>
          </div>
          <div className="title">{product.title}</div>
          <div
            className="desc"
            dangerouslySetInnerHTML={{ __html: product.descriptionHtml }}
          />
          <div className="details">
            <div className="price">₦{product.variants[0].price}</div>
            <button
              onClick={() => {
                addItemTocheckout(product.variants[0].id, 1);
                openCart();
              }}
            >
              Add To Cart
            </button>
          </div>
         </div>
      </div>
    </>
  );
};
export async function getStaticPaths() {
  let products = await client.product.fetchAll();
  products = JSON.parse(JSON.stringify(products));
  const paths = products.map((product) => ({
    params: { id: product.id.toString() },
  }));
  return {
    paths,
    fallback: false,
  };
}

export const getStaticProps = async ({ params }) => {
  const product = await client.product.fetch(params.id);
  return {
    props: {
      product: JSON.parse(JSON.stringify(product)),
    },
  };
};
In the code above, we want Next.js to statically generate the paths to our pages that use dynamic routes based on data ahead of time. This means we need to generate them at build time, so we define and return a list of all the possible paths (values
for id) in the getStaticPaths() function. In the getStaticPaths() function, we’re making a request to our Shopify API to pull in all the products in our store, and we’re using their ids to create a paths array.
In the return statement for the getStaticPaths() function, we’re returning an object with paths on it and a fallback property—we’ll talk about this fallback property later.
The getStaticProps() function also receives the params object from paths, and it is going to give us access to the data for each page with the id. The SingleProduct component then receives
the product as a prop at build time and uses it to display the details of each product.
Now let’s restart our server and head over to localhost:3000 to see the changes we added to our site.
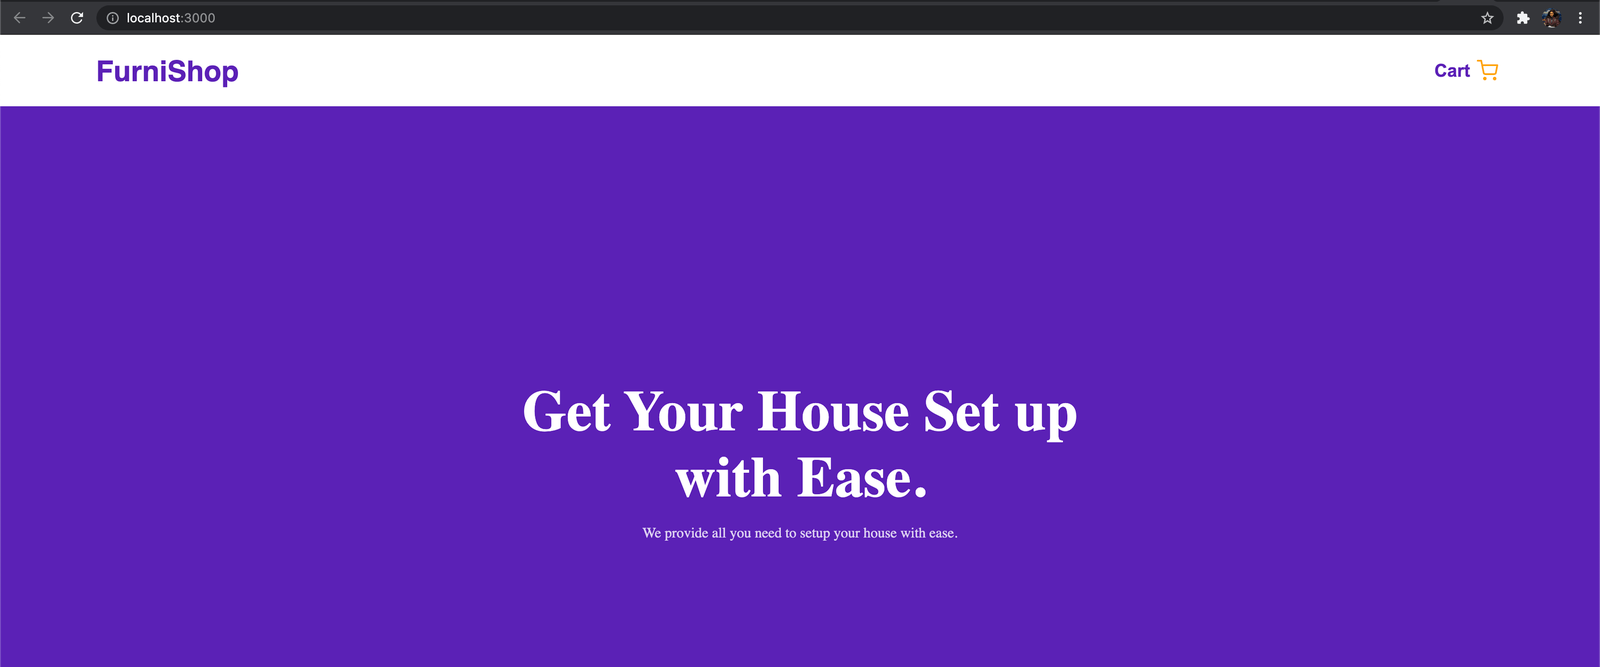
Everything works as expected!! If you click on each product, you’ll be taken to that product’s page.
Use Netlify’s DPR to Optimize Build Times
So, what problem are we trying to solve with Distributed Persistent Rendering? Remember how we defined a list of all the possible paths for our pages that use dynamic routes in the getStaticPaths() function so that Next.js can statically
generate them ahead of time (at build time) instead of at request time? The issue with doing this is that all the pages for our site are generated at build time. Now because we’re working on a small ecommerce site, having lengthy build times
may not be an issue, but the more our project grows, imagine the amount of time we’d spend on every build.
This is where Netlify comes with a new solution designed to work with any framework called Distributed Persistent Rendering. This concept addresses some of the issues we face while building large sites on the Jamstack: reducing build times. Netlify’s initial implementation of DPR is called On-demand Builders, and it is considered the first step toward achieving Distributed Persistent Rendering on Netlify.
According to Netlify, On-demand Builders are serverless functions used to generate web content as needed that’s automatically cached on Netlify’s Edge CDN.
This approach allows you to build your site incrementally by pre-building certain pages early (e.g., the critical content) and deferring other pages until they are requested for the first time. Those deferred pages are built and cached at the CDN when requested for the first time, and subsequent requests to the same page will serve the cached page, as would other pages pre-rendered at build time.
If you won’t be hosting your site on Netlify but want to use or create On-demand Builders, you need to follow Netlify’s docs to get it configured using Netlify’s serverless function. We won’t need to do that for our site because we are building our site with Next.js and deploying it to Netlify.
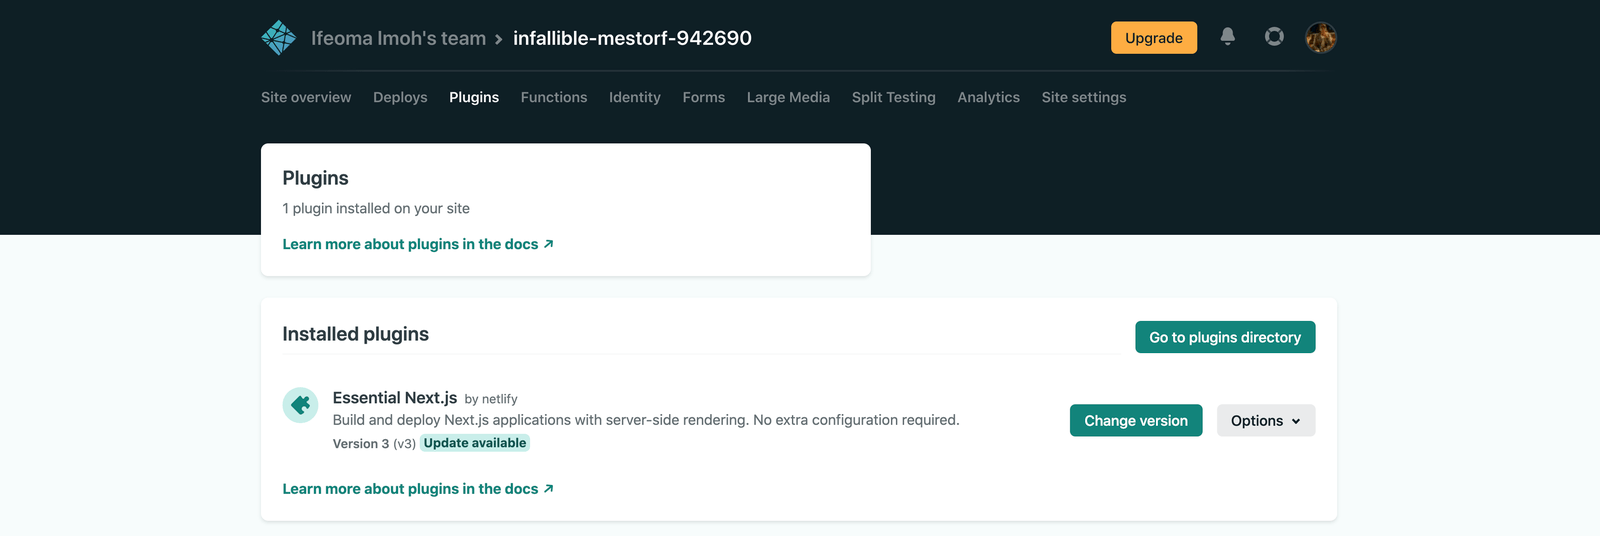
Since our project uses Next.js, when we link the repository for our new site to Netlify, Netlify will automatically install a plugin called Essential Next.js build plugin.
This plugin configures your site on Netlify to allow all Next.js features. It creates a Netlify function for each Next.js page that needs one and gives us automatic access to On-demand Builders when working with Next.js.
Deploy to Netlify
Follow the steps below to deploy your site to Netlify:
- Create a GitHub repository and push your code to it.
- Log in to your Netlify account and click the New site from Git button.
- Follow the prompts and authorize linking your GitHub account to your Netlify account.
- Select the repository for the project you want to deploy on Netlify and click the Deploy site button.
- When the build completes, you’ll see an error message that looks like the one in the image below, but don’t worry. We’ve got this!
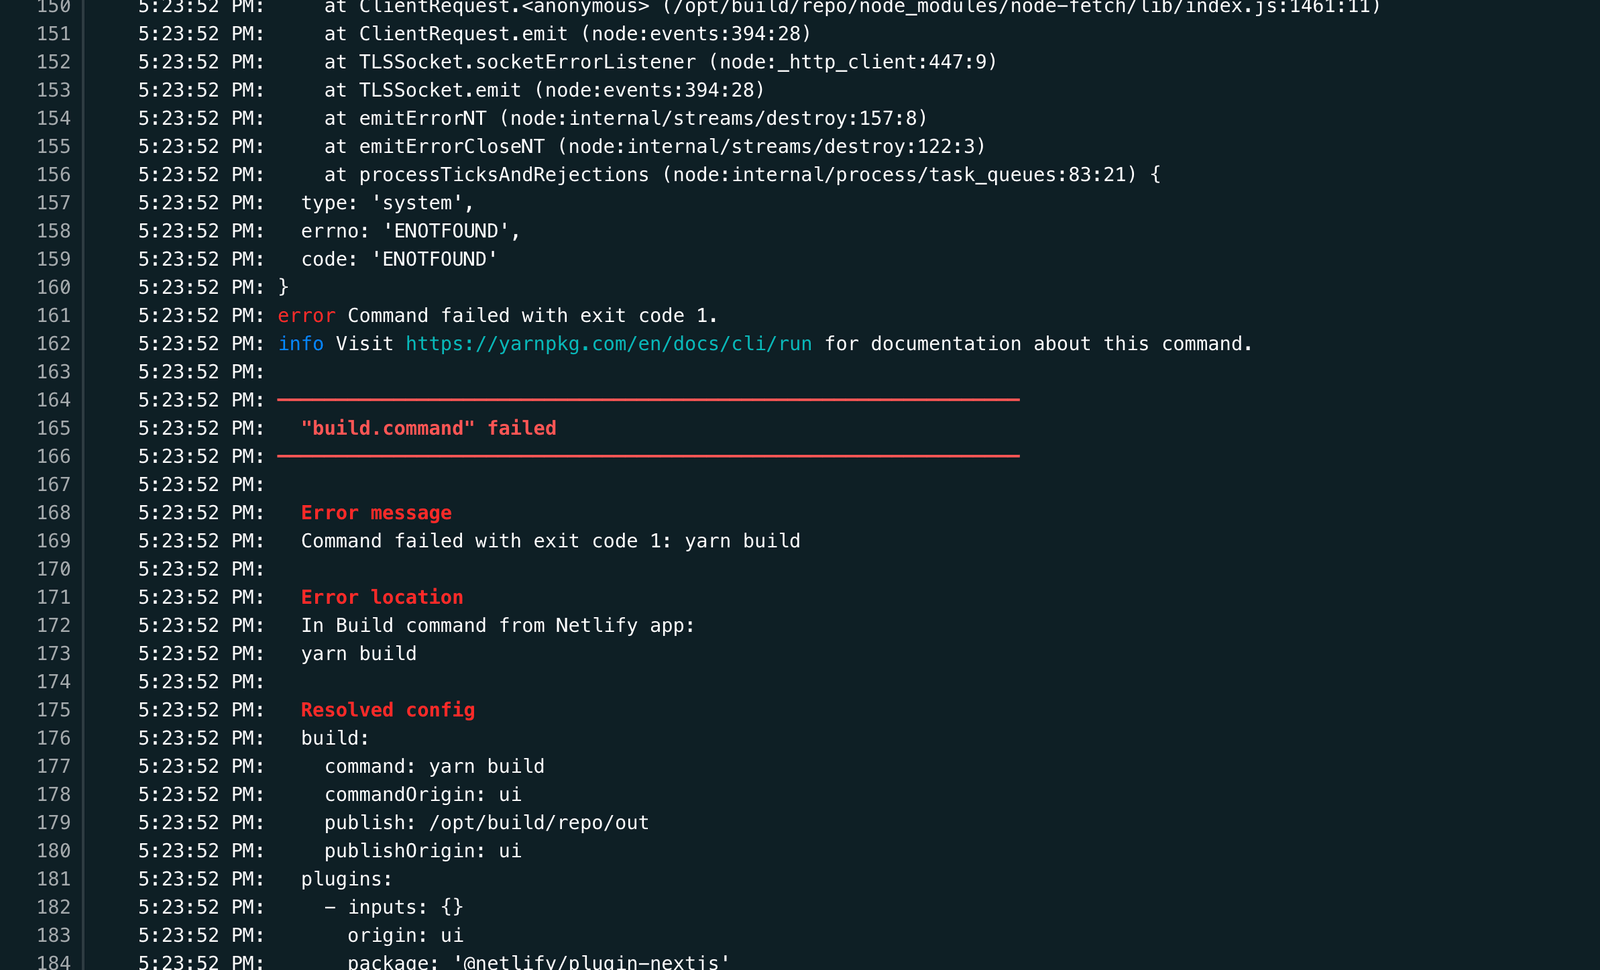
- To get rid of the error message above, go to your Netlify dashboard and click on your site name (the site you’re trying to deploy).
- Click on the Site settings button on the page.
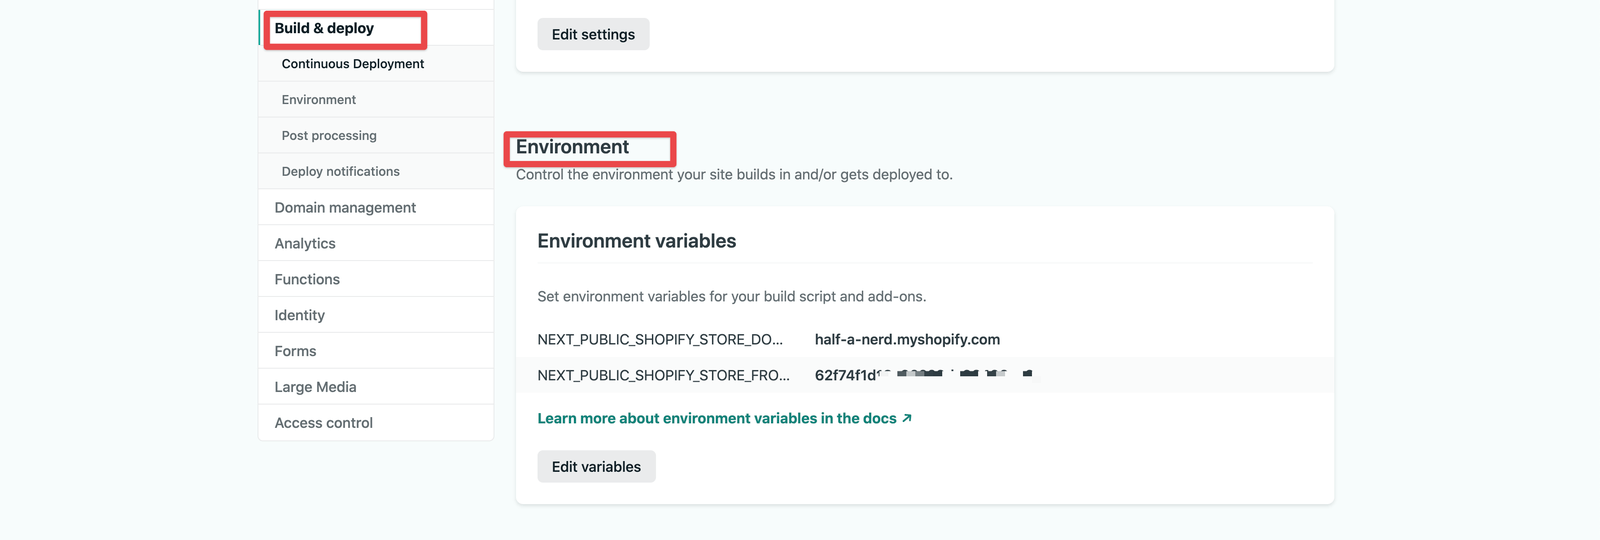
- Click on the Build and deploy link on the side menu.
- Scroll down to the Environment section of the page, add your environment variables for your storefront access token and domain as seen in the image below, and click Save.
- Go to your Netlify dashboard, click on your site name and click on the Site settings button on the page.
- Click on the failed deploy link, then click on the Retry deploy button.
- The build should be successful this time.
Now, if you click on the Plugins link on your Netlify dashboard, you will see that the Essential Next.js plugin was automatically installed for you. This plugin is automatically installed for all new sites deployed to Netlify with Next.js.
Congratulations! Without installing or writing any special function, you now have access to On-demand Builders out of the box.
Statically Generate Critical Pages
Open your [id].js file, add the following changes, build your site, and push to GitHub.
// Old Code
export async function getStaticPaths() {
  let products = await client.product.fetchAll();
  products = JSON.parse(JSON.stringify(products));
  const paths = products.map((product) => ({
    params: { id: product.id.toString() },
  }));
  return {
    paths,
    fallback: false,
  };
}

// New Update
export async function getStaticPaths() {
  let products = await client.product.fetchAll();
  products = JSON.parse(JSON.stringify(products));
  const firstProduct = products[0];
  return {
    paths: [{ params: { id: firstProduct.id.toString() } }],
    fallback: false,
  };
}
We updated the code in our [id].js file by defining only the path to the first product’s data in our getStaticPaths() function. We are looping through all our products and telling Next.js to statically generate only
the path to the first product at build time. The paths for other pages will be deferred and generated when a user requests them, and the generated paths will be reused for every other request to that same page.
That will benefit our site because if we have one thousand or ten thousand products, we won’t generate the data for all of them at once, thereby decreasing our build times.
Notice that in the return statement of our getStaticPaths() function in the [id].js file, we provide paths as well as false as the fallback value. Because we passed false as the value of fallback, if we try to access the details page of any of the other products whose paths weren’t defined in the getStaticPaths() function to be generated at build time, we’ll get a 404 page.
This is not the behavior we want. We still want to access the product details pages of paths that we intentionally didn’t generate at build time. To achieve that, set the value of fallback to true or blocking in the getStaticPaths() function.
fallback: true
Now, suppose we try to access any product whose path we didn’t generate ahead of time. Behind the scenes, Next.js will generate the path for that product, serve the page to the user, and cache it automatically on Netlify’s CDN. Subsequent requests to the same path will serve the cached page as if it were part of the pages statically generated at build time.
Summary
In this tutorial, we built a simple ecommerce website with Shopify and Next.js hosted on Netlify. We also saw how we could improve the performance of our site and reduce lengthy build times with On-demand Builders, which is Netlify’s first implementation of Distributed Persistent Rendering. With this concept, we generate our critical pages ahead of time (at build time) and defer other pages until they are requested for the first time. The On-demand Builders feature is still in its early access phase; you can check out the documentation to learn more about it.