Today, we’ll look at how to use localization and globalization in ASP.NET Core applications.
In this step-by-step tutorial, we are going to learn about localization in an ASP.NET Core application. This tutorial covers the following topics:
- What are globalization and localization?
- Create a .NET Core project
- How to configure project for localization
- How to access the localize string from resource file
- How to configure the default culture
What Are Globalization and Localization?
In computing, globalization (or internationalization) and localization are means of adapting software to various languages, regional specifics and technical requirements of a target locale, according to Wikipedia.
Globalization is making software adaptable to different languages and regions, so it’s available around the world.
Localization is adapting software for a particular region or language. It involves not only the language but also cultural elements specific to a region, such as the preferred date and time format, currency and number formatting, and units of measurement.
In ASP.NET Core, with the help of services and middleware, we can localize the app to support multiple languages and cultures.
Create a .NET Core Project
Firstly, let’s create a new ASP.NET Core MVC project using Visual Studio. Follow the below steps to create the project:
Step 1: Open Visual Studio (I’ll be using Visual Studio 2022).

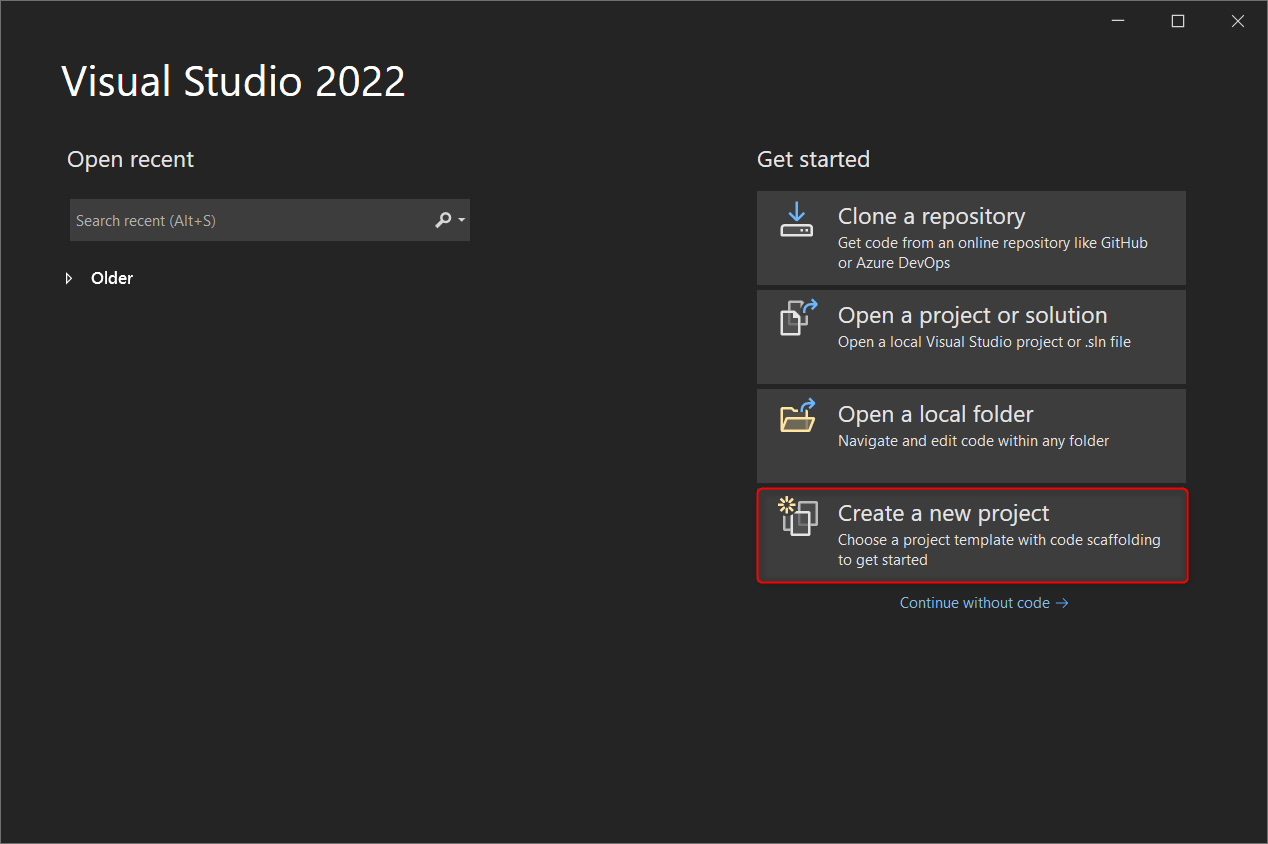
Step 2: Click on Create a new project.
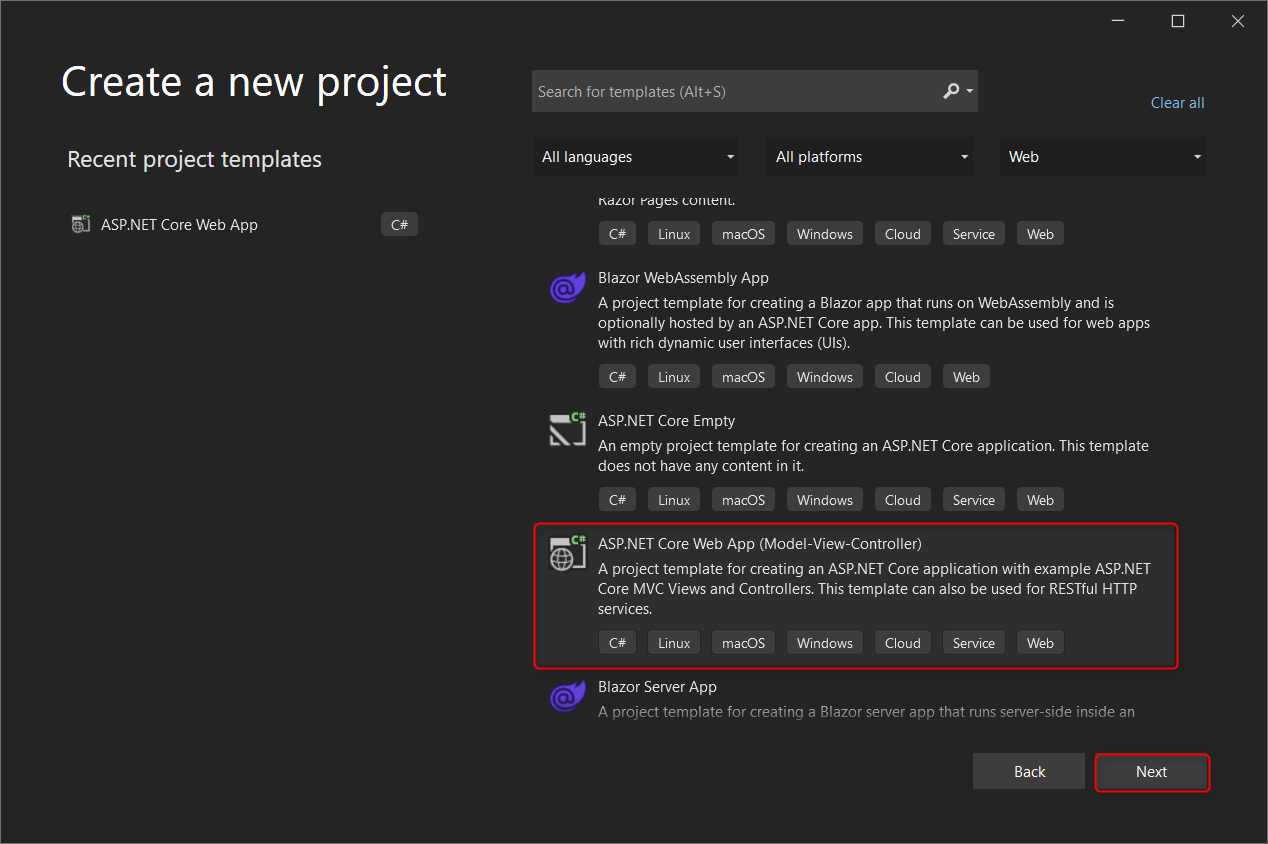
Step 3: Select ASP.NET Core Web App from the list of project templates and click the Next button.
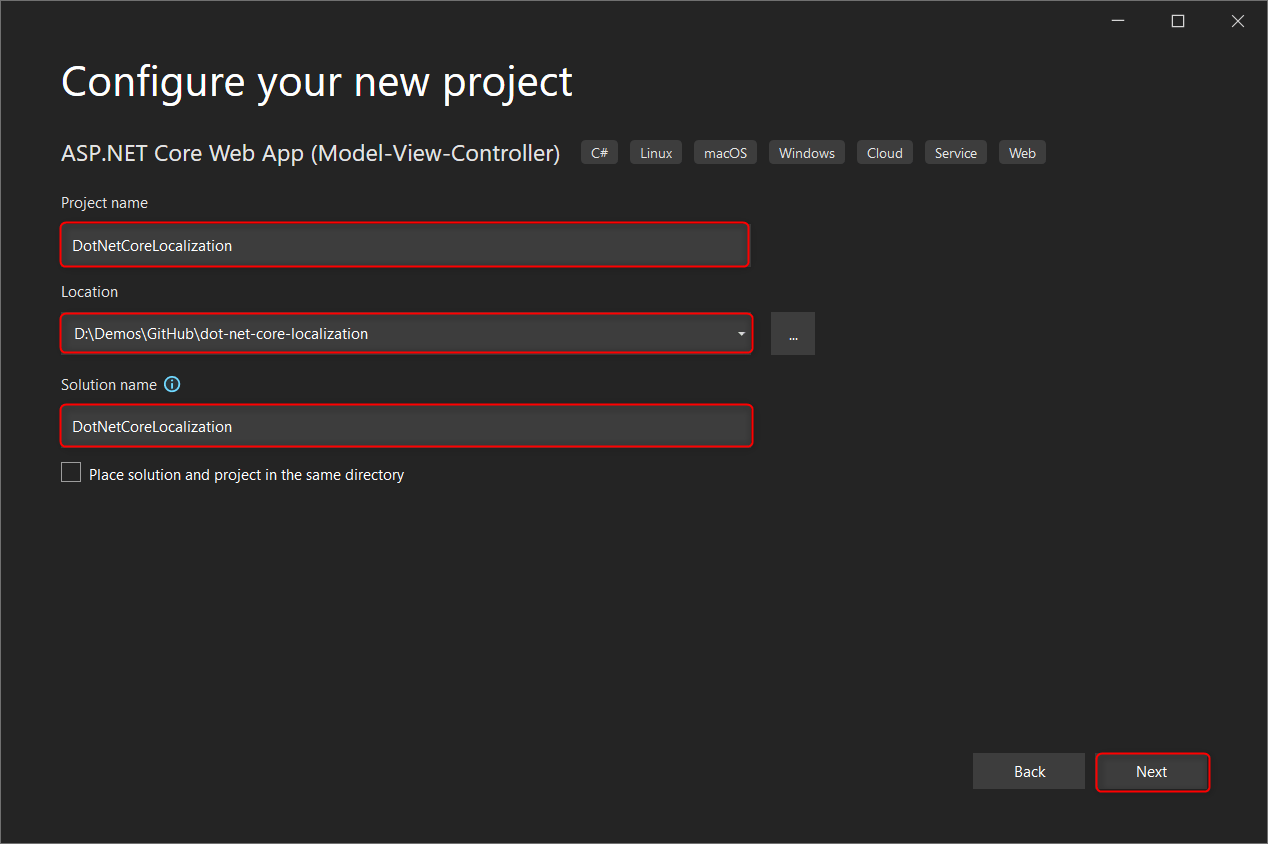
Step 4: Provide the project name and the location to save the created project. Here we have given the project name as DotNetCoreLocalization. Click the Next button.
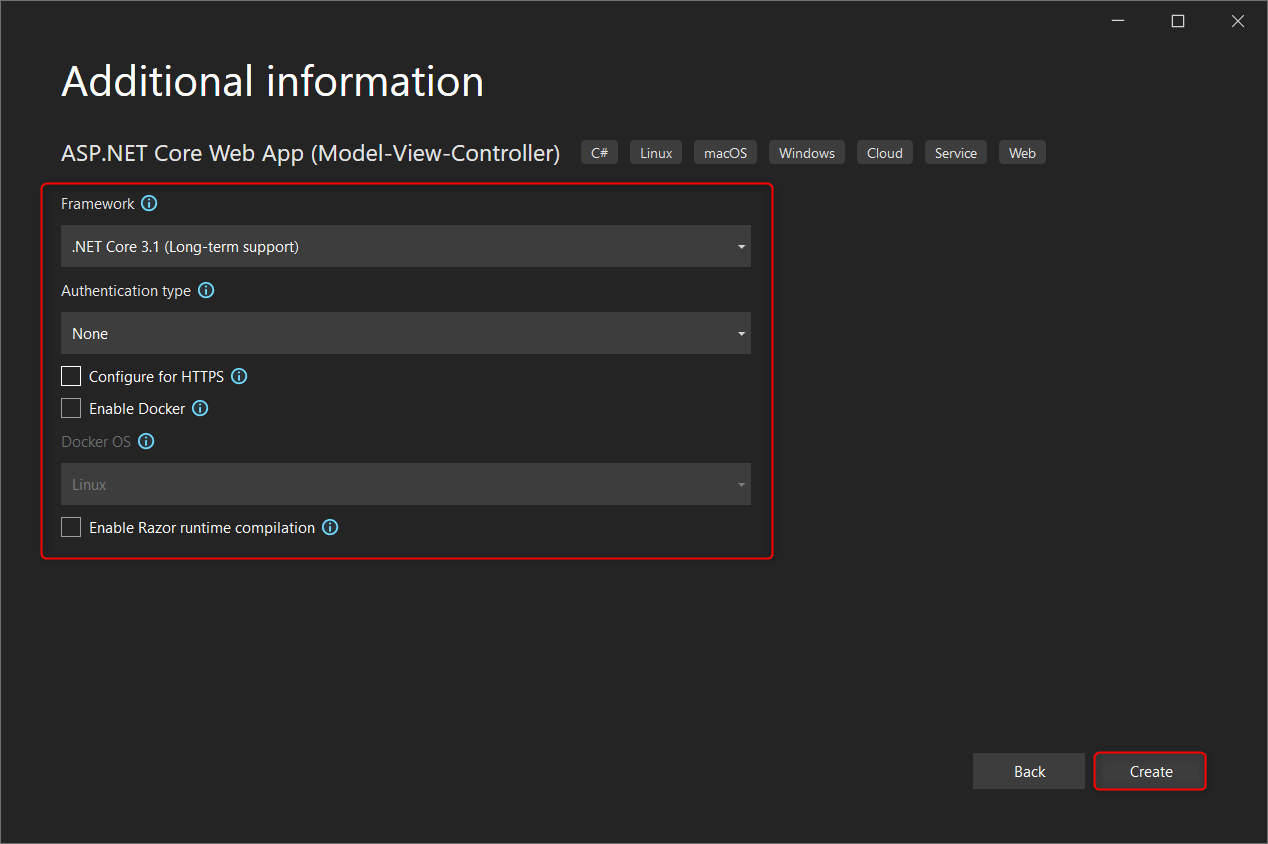
Step 5: On this page, you will be see the default framework, authentication-type and other configuration etc., click on Create button.
Step 6: Finally, the project is created, with a project structure like the screenshot below.
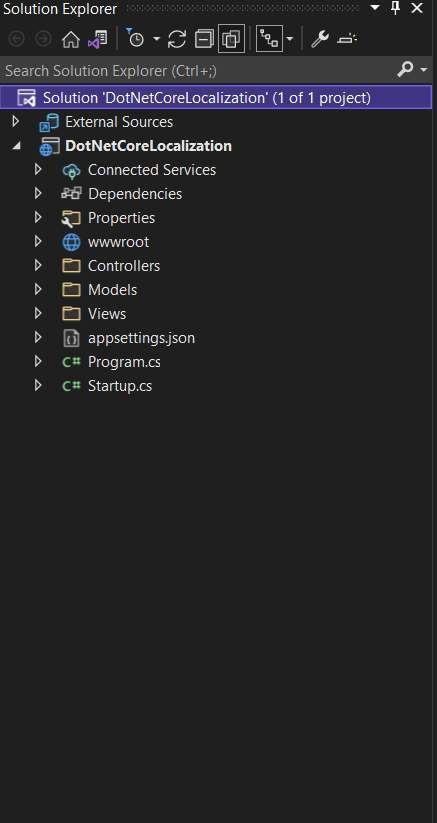
Step 7: Hit F5 or run the project, and you will see the output as below screenshot.
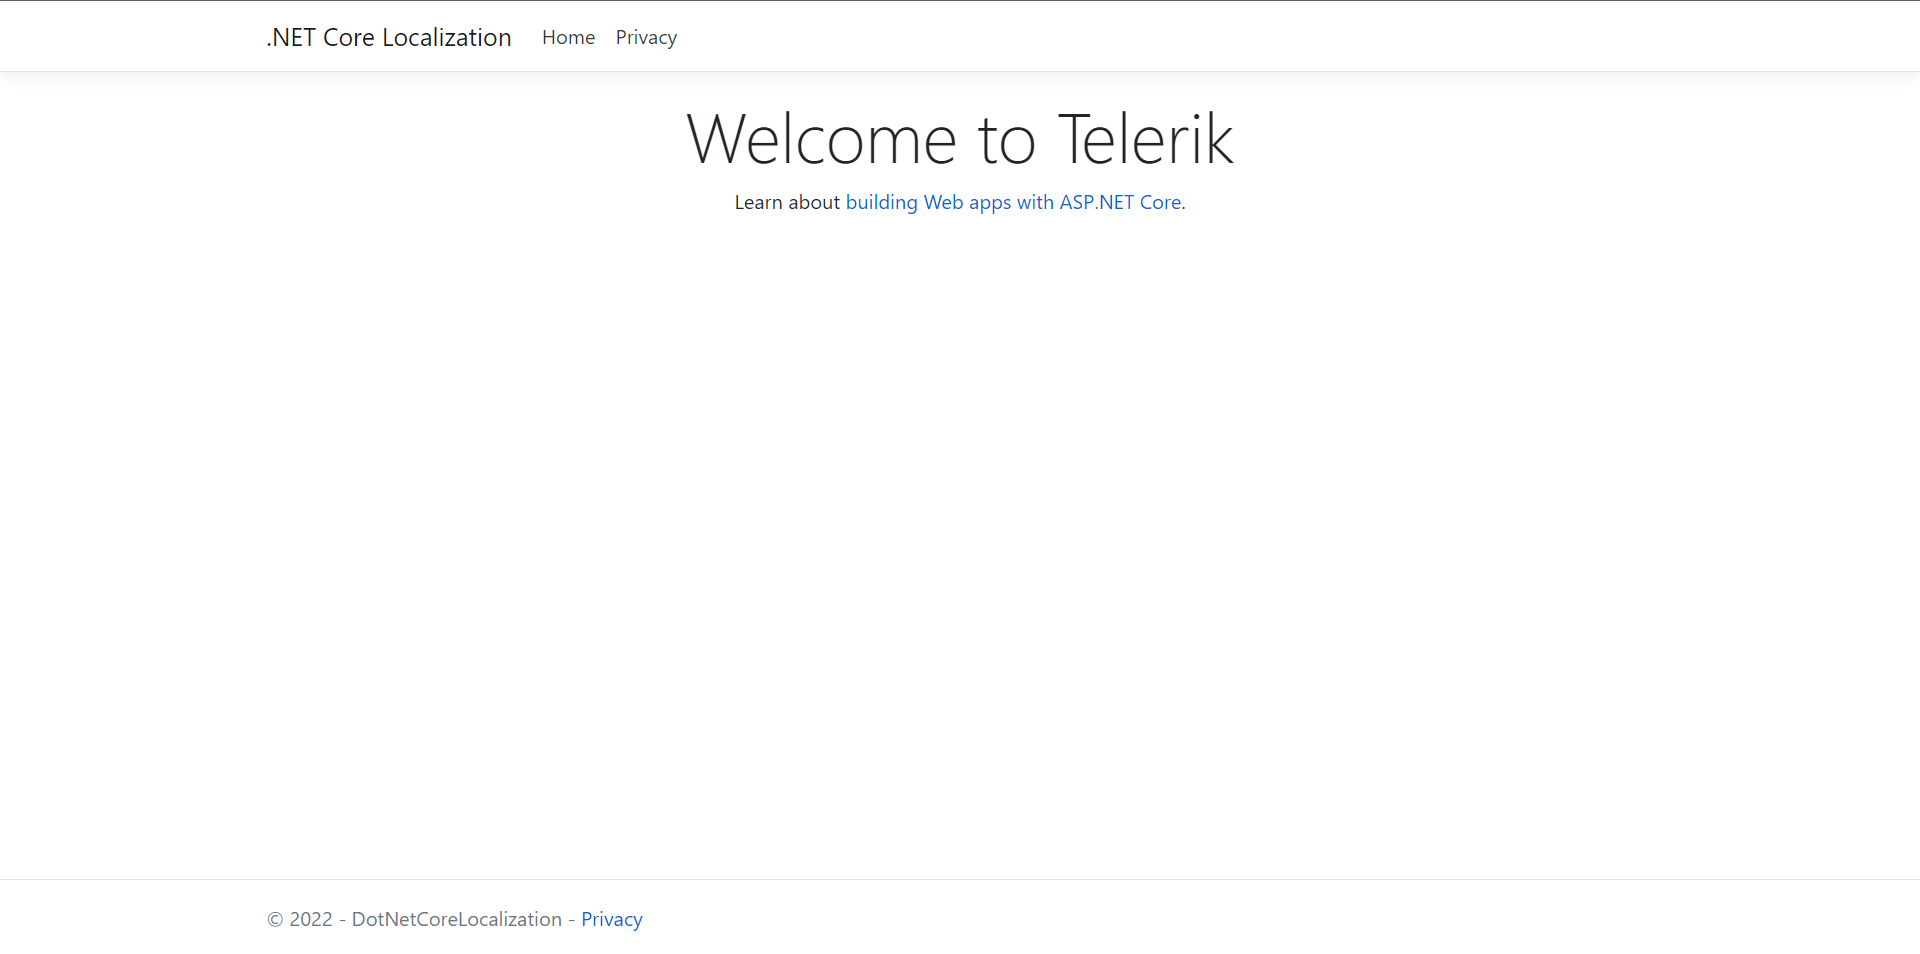
How To Configure Project for Localization
Let’s configure the project. For that we need to use the ConfigureServices method of the Startup class. There are three methods to configure the localization in ASP.NET Core:
- AddLocalization: This method adds the localization services in the services container, and also we can set the Resources file path in it.
- AddViewLocalization: Using this method, we can use the localization in view files with the help of IViewLocalizer.
- AddDataAnnotationsLocalization: Using this method we can use the localization in the DataAnnotations validation messages with the help of IStringLocalizer.
Localization Resource Files
Let’s understand the use of the resource file first. The resource file is used for separating the localize strings from code. These localize strings are stored in the key-value format with .resx file extension.
Resource File Name Conventions
There are two ways to provide the names for resource files:
- Using dot
Example: Resources/Controllers.TestController.en-US.resx - Using path
Example: Resources/Controllers/TestController.en-US.resx
Syntax: file-name.language-region.resx
Next, we are going to add the resource files for localization in our project by following the steps below:
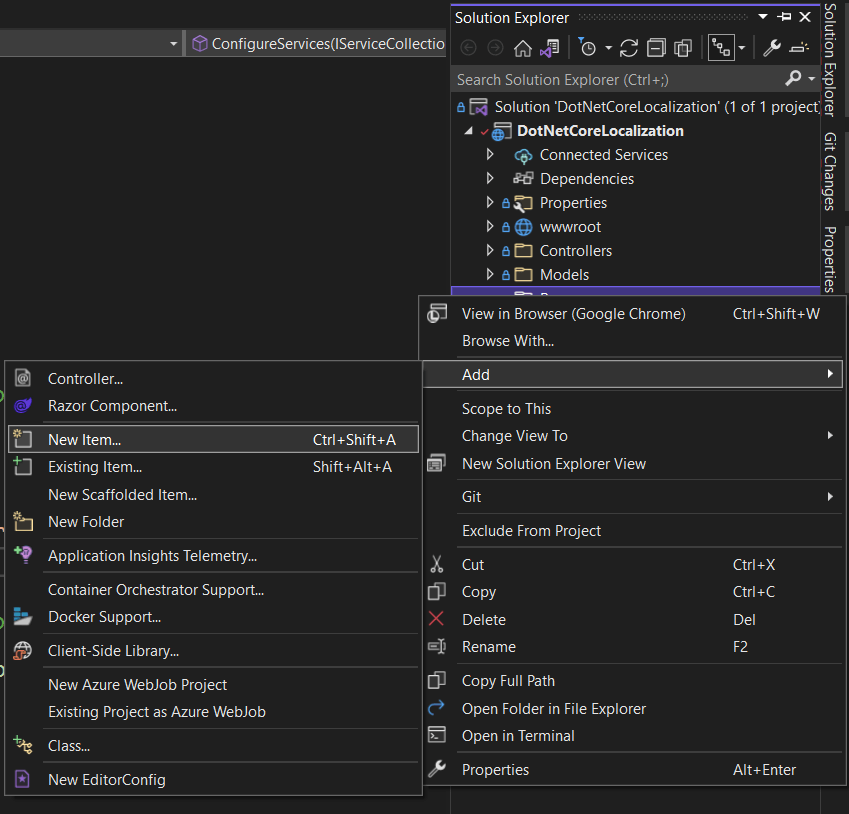
Step 1: Open Solution Explorer tab and right-click on project Add -> New Folder and name it as Resources. We are keeping all the project-related resource files in this folder only.
Step 2: Next, right-click on created folder Add -> New Item.
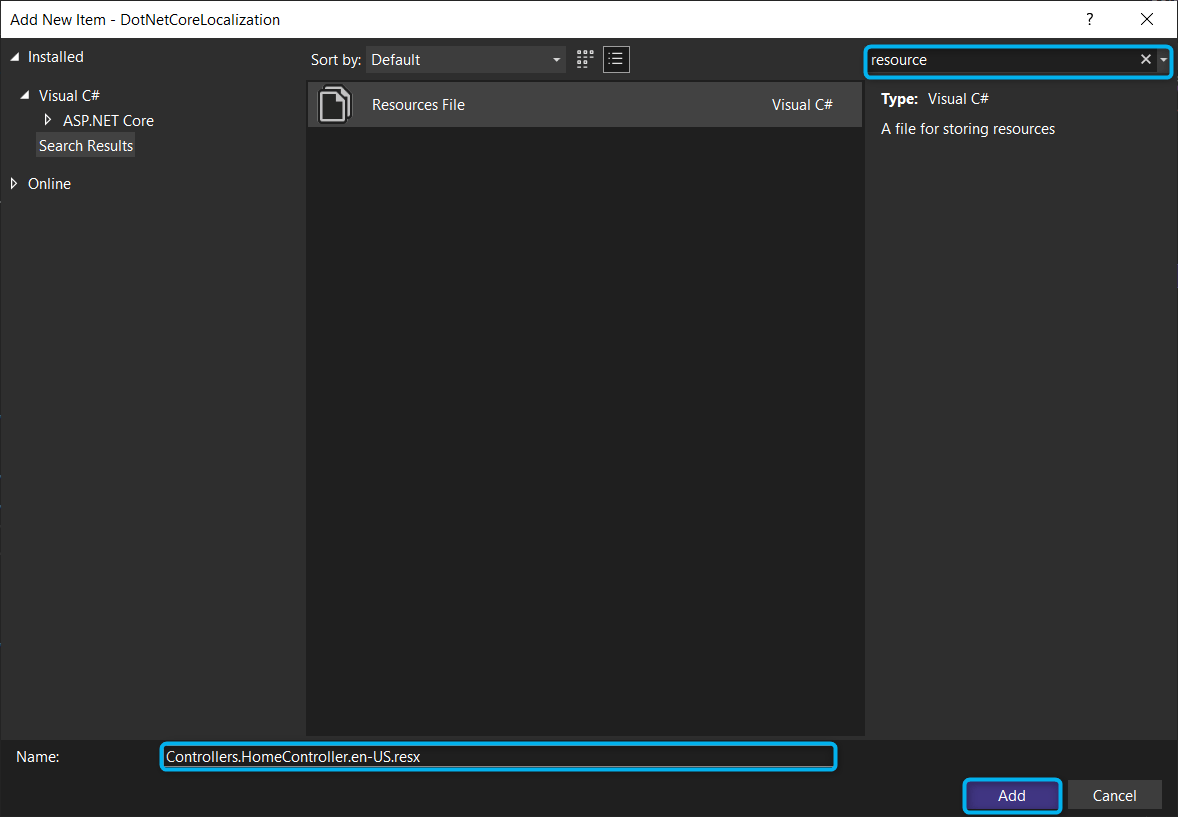
Step 3: In the Add New Item popup, search resource template, and name it Controllers.HomeController.en-US.resx. Here we have added it for controller, add another one for view name as Views.Home.Index.en-US.resx.
Step 4: Once the resource file is added, you will see the output as below. It contains three columns: Name, Value, Comment. These values we need to fill it.

Step 5: In the created resource file, I have added one default localize string value: Name - telerik and Value - Telerik.

Configure the Localization:
In the code below, you can see the method we used and we have set folder name to the ResourcePath as we have created previously Resources. Here we have configured it for Views and DataAnnotations validation message.
public void ConfigureServices(IServiceCollection services)
{
    services.AddLocalization(o => { o.ResourcesPath = "Resources"; });
    services.AddControllersWithViews()
        .AddViewLocalization(LanguageViewLocationExpanderFormat.Suffix)
        .AddDataAnnotationsLocalization();
}
How To Access the Localize String From Resource File
There are three ways to access the localize string from the resource files as below:
1. IStringLocalizer
This interface represents a service that provides localized strings. If the respected key is not found, it then returns the key as the result back. Below are the methods:
- Method 1: Get the localize strings from the resource file.
LocalizedString this[string name]
- Method 2: Get the localize string with formatted result from the resource file.
LocalizedString this[string name, params object[] arguments]
- Method 3: Get all the localize strings from the resource file.
IEnumerable<LocalizedString> GetAllStrings(bool includeParentCultures);
- Method 4: Get the localize strings from the resource file.
LocalizedString GetString(string name);
Example
public IActionResult Index()
{
    ViewData["Title"] = _stringLocalizer["title"].Value;
    return View();
}
In the above code, we are accessing the localize string from the resource file using the IStringLocalizer and assigning that value to the ViewData title property and using that value in Index.cshtml page as below:
@ViewData["Title"];
Output
Localize key we have used in the resource file: title.
Localize value for that key in the resource file: Localization.

2. IViewLocalizer
This interface represents a type that provides HTML-aware localization for views. Below are the methods:
- Method 1: Get the localize strings from the resource file.
LocalizedString this[string name]
- Method 2: Get the localize string with formatted result from the resource file.
LocalizedString this[string name, params object[] arguments]
- Method 3: Get all the localize strings from the resource file.
IEnumerable<LocalizedString> GetAllStrings(bool includeParentCultures);
- Method 4: Get the localize strings from the resource file.
LocalizedString GetString(string name);
- Method 5: Get the localize string with formatted result from the resource file.
LocalizedString GetString(string name, params object[] arguments);
Example
@using Microsoft.AspNetCore.Mvc.Localization
@inject IViewLocalizer Localizer

@{
    ViewData["Title"] = "Home Page";
}
<div class="text-center">
    <h1 class="display-4">Welcome to @Localizer["telerik"]</h1>
    <p>Learn about <a href="https://docs.microsoft.com/aspnet/core">building Web apps with ASP.NET Core</a>.</p>
</div>
In the above code, we have injected the IViewLocalizer with the help of @inject and accessing the localize string from resource file as below:
@Localizer["telerik"]
Output
Localize key we have used in the resource file: telerik.
Localize value for that key in the resource file: Telerik.

3. IHtmlLocalizer
This interface represents a type that does the HTML-aware localization of strings by HTML-encoding arguments that are formatted in the resource string. Below are the methods:
- Method 1: Get the localize strings from the resource file.
LocalizedString this[string name]
- Method 2: Get the localize string with formatted result from the resource file.
LocalizedString this[string name, params object[] arguments]
- Method 3: Get all the localize strings from the resource file.
IEnumerable<LocalizedString> GetAllStrings(bool includeParentCultures);
- Method 4: Get the localize strings from the resource file.
LocalizedString GetString(string name);
- Method 5: Get the localize string with formatted result from the resource file.
LocalizedString GetString(string name, params object[] arguments);
Example
@using DotNetCoreLocalization.Controllers
@using Microsoft.AspNetCore.Mvc.Localization

@inject IViewLocalizer Localizer
@inject IHtmlLocalizer<HomeController> HtmlLocalizer
@{
    ViewData["Title"] = @ViewData["Title"];
}
<div class="text-center">
    <h1 class="display-4">Welcome to @Localizer["telerik"]</h1>
    <p>@HtmlLocalizer["LearnMore"].</p>
    <br />
</div>
In the above code, we have injected the IHtmlLocalizer with the help of @inject and accessing the localize string from resource file as below:
@HtmlLocalizer["LearnMore"]
Output
Localize key we have used in the resource file: LearnMore.
Localize value for that key in the resource file: Learn about building Web apps with ASP.NET Core.

Next, till now we have only discussed creating the project, adding resource file then configuring it and accessing from the resource file with default English language. Let’s add another language resource file for German as we did in the previous step, and you need convert the first resource file values to German once you add that resource file.
How To Configure the Default Culture
To configure the culture in our project, we need to enable the localization middleware in the Configure method of the Startup class. In this configure, we can provide the supported culture for the project and set the default culture.
Add the line below in the Configure method—it must be added before any middleware accesses the request culture:
app.UseRequestLocalization();
This RequestLocalizationMiddleware provides the three built-in request culture providers. These are accessed using the RequestLocalizationOptions and also you can write your own custom provider. Following are the built-in providers:
- CookieRequestCultureProvider
- QueryStringRequestCultureProvider
- AcceptLanguageHeaderRequestCultureProvider
Note: If you want to use any of the above request culture providers, then you need to remove the line below and configure the request culture providers.
options.RequestCultureProviders.Clear();
Add the code below to the ConfigureServices method:
services.Configure<RequestLocalizationOptions>(options =>
{
    options.SetDefaultCulture("de-DE");
    options.AddSupportedUICultures("en-US", "de-DE");
    options.FallBackToParentUICultures = true;
    options.RequestCultureProviders.Clear();
});
In the above code we have supporting two cultures en-US and de-DE, and set the default culture to de-DE. Once you added the above code, your Startup class should now look like this:
public class Startup
    {
        public Startup(IConfiguration configuration)
        {
            Configuration = configuration;
        }

        public IConfiguration Configuration { get; }

        // This method gets called by the runtime. Use this method to add services to the container.
        public void ConfigureServices(IServiceCollection services)
        {
            services.AddLocalization(o => { o.ResourcesPath = "Resources"; });

// set the default culture and supported culture list
            services.Configure<RequestLocalizationOptions>(options =>
            {
                options.SetDefaultCulture("de-DE");
                options.AddSupportedUICultures("en-US", "de-DE");
                options.FallBackToParentUICultures = true;
                options.RequestCultureProviders.Clear();
            });

            services.AddControllersWithViews()
                .AddViewLocalization(LanguageViewLocationExpanderFormat.Suffix)
                .AddDataAnnotationsLocalization();
        }

        // This method gets called by the runtime. Use this method to configure the HTTP request pipeline.
        public void Configure(IApplicationBuilder app, IWebHostEnvironment env)
        {
            if (env.IsDevelopment())
            {
                app.UseDeveloperExceptionPage();
            }
            else
            {
                app.UseExceptionHandler("/Home/Error");
            }
            app.UseStaticFiles();

            app.UseRouting();

            app.UseAuthorization();

// Enable the localization middleware
            app.UseRequestLocalization();

            app.UseEndpoints(endpoints =>
            {
                endpoints.MapControllerRoute(
                    name: "default",
                    pattern: "{controller=Home}/{action=Index}/{id?}");
            });
        }
    }
Next, run the application. You will see the output like the screenshot below based on the default culture set:
For en-US locale

For de-DE locale

In the above two outputs, the highlighted texts are localize strings coming from the resource file.
Note: This demo application is only working for English and German languages. If you want more languages, you need to add those language resource files.
You can download this example from here.
Conclusion
In this article, we learned about configuring the localization in ASP.NET Core application, accessing the localize string from resource files and setting the default language and culture for the application. If you have any suggestions or queries regarding this article, please contact me.
“Learn it. Share it.”