What would it take to create your own blog website using Nuxt and Nuxt Content? It might be easier than you think.
Writing blog posts can be a great way to share knowledge with other developers and memorize what you learned. There are blog platforms you can use for sharing articles, but having your own blog website can provide more flexibility.
Creating your own blog is actually quite simple and quick. You don’t even need a database. In this tutorial, we will build a blog using Nuxt with the Nuxt Content module.
At the end of this article, you will know how to:
- Set up a Nuxt project with Nuxt Content
- Fetch and display blog posts
- Fetch and display a specific blog post by a slug
- Add search blog posts functionality
You can find the full code example in this GitHub repo, and an interactive example is available in the CodeSandbox below.
Project Setup
Let’s start with creating a new Nuxt project. You can do so by running one of the commands shown below:
// npx
npx create-nuxt-app my-nuxt-content-blog

// yarn
yarn create nuxt-app my-nuxt-content-blog

// npm
npm init nuxt-app my-nuxt-content-blog
You will need to answer a few questions. On the image below you can see how I answered them.

After the project is created, cd into the project directory and install the Nuxt Content module.
cd my-nuxt-content-blog
yarn add @nuxt/content
Now open the nuxt.config.js file and add a new entry to the modules array.
export default {
  // other config
  modules: [
    '@nuxt/content'
  ]
}
To make things nice and quick, we will use Tailwind CSS for styling. If you don’t want to use it, you can skip the setup steps and just start the dev server. Otherwise, run the command below to create the Tailwind CSS config.
npx tailwindcss init
This command will create a new file called tailwind.config.js at the root of your project. Open this file and add jit property as shown below.
module.exports = {
  jit: true
  // other config
}
The last step is to create the tailwind.css file.
assets/css/tailwind.css
@tailwind base;
@tailwind components;
@tailwind utilities;
Now you can start the dev server.
yarn dev
That’s it for the setup. Let’s create some blog posts.
Blog Posts Page
The Nuxt Content module acts as a Git-based headless CMS. You can create blog posts in the form of markdown files inside the content/ directory and then use the Nuxt Content module to fetch and display them.
If you would like to know more about what you can do with Nuxt Content, check out the documentation.
First, let’s create three markdown files that will be our blog articles.
content/how-to-prepare-for-a-javascript-interview.md
---
title: How to Prepare for a JavaScript Interview
description: Interviews can be stressful; the better prepared you are, the higher your chance of succeeding. This article shares useful tips and learning resources to help you prepare and become a better developer.
slug: how-to-prepare-for-a-javascript-interview
---

Interviews can be stressful; the better prepared you are, the higher your chance of succeeding. This article shares useful tips and learning resources to help you prepare and become a better developer.
content/latest-javascript-features.md
---
title: The Latest Features Added to JavaScript in ECMAScript 2020
description: JavaScript is one of the most popular programming languages, and features are now added to the language every year. This article covers new features added in ECMAScript 2020, also known as ES11.
slug: the-latest-features-added-to-javascript-in-ecmascript-2020
---

JavaScript is one of the most popular programming languages, and features are now added to the language every year. This article covers new features added in ECMAScript 2020, also known as ES11.

```js
const personName = personObject?.name
```

Optional Chaining is a very useful feature.
content/a-view-on-new-vue.md
---
title: 'A View on New Vue: What to Expect in Vue 3'
description: The next version of Vue brings a lot of improvements over its predecessor. It will be faster, smaller and offer new features. In this article we go through what Vue 3 will offer.
slug: a-view-on-new-vue-what-to-expect-in-vue-3
---

The next version of Vue brings a lot of improvements over its predecessor. It will be faster, smaller and offer new features. In this article we go through what Vue 3 will offer.
Each markdown file consists of front matter and body. The front matter goes between triple dashes (---). It has to be written in a valid
YAML format. This config will be later injected into a Nuxt Content document. For the example posts, we have a title, description and slug. You can, of course, add more properties if you want to—for instance, an image URL or created date.
After creating the blog posts files, head to the pages/index.vue file. It’s time to fetch and render the posts. You can replace the contents of this file with the code below.
pages/index.vue
<template>
  <div
    class="max-w-3xl max-w-5xlmin-h-screen flex justify-center mx-auto my-12"
  >
    <main class="w-full">
      <h1 class="text-2xl font-semibold mb-6">My awesome blog</h1>
      <section class="space-y-4 divide-y">
        <article v-for="post of posts" :key="post.slug" class="pt-4">
          <h2 class="text-lg mb-2 text-blue-700 hover:text-blue-800">
            <nuxt-link :to="`/blog/${post.slug}`">
              {{ post.title }}
            </nuxt-link>
          </h2>
          <span>
            {{ post.description }}
          </span>
        </article>
      </section>
    </main>
  </div>
</template>

<script>
export default {
  data() {
    return {
      posts: [],
    }
  },
  async fetch() {
    this.posts = await this.$content().fetch()
  },
}
</script>
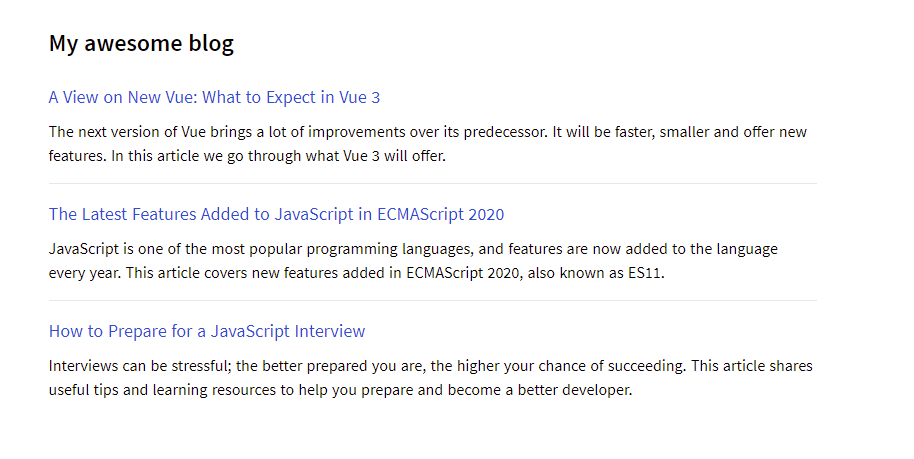
Nuxt Content globally injects the $content instance, which can be used to fetch articles. It provides a powerful MongoDB like API to query the content. As you can see in the code above, we do not provide any filters, so all the posts
will be fetched immediately. The image below shows how the homepage should look now.

If you click on one of the links, it should redirect you to a /blog/<slug> page, which doesn’t exist yet, so let’s deal with that next.
View Blog Post Page
Let’s create a new file called _slug.vue.
pages/blog/_slug.vue
<template>
  <div class="max-w-3xl mx-auto min-h-screen my-12">
    <div v-if="post">
      <h1 class="text-2xl font-semibold mb-6">{{ post.title }}</h1>
      <nuxt-content :document="post" />
      <div class="mt-8">
        <nuxt-link to="/" class="hover:underline">Back to blog</nuxt-link>
      </div>
    </div>
  </div>
</template>

<script>
export default {
  data() {
    return {
      post: null,
    }
  },
  async fetch() {
    this.post = (
      await this.$content()
        .where({ slug: this.$route.params.slug })
        .limit(1)
        .fetch()
    )?.[0]
  },
}
</script>
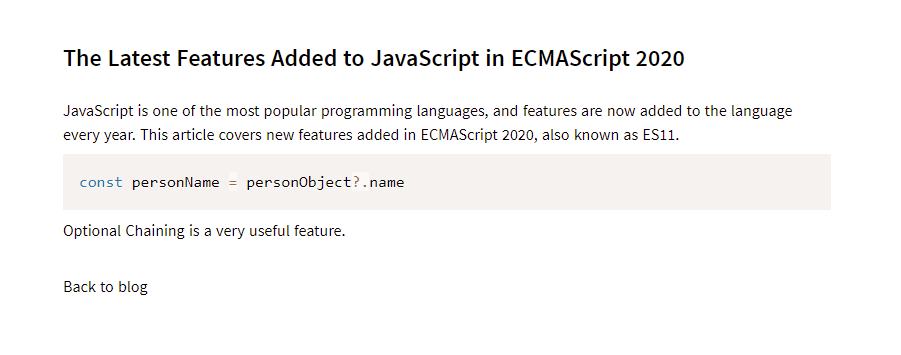
Instead of calling the fetch method immediately, we provide a slug filter that is extracted from the route params. We also limit the results to one, as we want to fetch only the specific blog post, so we don’t expect more results, as
slugs should be unique. The fetch post is then passed to the <nuxt-content /> component via the document prop. The image below shows the “The Latest Features Added to JavaScript” article.

Great—we have our blog working. The website displays all blog posts and allows users to read each article. However, before we finish, let’s add a blog search functionality.
Blog Search
Head back to the pages/index.vue file. We need to add an input field so users can provide a search query. Besides that, we will update the fetch method, so if there is a search query available, we will perform a text search instead
of just fetching all the articles.
pages/index.vue
<template>
  <div
    class="max-w-3xl max-w-5xlmin-h-screen flex justify-center mx-auto my-12"
  >
    <main class="w-full">
      <h1 class="text-2xl font-semibold mb-6">My awesome blog</h1>
      <section>
        <form class="flex flex-col space-y-2 mb-4">
          <label for="search-blogs" class>Search blogs</label>
          <input
            id="search-blogs"
            v-model="query"
            class="px-3 py-2 shadow border border-gray-200"
            type="text"
          />
        </form>
      </section>
      <section class="space-y-4 divide-y">
        <article v-for="post of posts" :key="post.slug" class="pt-4">
          <h2 class="text-lg mb-2 text-blue-700 hover:text-blue-800">
            <nuxt-link :to="`/blog/${post.slug}`">
              {{ post.title }}
            </nuxt-link>
          </h2>
          <span>
            {{ post.description }}
          </span>
        </article>
      </section>
    </main>
  </div>
</template>

<script>
export default {
  data() {
    return {
      query: '',
      posts: [],
    }
  },
  async fetch() {
    if (!this.query) {
      this.posts = await this.$content().fetch()
      return
    }
    this.posts = await this.$content().search(this.query).fetch()
  },
  watch: {
    query: '$fetch',
  },
}
</script>
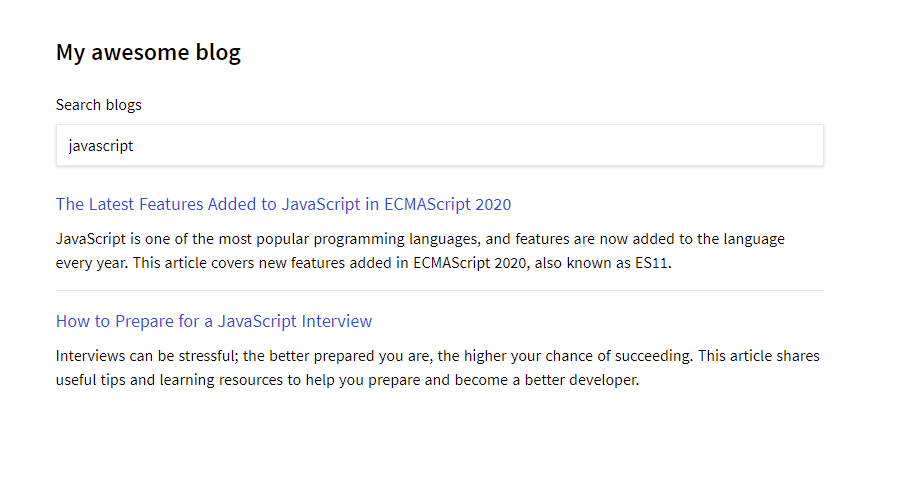
After updating the code, you should be able to search your blog posts, as shown in the gif below.

Wrap-up
That’s it! We have successfully created our own new blog using Nuxt and Nuxt Content and even implemented blog search functionality. If you would like an additional challenge, you can add more features, such as search debouncing, filtering by categories, and even pagination or lazy loading more articles with infinite scroll.