In this post, we are going to be looking at how to render lists in Vue.js using the v-for directive.
Before We Start
You will need Node.js installed and also:
- A code editor: Visual Studio Code is highly recommended (here’s why).
- Vue CLI 3.0 installed on your machine. To do this, uninstall the old CLI version first:
npm uninstall -g vue-clithen install the new one:
npm install -g @vue/cliWhat We Are Building
Let’s build a simple Vue component that displays a list of artists. We will be using the Vue CLI to scaffold the app. Open VS Code and use the terminal to run this command:
vue create vueapp
After that completes successfully, navigate into the src file and make sure the app.vue file looks like this:
<template>
  <div id="app">
    <img alt="Vue logo" src="./assets/logo.png">
    <HelloWorld msg="Welcome to Your Vue.js App"/>
  </div>
</template>
<script>
import HelloWorld from './components/HelloWorld.vue'
export default {
  name: 'app',
  components: {
    HelloWorld
  }
}
</script>
<style>
#app {
  font-family: 'Avenir', Helvetica, Arial, sans-serif;
  -webkit-font-smoothing: antialiased;
  -moz-osx-font-smoothing: grayscale;
  text-align: center;
  color: #2c3e50;
  margin-top: 60px;
}
</style>
To display the names, we will be using property binding. The major data points are the artist names, songs and weeks spent on Billboard. Inside your component folder, open the helloworld component and it should look like this:
<template>
  <div class="hello">
    <h1>{{ msg }}</h1>
    <p>
      For a guide and recipes on how to configure / customize this project,<br>
      check out the
      <a href="https://cli.vuejs.org" target="_blank" rel="noopener">vue-cli documentation</a>.
    </p>
    <h3>Installed CLI Plugins</h3>
    <ul>
      <li><a href="https://github.com/vuejs/vue-cli/tree/dev/packages/%40vue/cli-plugin-babel" target="_blank" rel="noopener">babel</a></li>
      <li><a href="https://github.com/vuejs/vue-cli/tree/dev/packages/%40vue/cli-plugin-eslint" target="_blank" rel="noopener">eslint</a></li>
    </ul>
    <h3>Essential Links</h3>
    <ul>
      <li><a href="https://vuejs.org" target="_blank" rel="noopener">Core Docs</a></li>
      <li><a href="https://forum.vuejs.org" target="_blank" rel="noopener">Forum</a></li>
      <li><a href="https://chat.vuejs.org" target="_blank" rel="noopener">Community Chat</a></li>
      <li><a href="https://twitter.com/vuejs" target="_blank" rel="noopener">Twitter</a></li>
      <li><a href="https://news.vuejs.org" target="_blank" rel="noopener">News</a></li>
    </ul>
  </div>
</template>
Before V-For
How do you render lists when building your Vue.js app? If the v-for directive did not exist, this is how you would render a list of Billboard’s hot 10 artists and the number of weeks they have spent on the list. Change the content of the helloworld component to the code block below:
<template>
  <div class="hello">
    <h3>{{ name }} with {{ song }} has spent {{ weeks }} weeks on the Billboard charts</h3>
  </div>
</template>
<script>
export default {
  name: 'HelloWorld',
  props: {
    name: String,
    song: String,
    weeks: Number
  }
}
</script>
<!-- Add "scoped" attribute to limit CSS to this component only -->
<style scoped>
h3 {
  margin: 40px 0 0;
}
ul {
  list-style-type: none;
  padding: 0;
}
li {
  display: inline-block;
  margin: 0 10px;
}
a {
  color: #42b983;
}
</style>
Here we have defined the data types of these outlined properties and now we have to display them in the app.vue file.
<template>
  <div id="app">
    <img alt="Vue logo" src="./assets/logo.png">
        <h2>Billboard Hot 10 Records</h2>
    <HelloWorld name="1. Mariah Carey" song="All I want for Christmas is You" weeks="50"/>
    <HelloWorld name="2. Brenda Lee" song="Rocking Around the Christmas Tree" weeks="44"/>
    <HelloWorld name="3. Bobby Helms" song="Jingle Bell Rock" weeks="41"/>
    <HelloWorld name="4. Burl Ives" song="A Holly Jolly Christmas" weeks="25"/>
    <HelloWorld name="5. Adele" song="Easy on Me" weeks="11"/>
    <HelloWorld name="6. Andy Williams" song="Its the Most Wonderful Time of The Year" weeks="26"/>
    <HelloWorld name="7. Wham" song="Last Christmas" weeks="24"/>
    <HelloWorld name="8. Jose Feliciano" song="Feliz Navidad" weeks="19"/>
    <HelloWorld name="9. The Kid LAROI ft Justin Bieber" song="Stay" weeks="24"/>
    <HelloWorld name="10. The Ronettes" song="Sleigh Ride" weeks="15"/>
  </div>
</template>
<script>
import HelloWorld from './components/HelloWorld.vue'
export default {
  name: 'app',
  components: {
    HelloWorld
  }
}
</script>
<style>
#app {
  font-family: 'Avenir', Helvetica, Arial, sans-serif;
  -webkit-font-smoothing: antialiased;
  -moz-osx-font-smoothing: grayscale;
  text-align: center;
  color: #2c3e50;
  margin-top: 60px;
}
</style>
If you save all files and run the serve command:
npm run serve
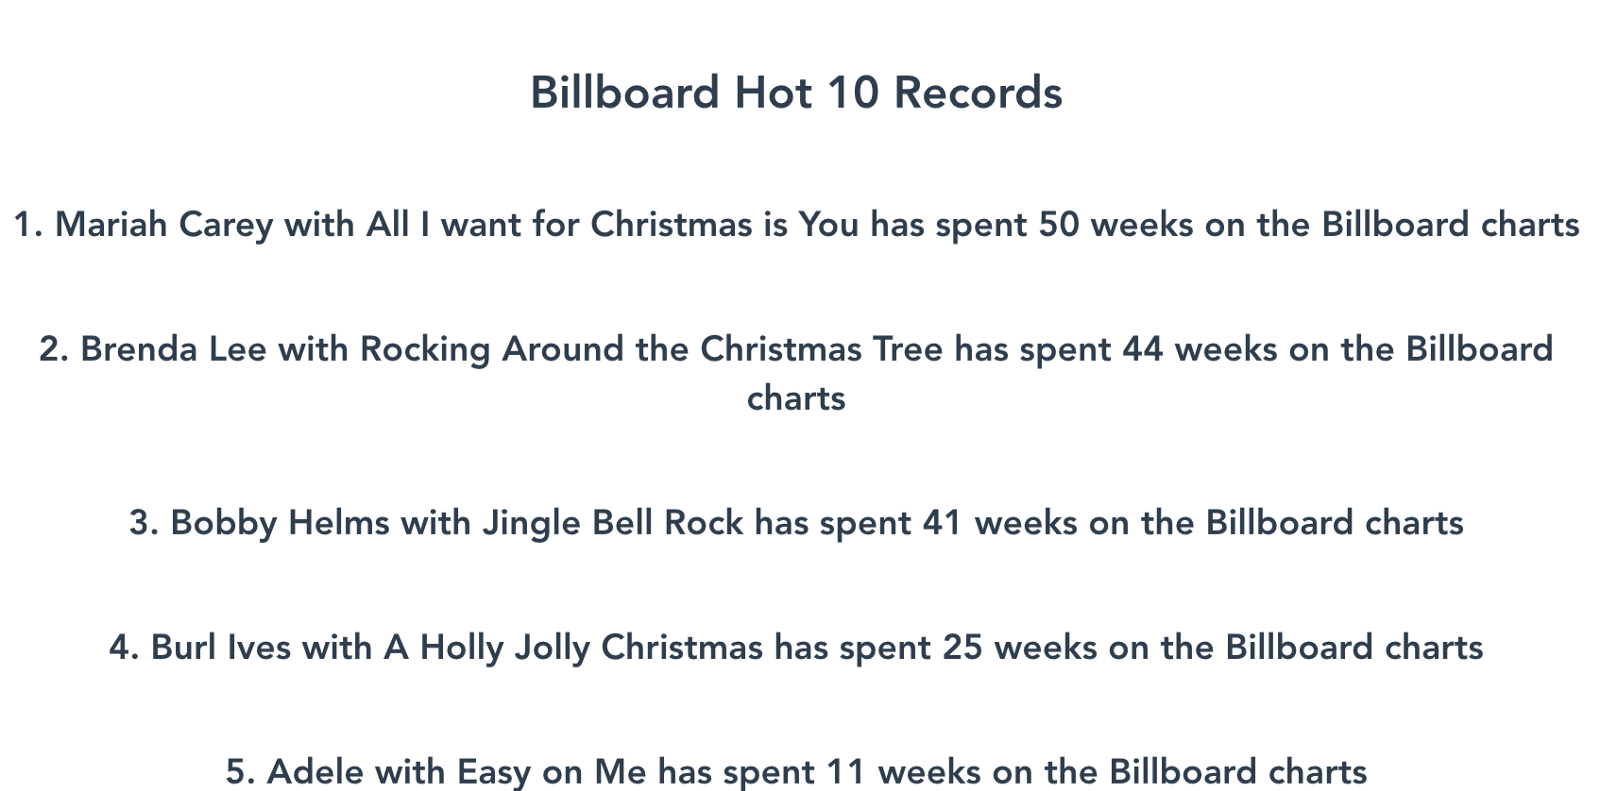
It should look like this in your browser’s localhost:8080:

This approach is good for when you are rendering a few things, but over time it becomes really bad practice as it involves a lot of repetition of code and is highly inefficient. In our case, imagine if we are to display 100 artists, it would be better to save the data in a database and then loop through and display it.
V-For Directive
The v-for directive is how Vue solves this, making sure that your presentation code stays completely clean and presentable without a need for code repetition.
The syntax for v-for looks something like this:
<ul id="array-rendering">
  <li v-for="item in items">
    {{ item.message }}
  </li>
</ul>
Creating the Database
Vue has a data option where you can handle component data business, and, for us, we would like to store Artist information from the Billboard list.
<script>
import HelloWorld from './components/HelloWorld.vue'
export default {
  name: 'app',
  components: {
    HelloWorld
  },
  data: function(){
    return{
      ArtistList: [
        {
          name:'Mariah Carey',
          song:'All I want for Christmas is You',
          weeks:50
        },
        {
          name:'Brenda Lee',
          song:'Rocking Around the Christmas Tree',
          weeks:44
        },
        {
          name:'Bobby Helms',
          song:'Jingle Bell Rock',
          weeks:41
        },
        {
          name:'Burl Ives',
          song:'A Holly Jolly Christmas',
          weeks:25
        },
        {
          name:'Adele',
          song:'Easy on Me',
          weeks:11
        }
      ]
    }
  }
}
</script>
Now that we have defined it, we will go ahead and define the v-for directive to tell Vue to go through the list and loop through and display the artists one by one.
Change the template section of the app.vue file to the code block below:
<template>
  <div id="app">
    <img alt="Vue logo" src="./assets/logo.png">
        <h2>Billboard Hot 10 Records</h2>
    <HelloWorld v-for="artist in ArtistList" v-bind:key="artist.weeks" :name="artist.name" :song="artist.song" :weeks="artist.weeks"/>
  </div>
</template>
Here we looped through the Artistlist array we created and then bound every single attribute of Helloworld to the corresponding array item. This is how to use v-for to loop through an already created array of data.
Conclusion
Today we have taken a quick look at the v-for directive and how it works. We also saw why it is important and why the Vue team made it an easy-to-access directive for us. There is a lot more you can do with the v-for directive, so make sure to stay tuned to the blog. Happy hacking!