This post covers how to create a new React project, GitHub repository, SSH keys and Vercel deployments. With an automated process, your deployment will be much easier—just push to GitHub, and Vercel will handle the builds for you.
In the past, deploying a project and uploading it to a hosting provider used to be quite a nuisance. After making even a simple change, we would need to upload a whole project using FTP software or some kind of system like CPanel, and don’t even get me started on versioning, especially when working in a team.
Those days are fortunately behind us, as there are many great services that can help with automating the deployment process. In this article, I want to show you how you can easily deploy a React app using Vercel and GitHub. This is a step-by-step guide that will cover:
- How to create a React project
- How to create a GitHub repository
- How to set up SSH keys to push a project to a GitHub repository
- How to set up a Vercel account and create automated deployments from your GitHub repository
Setting Up a React Project
First, let’s create a new React project. To quickly scaffold it, you can use Create React App or Vite. For this demo, we are going to use Create React App. You can create a React project by running one of the below commands in your terminal.
npx create-react-app react-vercel-app
cd react-vercel-app
npm start
That’s your project setup. You should be able to see your project running on http://localhost:3000. Now, let’s head to GitHub.
Creating a GitHub Repository
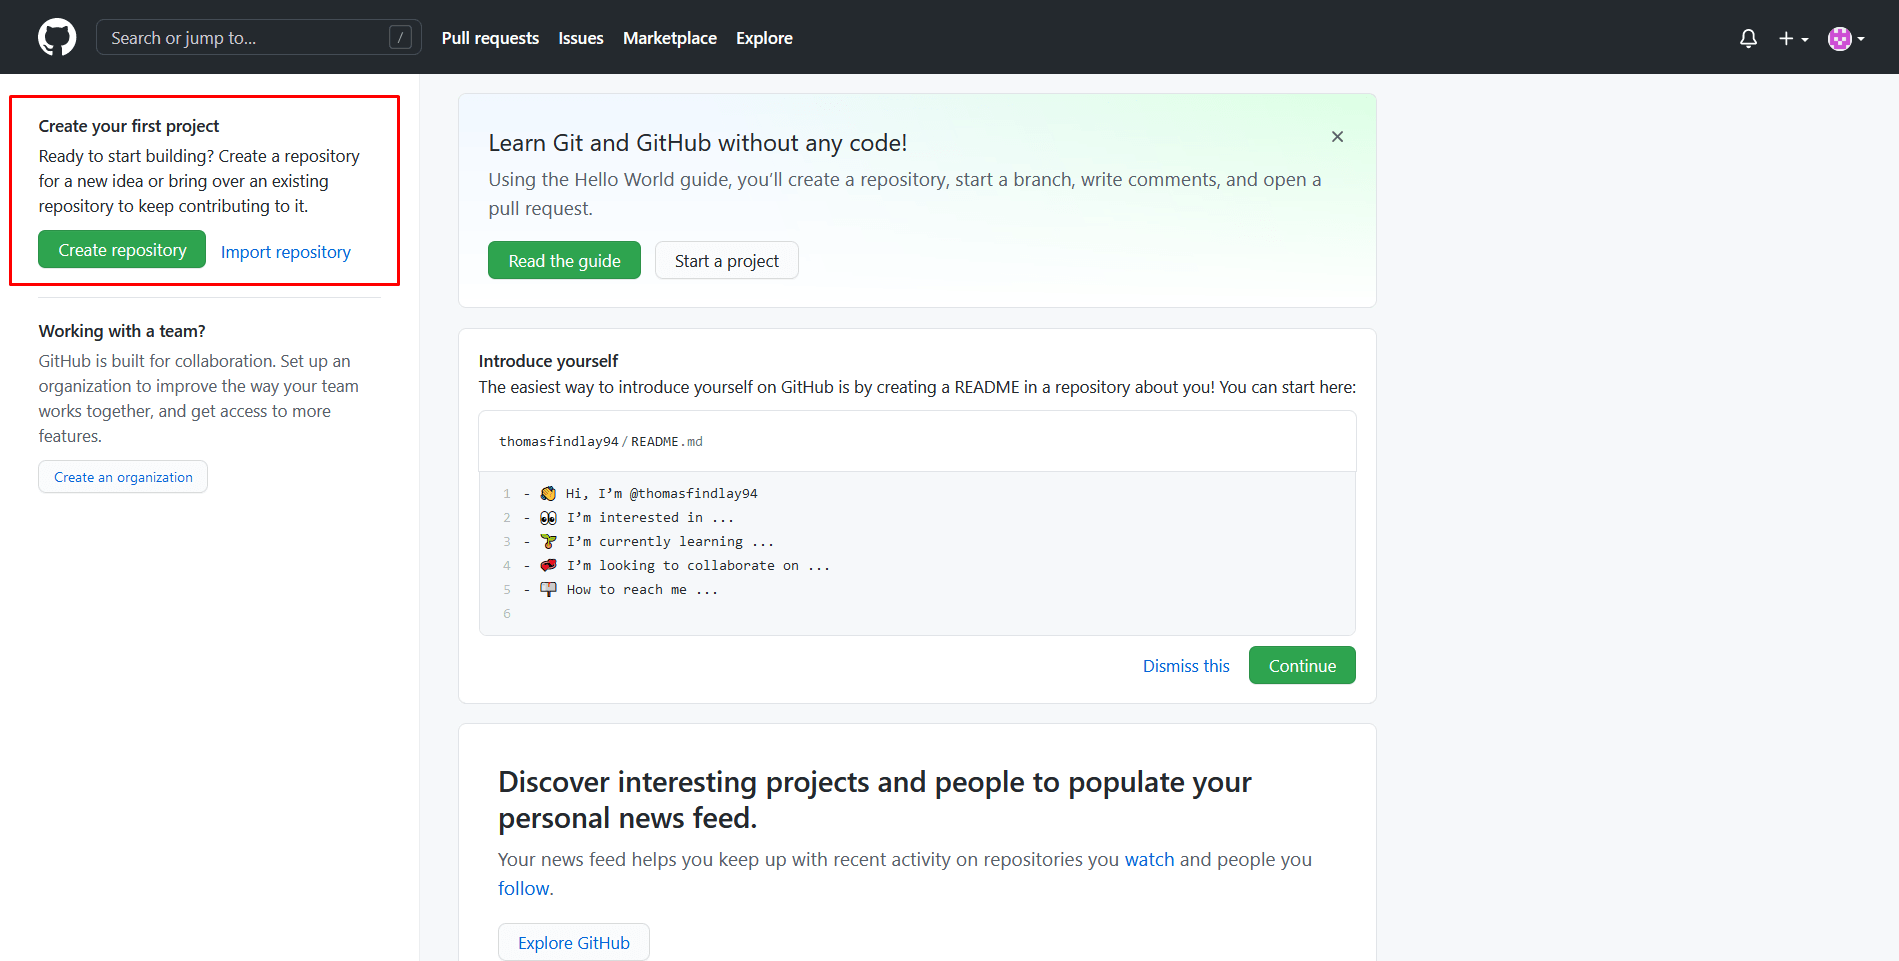
Next, if you don’t have a GitHub account, you can create one here. After creating an account, we will need to create a new repository. Have a look at the area highlighted in the image below. Clicking on the “Create repository” button will take you to the page with the new repository form.
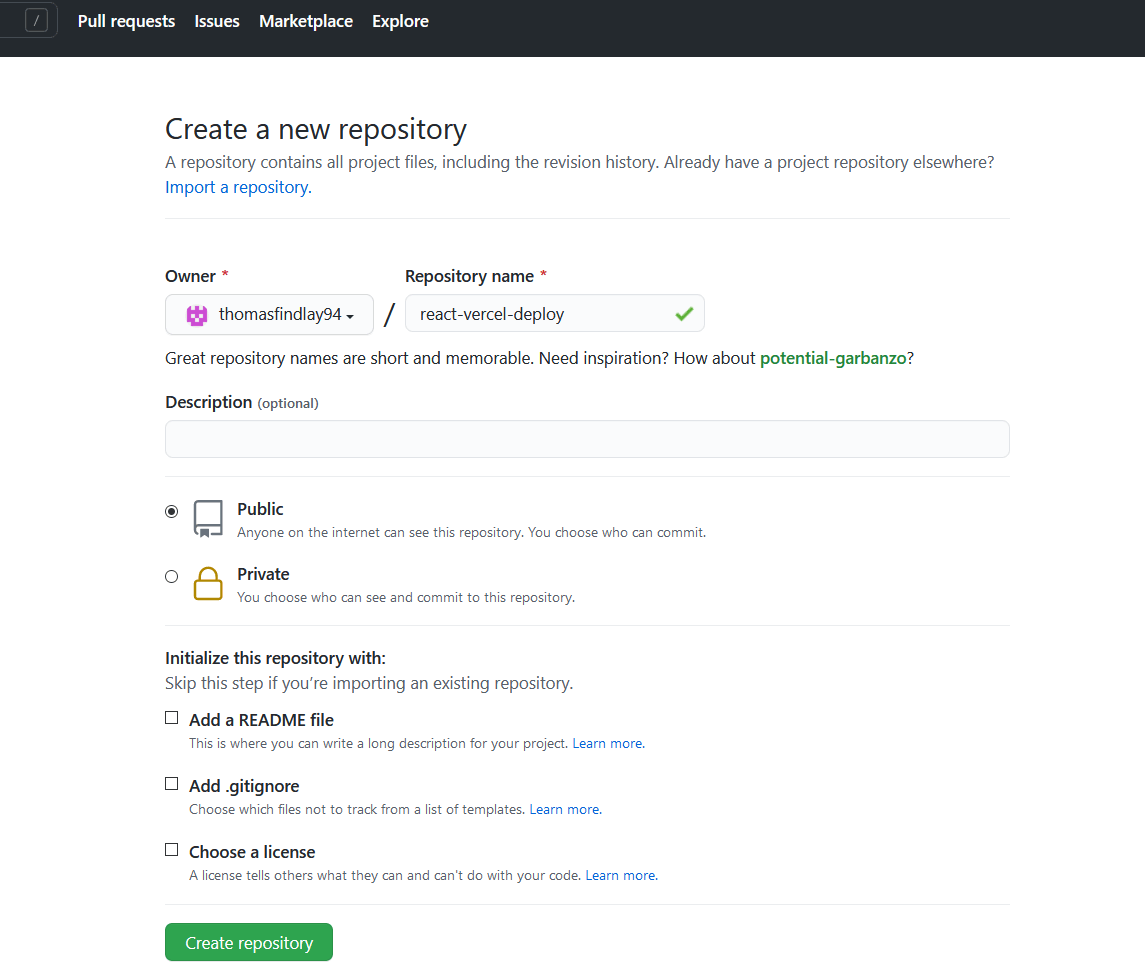
In the new repository form, you only need to provide a repository name. For the rest of the settings, you can leave them as they are.
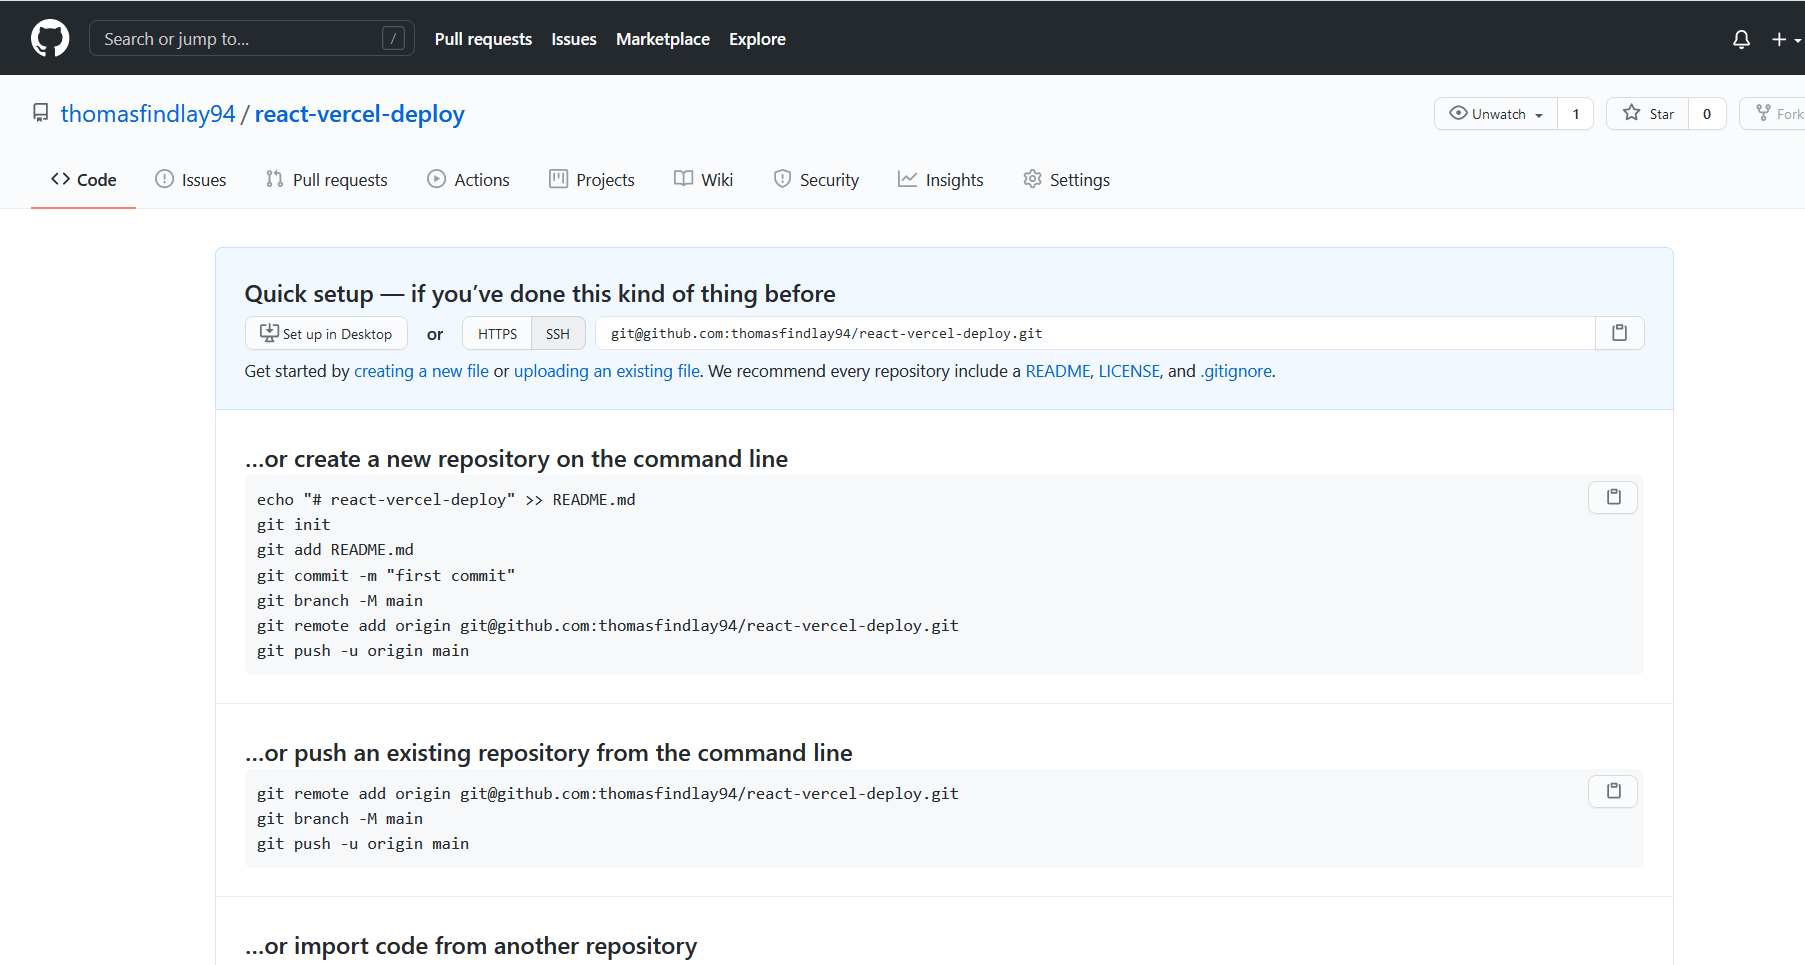
After creating a new repo, you should see this screen:
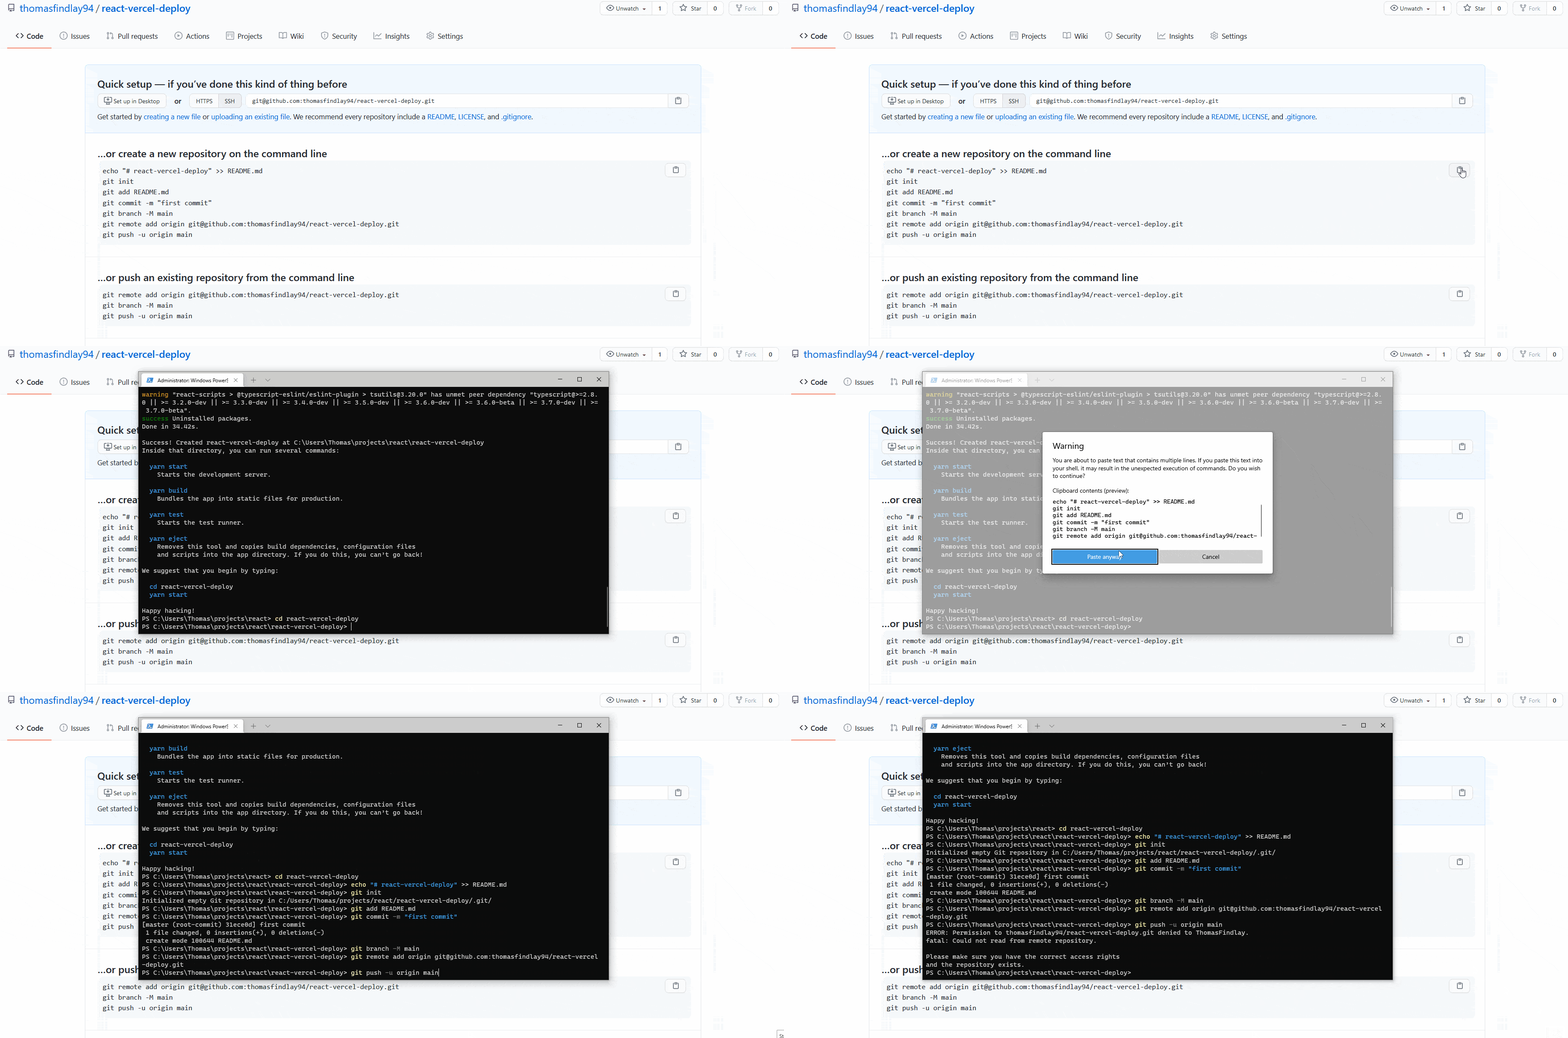
We have created a new React project already, so head back to the terminal and run the command from the section titled “…or create a new repository on the command line.” Just make sure you are in your project directory. If not, then first run cd react-vercel-deploy command. Now, you can copy the Git commands and paste them into your terminal.
Well, that unfortunately failed. We were not able to push the project to GitHub. The reason for it is because we do not have access rights to the repository. GitHub requires us to set up SSH keys, which are used for authentication.
Setting Up SSH Keys for Authentication
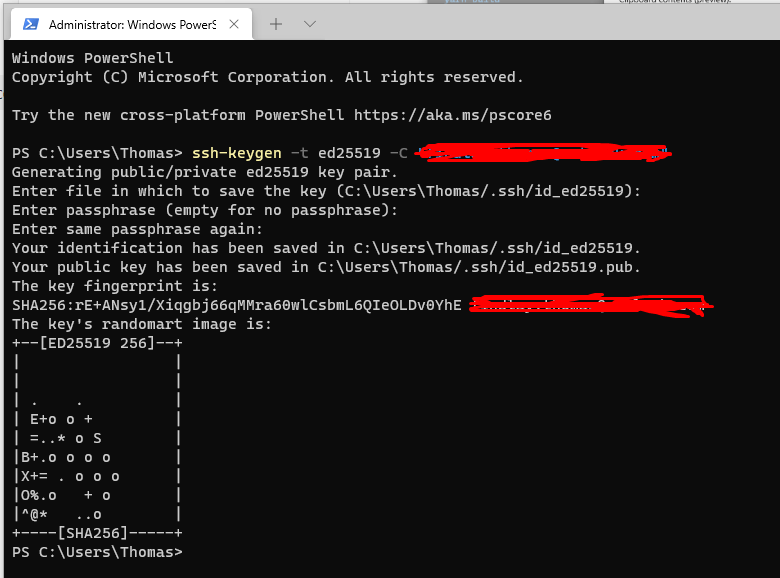
In the terminal, run the command below. Just make sure you replace your_email@example.com with your own email address.
ssh-keygen -t ed25519 -C "your_email@example.com"
Now you will need to answer some questions regarding the file location and password for the key. For now, you can just press enter through them, though in the future, you might want to create a password for your key.
On the image below, you can see an example of how it can look. The area covered by the red lines is the email address. Note that the file location will be different depending on the system you are on. I’m on Windows, so the SSH key was generated in the C:/Users/Thomas/.ssh directory.
If you encounter any problems during SSH key generation, you can visit this guide.
As you can see, the ssh-keygen command generated two files: id_ed25519 and id_ed25519.pub. The former one is your private key, while the latter is the public key. We will use the public key in a moment.
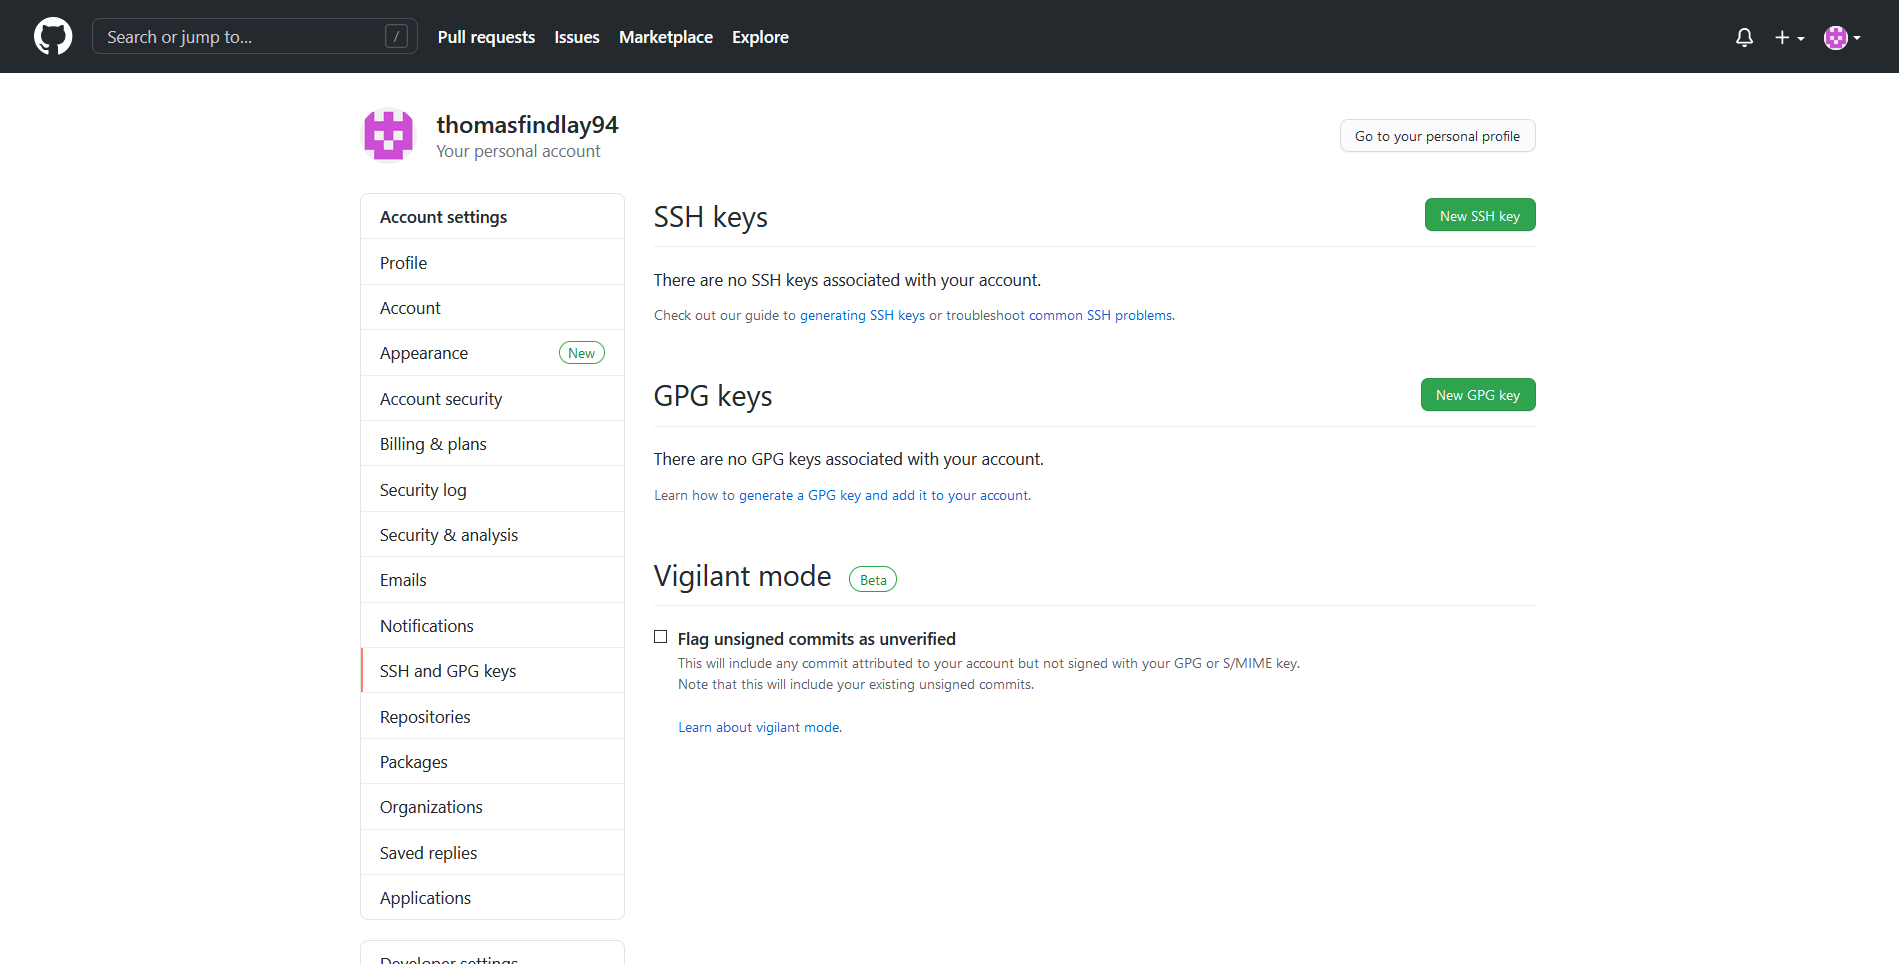
First, we need to go to the SSH keys settings page on GitHub, so head to the https://github.com/settings/keys page and click on the green “New SSH key” button.
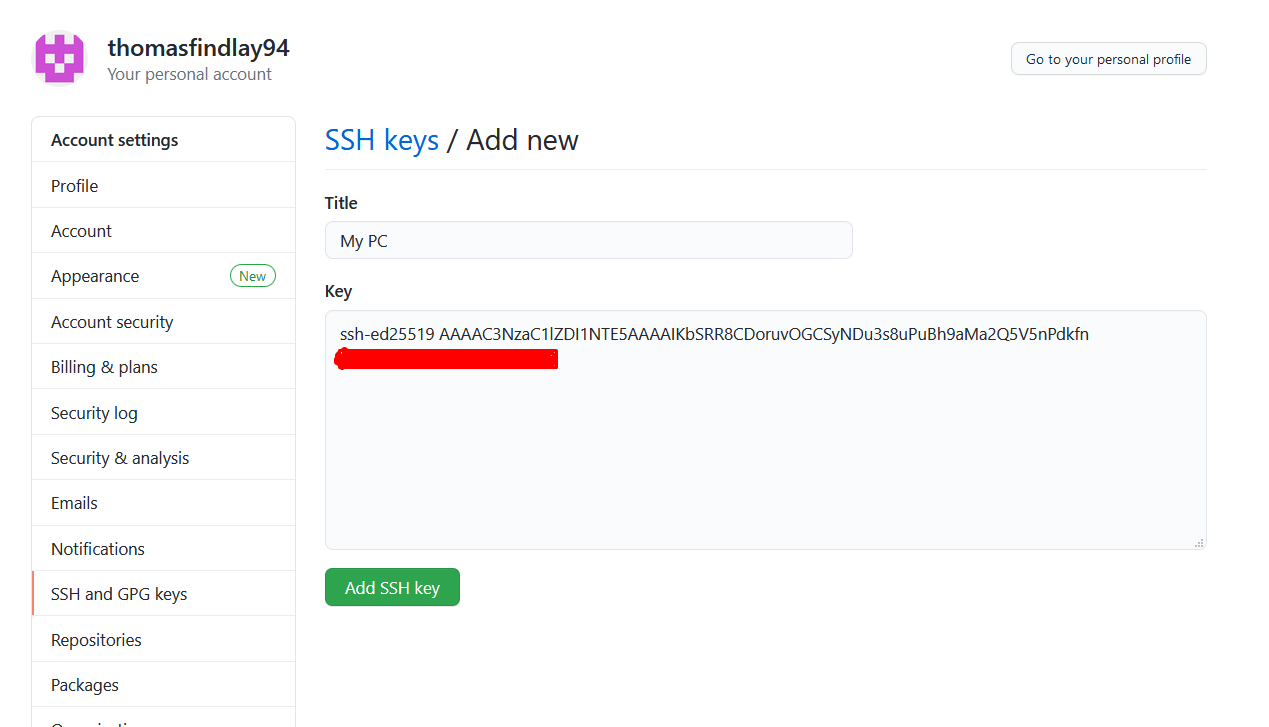
You should see a form with Title and Key fields.
Now you can open the id_ed25519.pub file that we just generated and copy its contents into the Key field. Again, the red area covers my email address. After adding both fields, click on “Add SSH key” button and that should do it.
Now you can get back to your project directory in the terminal and run the commands below:
git add -A;
git commit -m "first commit";
git push -u origin main;
Your React project should now be on GitHub.
Why Vercel?
There are many great things about Vercel. First of all, it offers a very generous free tier, so you can easily get your projects started and only pay when you have more users and start earning on it. The free tier offers unlimited websites, APIs and more. You can see the limits here.
What’s more, Vercel provides a lot of starting templates for many popular frameworks, automated builds and deployments, separate environments for staging and production, serverless functions, CDN and more. For the full list of what Vercel offers, check out their documentation. Now, it’s time to set up a Vercel account.
Setting Up a Vercel Account
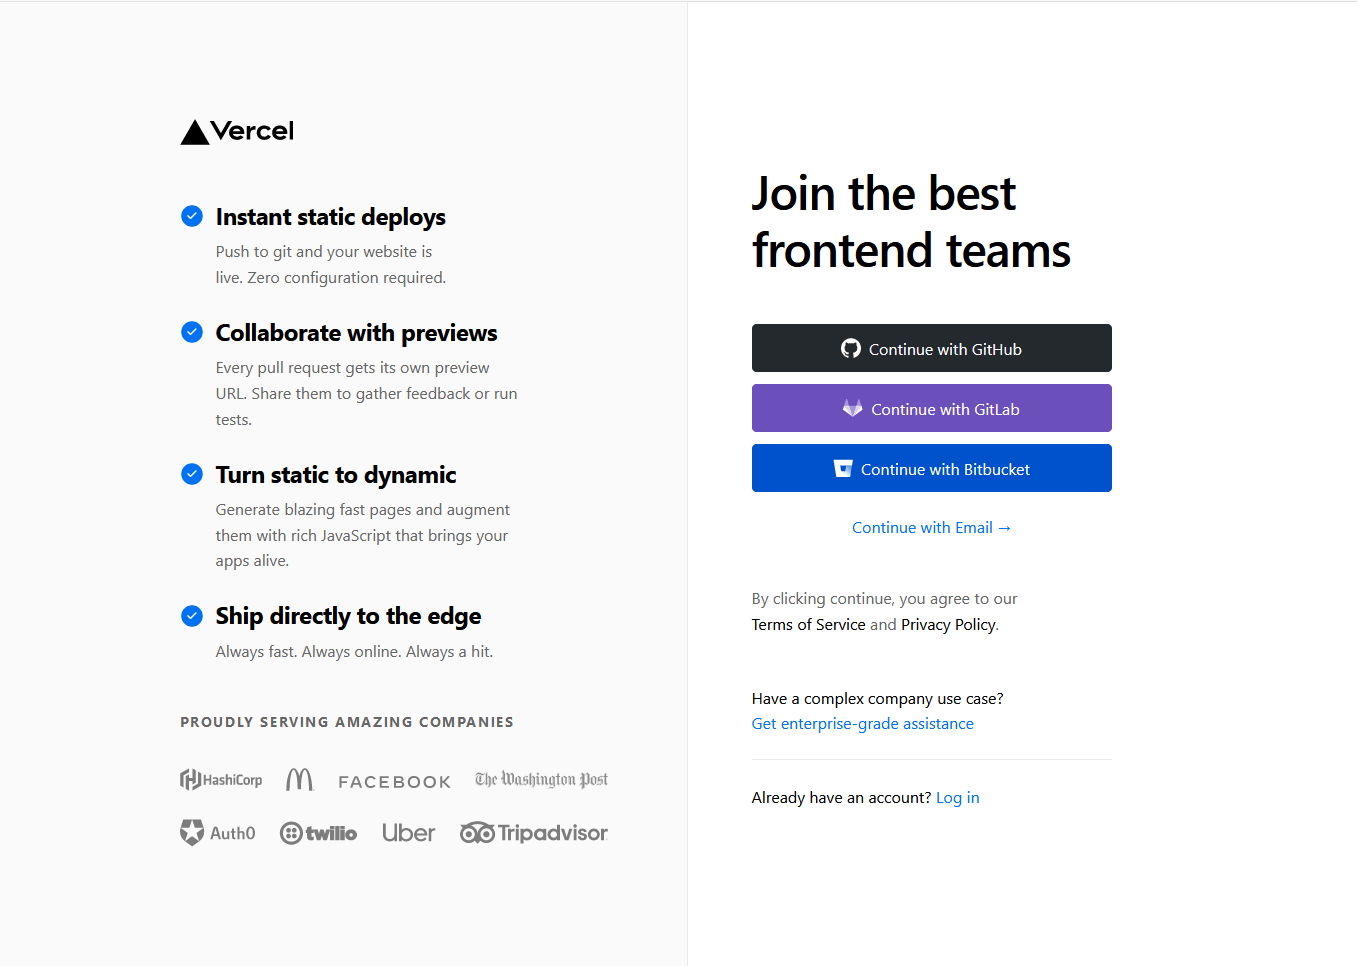
There are a few ways in which you can create a Vercel account. You can either create one with your email or use a GitHub, GitLab or Bitbucket account.
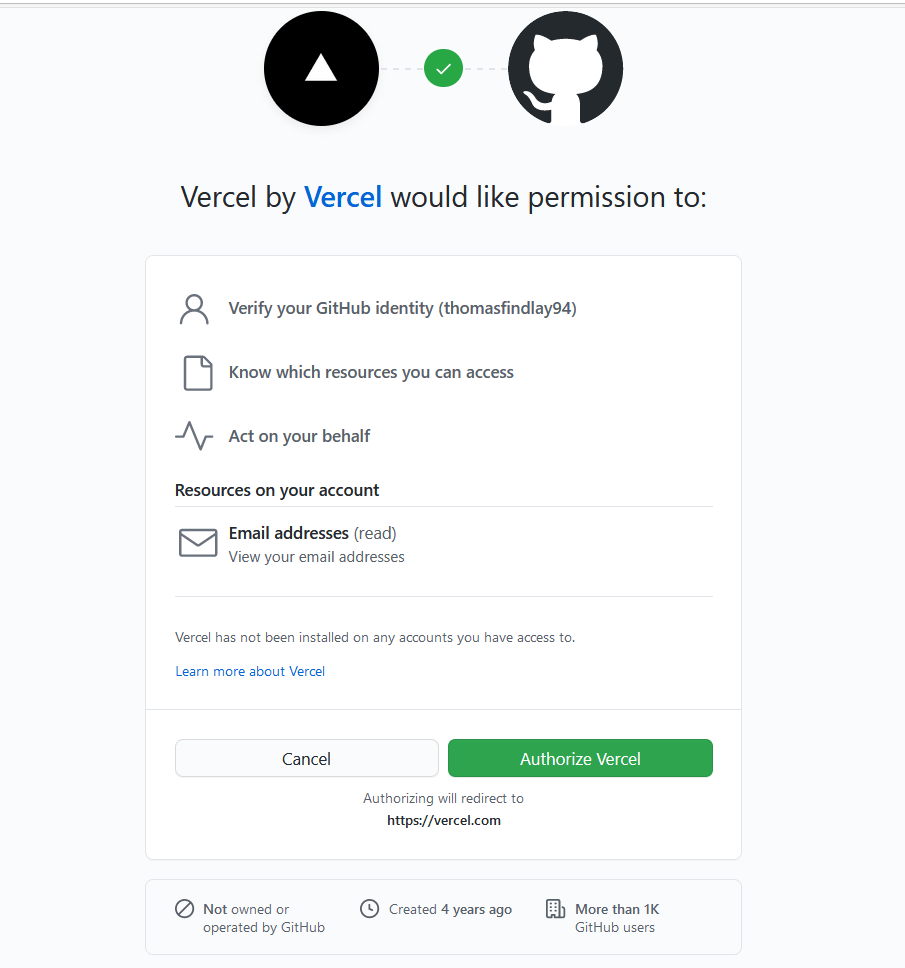
I decided to use GitHub for this project, but steps for other providers should be very similar, so just follow along. Vercel’s onboarding is very user friendly. If you decide to go with one of the three providers, you will be asked to authorize Vercel and grant it some permissions.
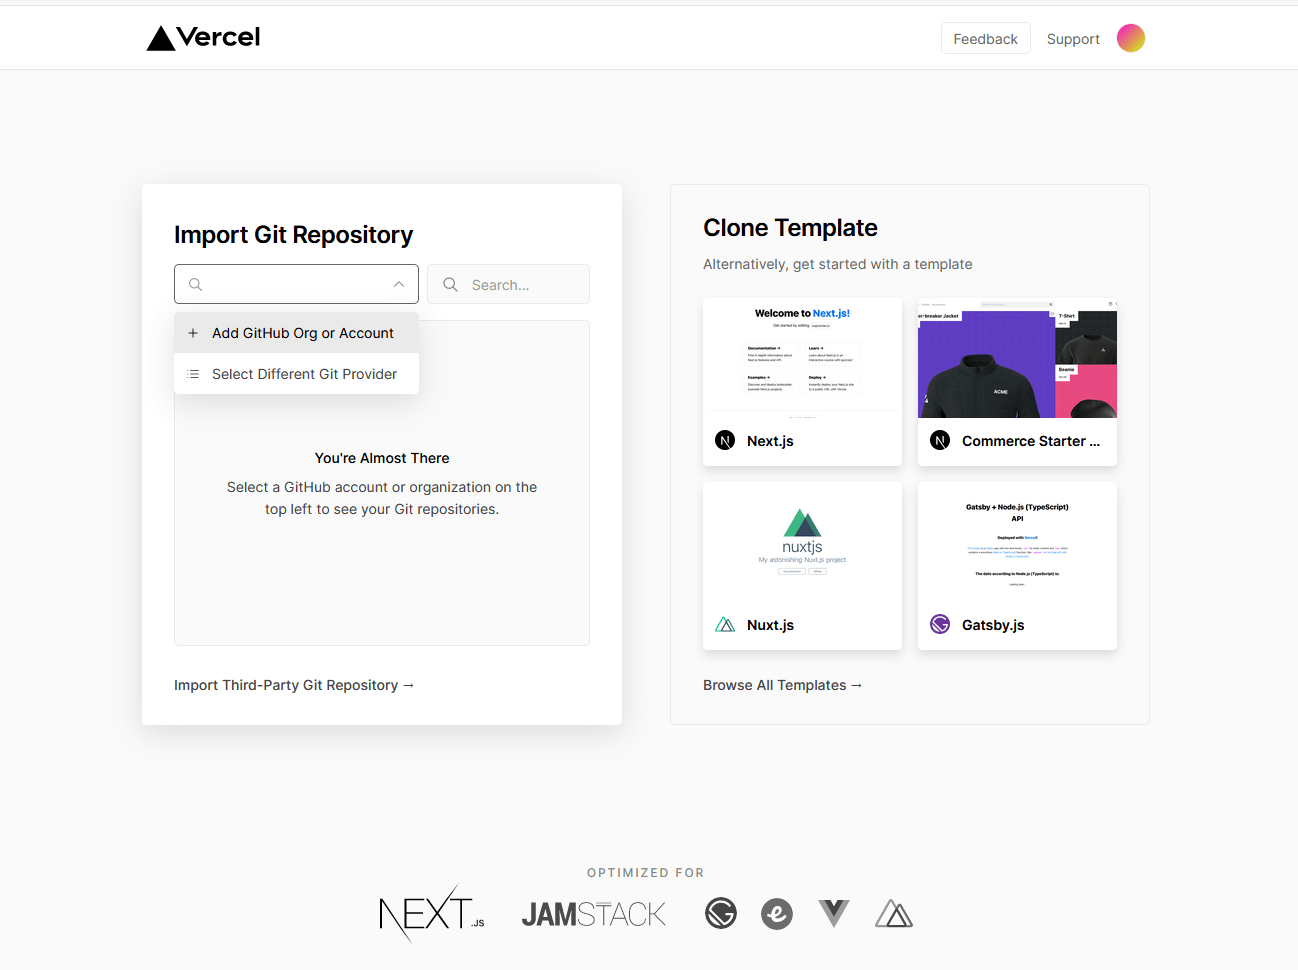
After authorization, you should be redirected to the welcome screen, which allows you to import a repository or create a new project from one of the templates. We don’t want to use templates, so click on the search input under Import Git Repository. For GitHub, just select “Add GitHub Org or Account,” and if you are using any other providers, choose the lower option, as shown below.
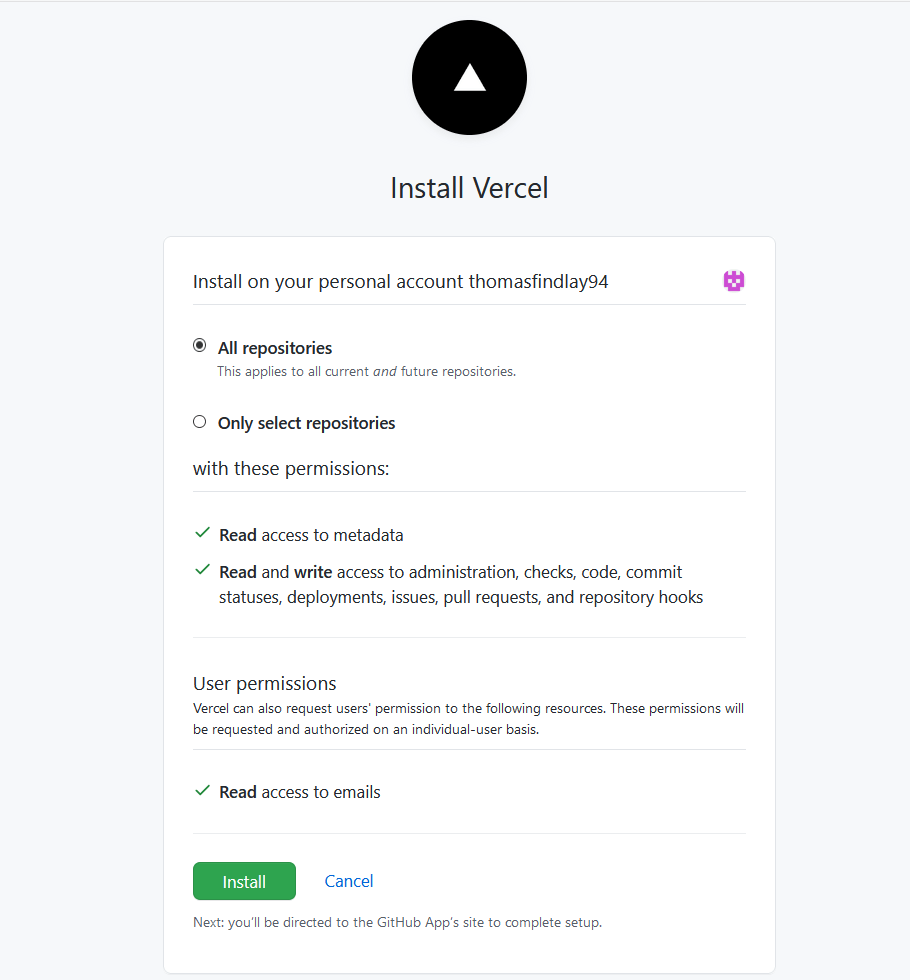
This will open a popup asking to install Vercel. By default, it has “All repositories” selected, and I will keep it that way—although, for your own projects, you might want to specify which repositories Vercel should have access to. You can adjust these settings later on as well as when adding a new project.
When you’re ready, click on the “Install” button.
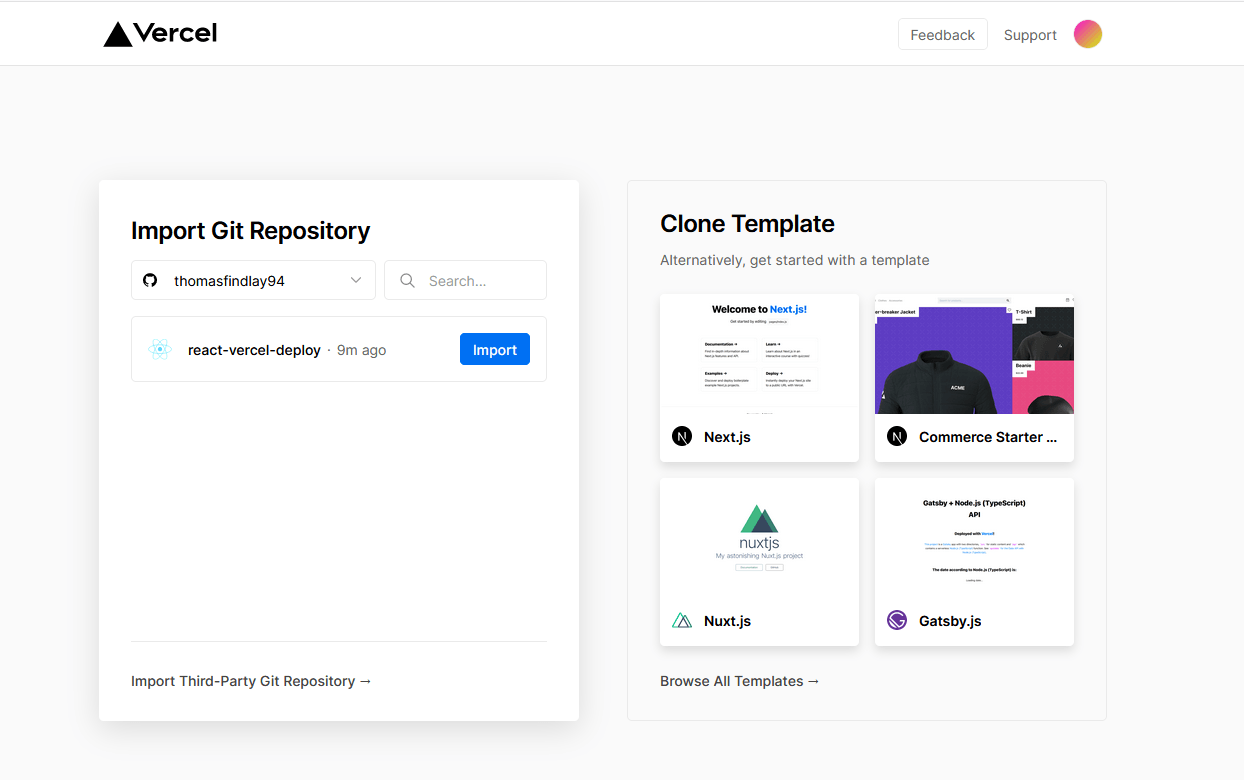
After installing Vercel, you should see the react-vercel-deploy repository. Just click on the “Import” button.
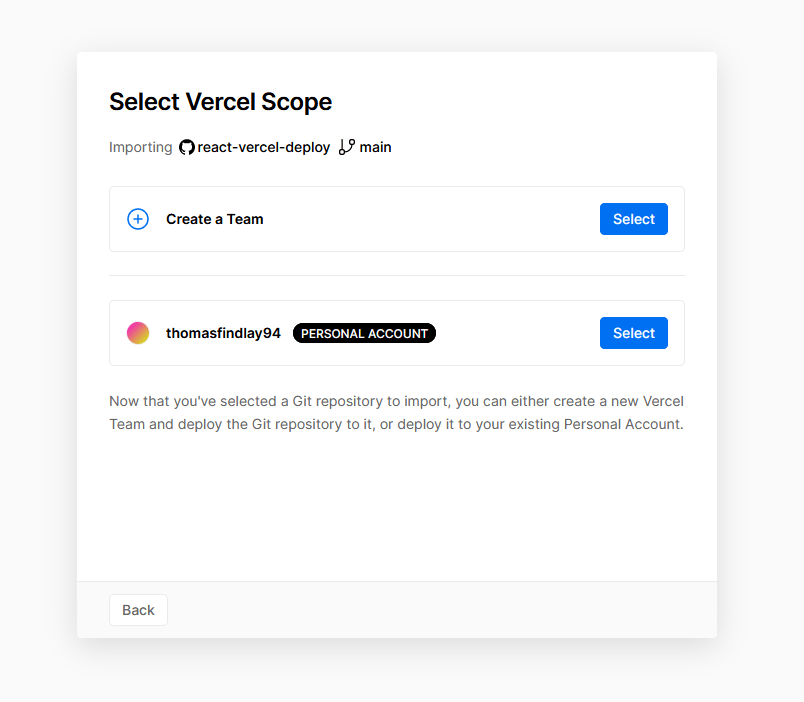
After selecting the repo to import, on the next screen, select your personal account.
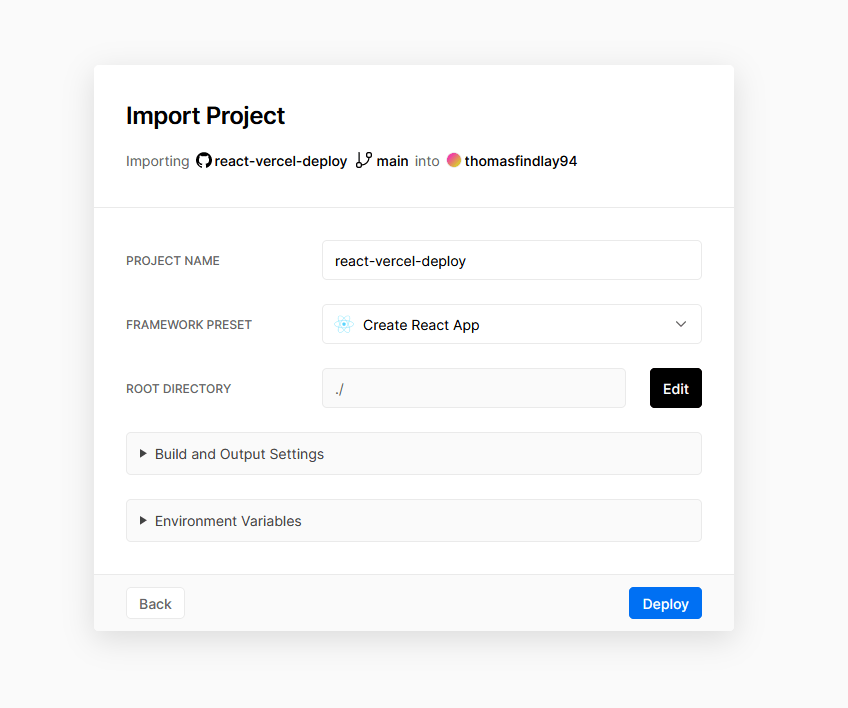
Now you will be asked about project details. You can leave everything as it is and just click on the Deploy button.
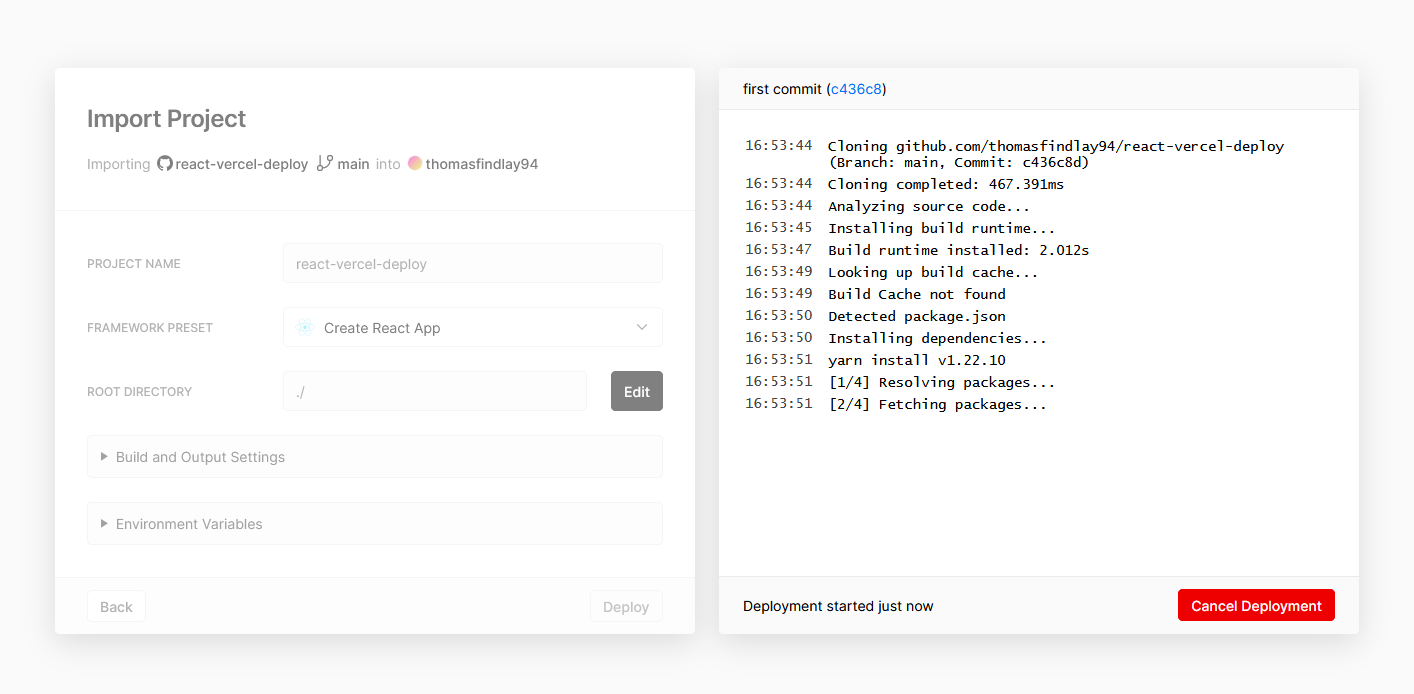
When you start the deployment, you should see a screen like the one shown below.
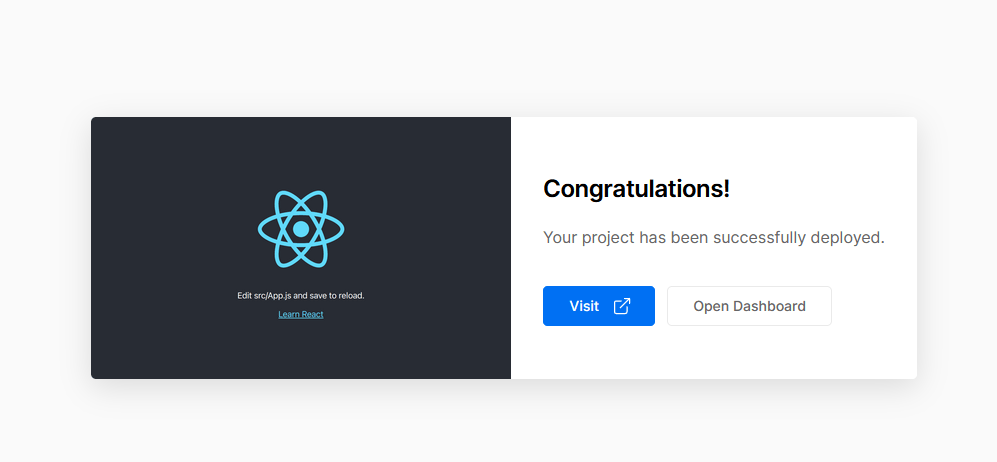
When the deployment is complete, you will see a congratulations message as well as two buttons that will allow you to visit the deployed website and the dashboard.
If you visit the website, you should see the default React app screen running. Let’s make a change to the project and deploy a new update. Go back to the project in your code editor, open the App.js file, and change this line:
<p>
  Edit <code>src/App.js</code> and save to reload
</p>
To this:
<p>
  I deployed my first app with Vercel!
</p>
Now back to the terminal to commit and push the update.
git add .;
git commit -m "New update";
git push;
After a successful push, you can head back to the Vercel dashboard of your project. You should see that Vercel is just building a new deployment for you in the “Preview Deployments” section. If you can’t see it, then it might have already finished deploying the update, so just visit the website again and refresh it.
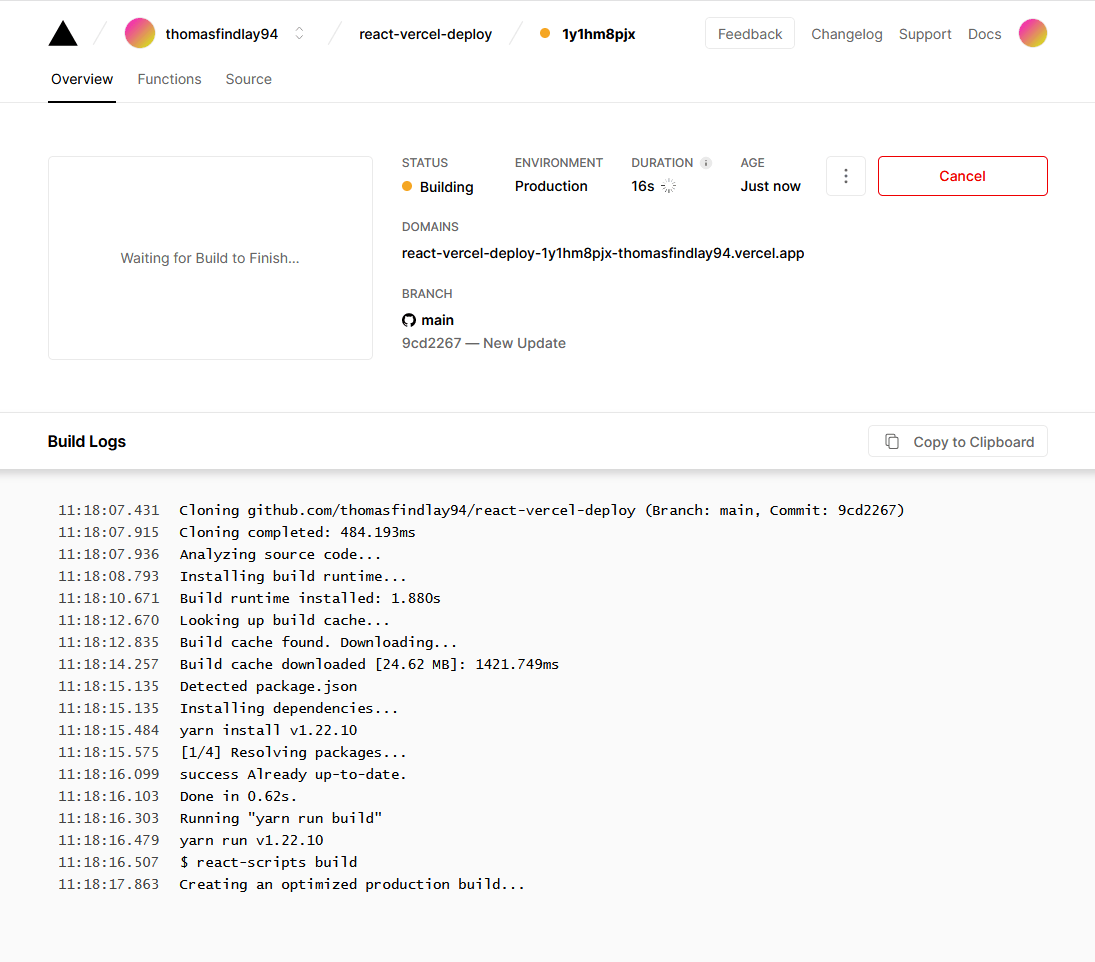
You can click on the preview deployment to see logs and how the deployment is going. When it’s done, the status will change from orange and “Building” to green “Ready,” and the “Cancel” button will be replaced by the “Visit” button.
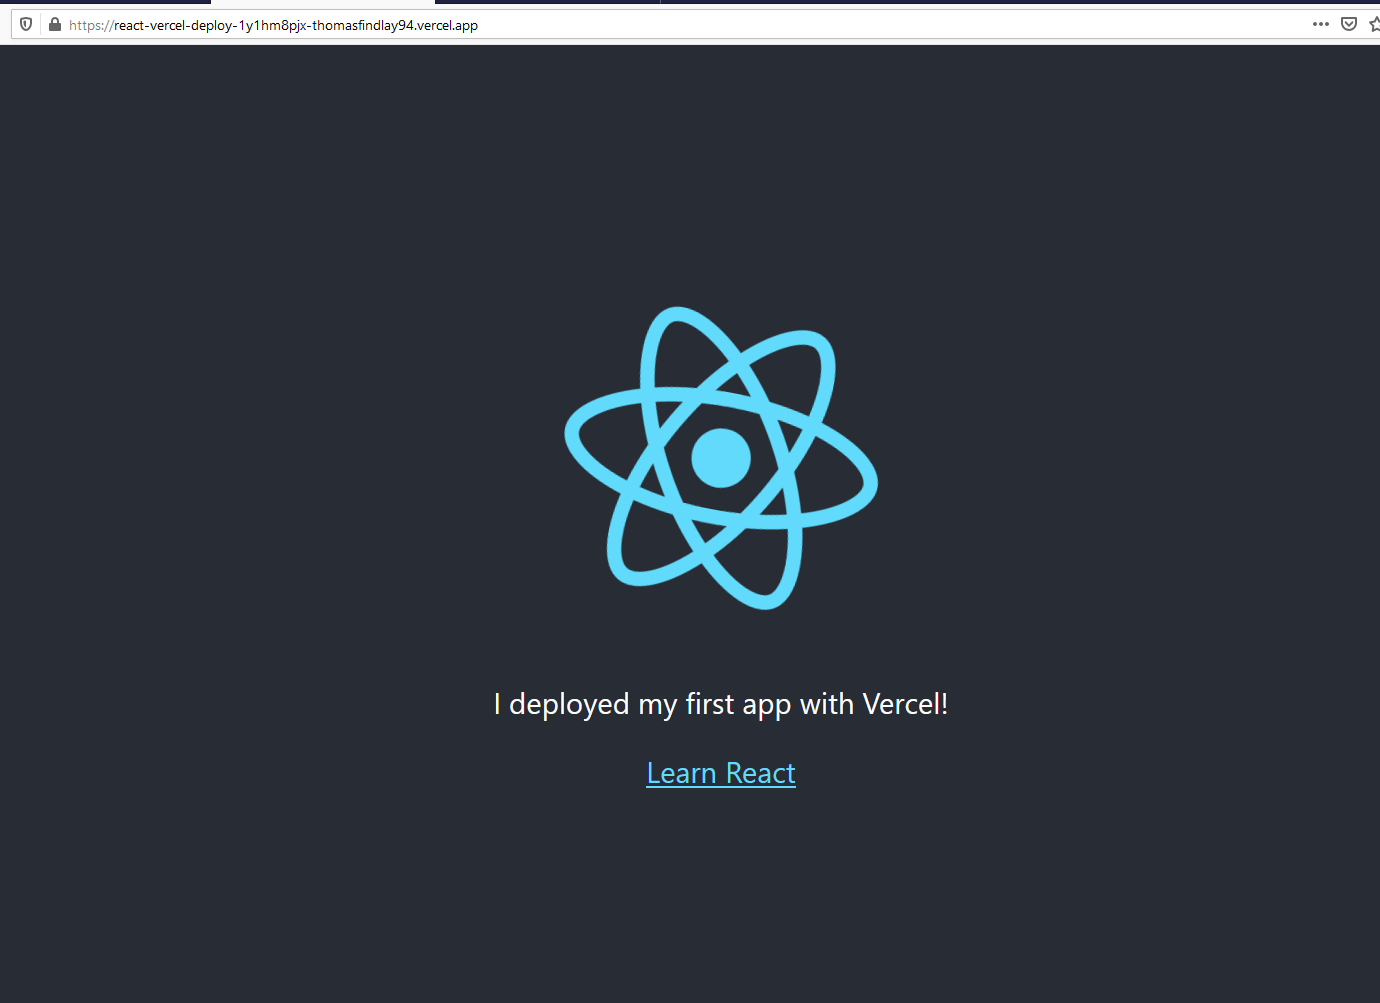
When the deployment is ready, just click on the “Visit button” and you should the website with updated text.
Wrap-up
That’s it! We have covered how to create a new React project, GitHub repository, SSH keys and Vercel deployments. This should help you get started with your project and make the deployment process much easier, as it’s fully automated. Just push to GitHub, and Vercel will handle the builds for you. In this tutorial, we used React, but remember that you can use and deploy other frameworks to Vercel as well, such as Next, Vue or Nuxt.
