Data binding can be confusing when you’re getting started in Angular. Let’s break it down! This post covers one-way property binding.
This is the third post in the data binding in the Angular series on the blog. If you have not, you should consider taking a look at the interpolation post here and the event binding post here.
Prerequisites
This post is suited for all levels of frontend developers who use Angular, so being conversant with beginner concepts and installation processes is not assumed.
Here are a few prerequisites you should have to follow this article’s demonstration with Angular 12:
- An integrated development environment like VS Code
- Node version 11.0 installed on your machine
- Node Package Manager version 6.7 (it usually ships with Node installation)
- Angular CLI version 8.0 or above
- The latest version of Angular (version 12)
// run the command in a terminal
ng version
Confirm that you are using version 12, and update to 12 if you are not.
Other nice-to-haves include:
- Working knowledge of the Angular framework at a beginner level
Why Property Binding?
While building applications with Angular working with HTML in the template is fun, Angular makes it more fun by letting you define or change values of HTML elements easily using property binding.
Property binding in Angular helps you set values for properties of HTML elements or directives. With property binding, you can do things such as toggle button functionality, set paths programmatically, and even share values between components . — Angular Docs
The syntax looks like this:
[property]="expression"
It is a one-way data-binding approach where you can bind data from the component to the template like with interpolation. This is a great feature because binding can happen to every single DOM property, which gives you endless possibilities as you build out your application and consider interactions.
What We Are Building
Let’s build a sample Angular application with which to illustrate property binding with various examples. We will be using the Angular CLI to generate this project and then work in the app component folder.
Open your terminal and run this command in the directory of your choice:
ng new props
After following the prompts, the CLI will create an app shell for you to modify. Now, navigate to the app component.html file and replace the content with the code block below:
<div class="toolbar" role="banner">
  <span>Welcome</span>
    <div class="spacer"></div>
    <a aria-label="Angular on twitter" target="_blank" rel="noopener" href="https://twitter.com/angular" title="Twitter">
    </a>
</div>
<div class="content" role="main">
<!-- Highlight Card -->
  <div class="card highlight-card card-small">
<svg id="rocket" alt="Rocket Ship" xmlns="http://www.w3.org/2000/svg" width="101.678" height="101.678" viewBox="0 0 101.678 101.678">
      <g id="Group_83" data-name="Group 83" transform="translate(-141 -696)">
        <circle id="Ellipse_8" data-name="Ellipse 8" cx="50.839" cy="50.839" r="50.839" transform="translate(141 696)" fill="#dd0031"/>
      </g>
    </svg>
<span>{{ title }} app is running!</span>
<svg id="rocket-smoke" alt="Rocket Ship Smoke" xmlns="http://www.w3.org/2000/svg" width="516.119" height="1083.632" viewBox="0 0 516.119 1083.632">
    </svg>
</div>
<!-- Resources -->
  <h2>Resources</h2>
  <p>Here are some links to help you get started:</p>
<div class="card-container">
    <a class="card" target="_blank" rel="noopener" href=#>
      <svg class="material-icons" xmlns="http://www.w3.org/2000/svg" width="24" height="24" viewBox="0 0 24 24"></svg>
<input value="text1">
<svg class="material-icons" xmlns="http://www.w3.org/2000/svg" width="24" height="24" viewBox="0 0 24 24"></svg>    </a>
<a class="card" target="_blank" rel="noopener" href=#>
      <svg class="material-icons" xmlns="http://www.w3.org/2000/svg" width="24" height="24" viewBox="0 0 24 24"></svg>
<input value="text2">
<svg class="material-icons" xmlns="http://www.w3.org/2000/svg" width="24" height="24" viewBox="0 0 24 24"></svg>
    </a>
<a class="card" target="_blank" rel="noopener" href=#>
      <svg class="material-icons" xmlns="http://www.w3.org/2000/svg" width="24" height="24" viewBox="0 0 24 24"></svg>
<input value="text3">
<svg class="material-icons" xmlns="http://www.w3.org/2000/svg" width="24" height="24" viewBox="0 0 24 24"></svg>
    </a>
</div>
</div>
Move all the styles defined in the style section to the component.css file.
Input Property Binding
Let us start with the input element and bind the value property from the component. Inside the app component.ts file, define the data you want to be bound like this:
import { Component } from '@angular/core';
@Component({
  selector: 'app-root',
  templateUrl: './app.component.html',
  styleUrls: ['./app.component.css']
})
export class AppComponent {
  title = 'props';
  text = 'type your question here'
}
The data is the string that says “type your question here.” You can bind this string data to the value of the input element you already created with the property binding syntax we saw earlier. Simply head over to your app component.html file and change one of these:
<input value="text1">
To this:
<input [value]="text">
This immediately gets bound to the template, as you can see.

Binding to Element Class Properties
Let’s try something else—binding some data to the class of an element. We start by defining the data we want to bind.
import { Component } from '@angular/core';
@Component({
  selector: 'app-root',
  templateUrl: './app.component.html',
  styleUrls: ['./app.component.css']
})
export class AppComponent {
  title = 'props';
  text = 'type your question here';
  chosenColor = 'green'
}
Now inside your component file, do the binding on the heading element here:
<h2>Resources</h2>
To this:
<h2 [ngStyle]=”{color: chosenColor}”>Resources</h2>
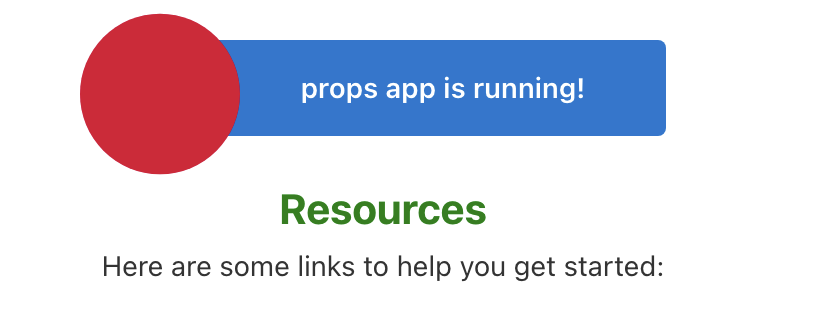
When you save the files, you will notice that the color of the heading is now green as expected.

Binding to innerHTML
Our app has a small paragraph we can also bind to using the property binding. Let us create the data we want to be bound like this:
import { Component } from '@angular/core';
@Component({
  selector: 'app-root',
  templateUrl: './app.component.html',
  styleUrls: ['./app.component.css']
})
export class AppComponent {
  title = 'props';
  text = 'type your question here';
  chosenColor = 'green';
  para = 'this is the new paragraph you get'
}
Then you can just change this line below:
<p>Here are some links to help you get started:</p>
To this:
<p [innerText]="para">Here are some links to help you get started:</p>
When you save it all, you should see the binding worked perfectly.
Conclusion
In today’s post, we took a look at property binding—what it is used for and how it all works. We saw how it can look similar to interpolation and how it focuses instead on properties of DOM elements in your template. We have other posts on data binding in Angular you should also check out. Happy hacking!