In this guide, learn how to use Azure Cosmos DB with Web Forms to create a powerful grid for your web apps.
Azure Cosmos DB and Grid in Web Forms - is this combination really possible?
Yes, absolutely. Azure Cosmos DB is the new kid in the block while Web Forms is the old veteran, but still the favorite web development technology of many people.
So, let’s start with building this grid.
This is a list of the content sections, so you can navigate easier:
- Create an Azure Cosmos DB Collection
- Partition Key
- Create a New Web Forms Project
- Add a Grid Control to the Page
- Read the Data from the Database
- Bind the Data to the Grid
- Inserting
- Deleting
- Updating
- Download and Run the Ready Project
Before we begin, here's a short summary defining Cosmos DB:
“Today’s applications are required to be highly responsive and always online. To achieve low latency and high availability, instances of these applications need to be deployed in datacenters that are close to their users.
...
Azure Cosmos DB is a globally distributed database service that's designed to provide low latency, elastic scalability of throughput, well-defined semantics for data consistency, and high availability. In short, if your application needs guaranteed fast response time anywhere in the world, if it's required to be always online, and needs unlimited and elastic scalability of throughput and storage, consider building applications by using Azure Cosmos DB.”
—MSDN: Global data distribution with Azure Cosmos DB - overview
1. Create an Azure Cosmos DB Collection
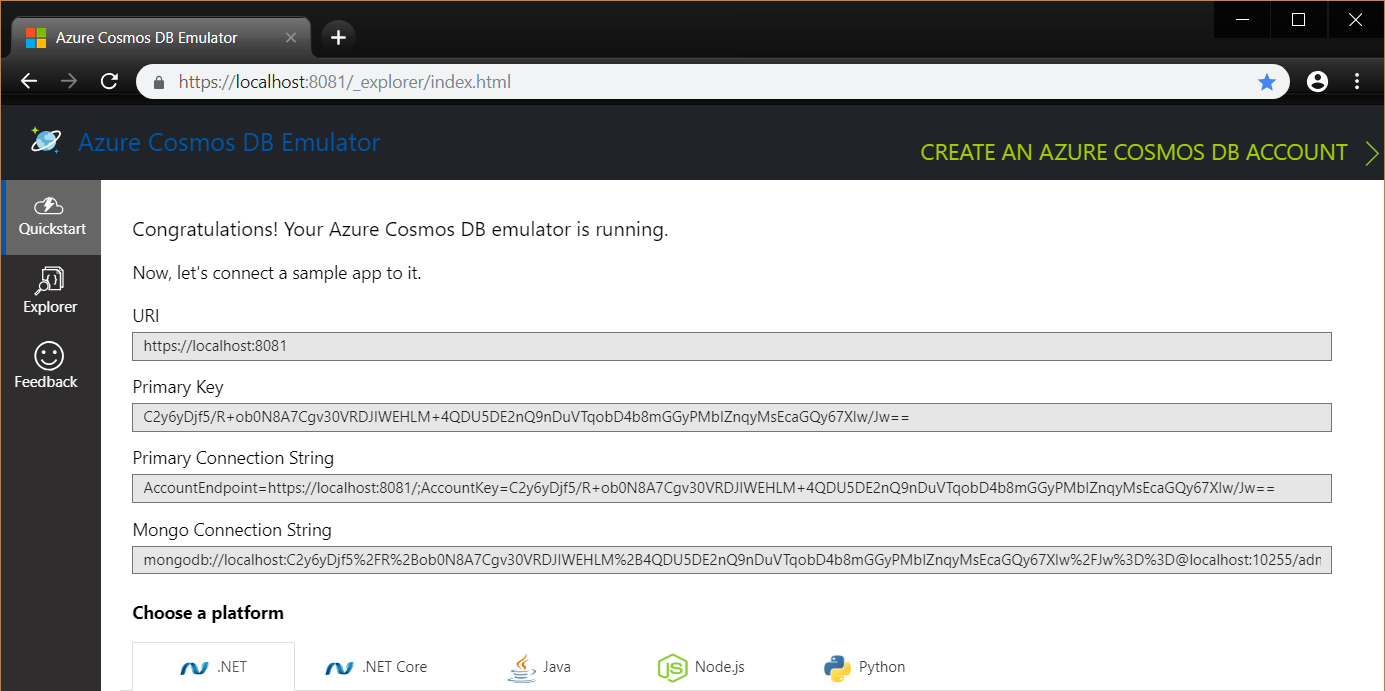
In this sample I will use a nice option to configure an Azure Cosmos DB – its dedicated Emulator. You can use your existing collection from your Azure account or download the Emulator, which does not require an account.
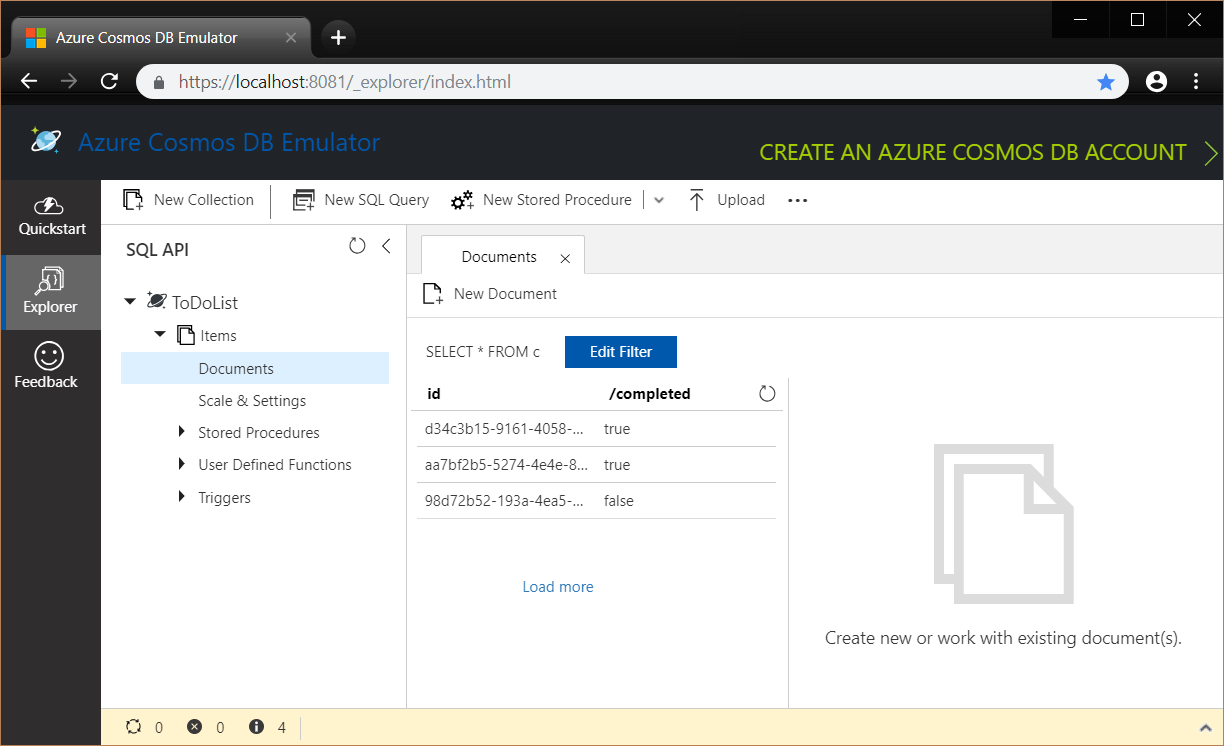
Next step is to create the Container (Collection) and add some items. One of the fields you need to fill is called Partition Key and this setting is explained in more detail in the next section.
Once this is complete, your database emulator will now look like this:
In the Explorer tab you can now see any records you might have:
2. Partition Key
- What is this?
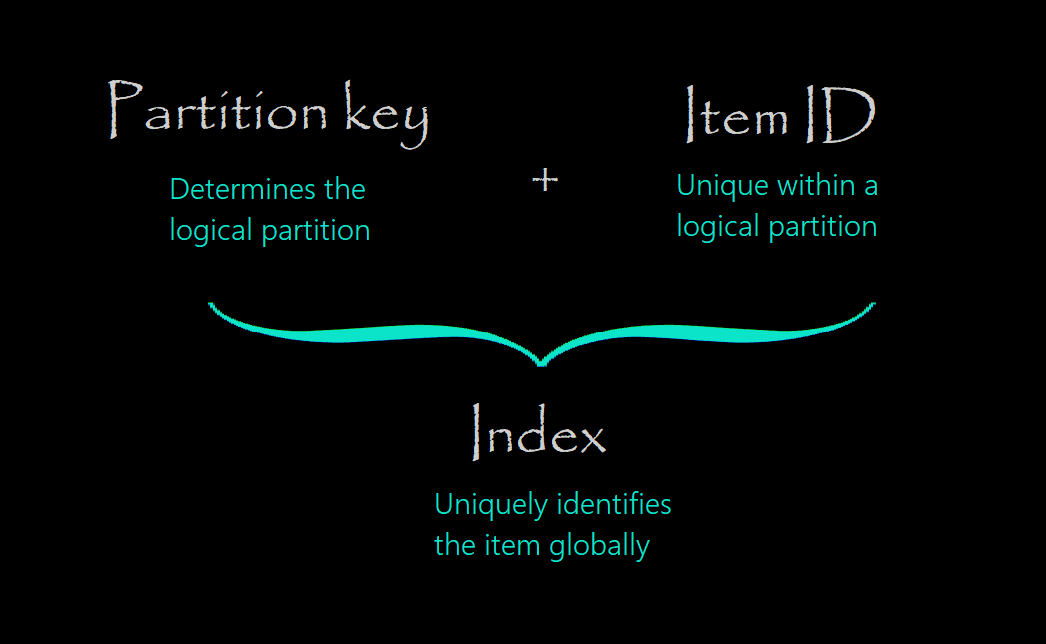
Are you familiar with the concept of Grouping data? Partitioning is similar where it uses the same values of a field to distribute the data into divisions.
It is useful for load balancing, performance, scalability, manageability, availability and similar abilities.
- Some juicy details
Let’s divide this in 2 sections (Reference):

- Logical partitions:
By using partitioning, the items in a container are divided into distinct subsets, called logical partitions.
Example 1: If
UserIDserves as the partition key for the items in a container, and there are 1000 uniqueUserIDvalues, 1000 logical partitions will be created for the container.Example 2: If all the items contain a City property, then you can use City as the partition key for the container and specific values for the City such as, "London", "Paris", "NYC" etc. will form a distinct logical partition.
- Physical partitions:
You don’t need to worry about these since Cosmos DB automatically manages the placement of logical partitions onto physical partitions (server infrastructure) depending on the load. Also, you can't control their size, placement, the count, or the mapping. What you can do, however, is to control the number of logical partitions and the distribution of data and throughput by choosing the right partition key using the suggestions from the next step.
Choosing a partition key is an important decision that will affect your application’s performance. You can consider the following best practices and details when choosing a partition key:
- Have a wide range partition key with many distinct values such as hundreds or thousands.
- Avoid “hot” partition key value (check the image below). If the requests for a specific value exceed the allocated throughput, the requests will be rate-limited.
- By default, a single logical partition is allowed an upper limit of 10 GB of storage.
- Candidates for partition keys may include the properties that appear frequently as a filter in your queries.
- Think about not only having general even storage distribution, but also even distribution when your data is getting hit. Choose a partition key that spreads workload evenly across all partitions and evenly over time.
- If such a property doesn’t exist in your data, a synthetic partition key can be constructed.
Click the image below to expand and see a possible case with hot partition:
![Possible Hot Partition Possible Hot Partition]()
Pro Tip: You can choose this key only initially - changing some properties of a collection like the ID or the partition key are not supported. Reference
I highly suggest that you check these videos before choosing the key:
- How to partition your data in Azure Cosmos DB | Azure Friday - 9 min, 16 secs
- Azure DocumentDB Elastic Scale - Partitioning - 14 min, 7 secs
3. Create a New Web Forms Project
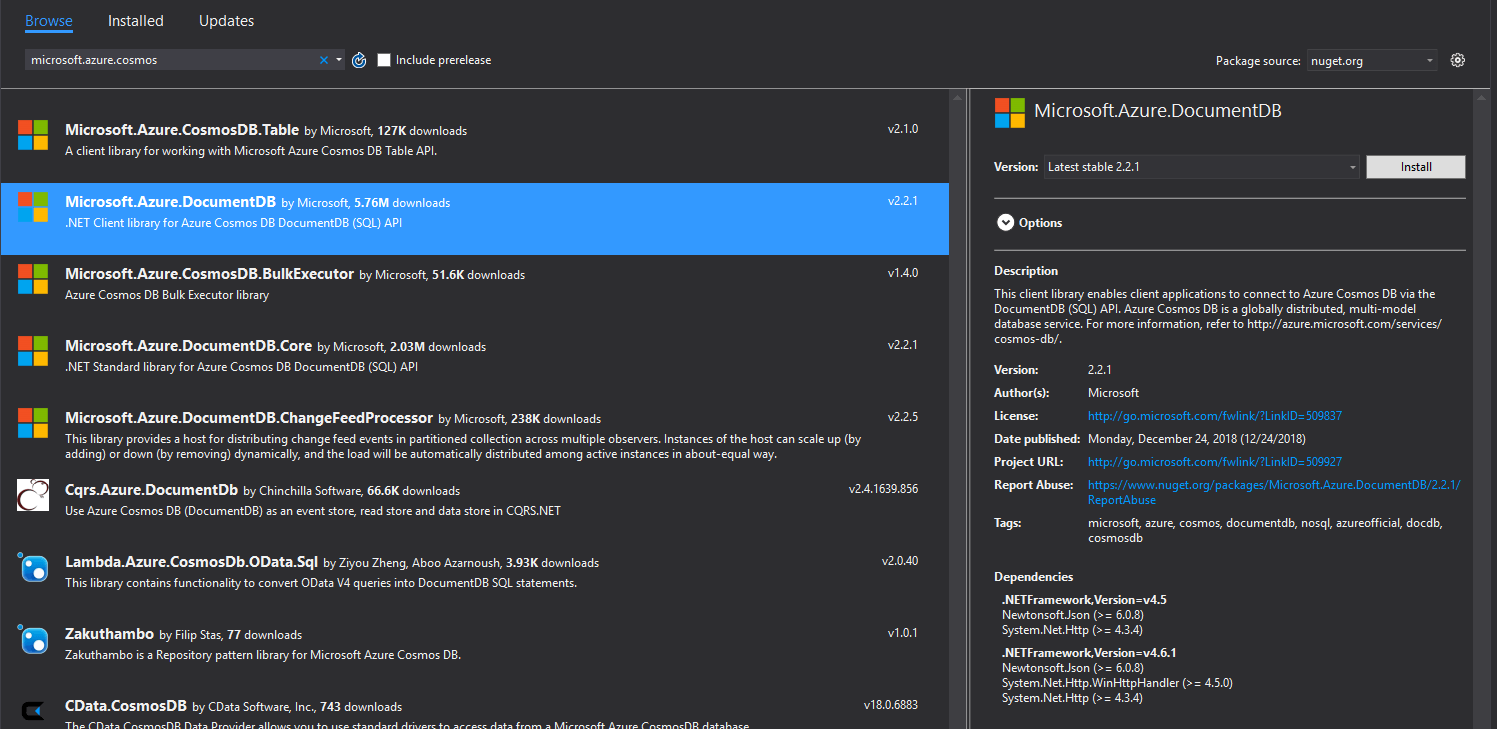
I choose to use a Template Web Application provided by the Progress Telerik UI for ASP.NET AJAX Toolset. It is very similar to a standard ASP.NET Web Application Project so you are perfectly fine if you decide to use that instead. The next step would be to open the NuGet Manager and add the Microsoft Azure Cosmos DB Client Library.
Pro Tip: Make sure that you are using a corresponding version of the Azure Cosmos DB Library and the Emulator. A long-time discrepancy between these can lead to issues. To avoid this, you can use their latest version.
4. Add a Grid Control to the Page
Now we will display our data in a grid control and make it visually appealing to the user’s eye. This can be achieved by using a standard asp:GridView or any other server-side grid control you prefer. I will be using the RadGrid– the most capable player in the Telerik AJAX league:
<telerik:RadGrid ID="RadGrid1" runat="server" AllowPaging="True" Width="800px"
OnNeedDataSource="RadGrid1_NeedDataSource" OnColumnCreated="RadGrid1_ColumnCreated"
AutoGenerateEditColumn="true" OnUpdateCommand="RadGrid1_UpdateCommand"
AutoGenerateDeleteColumn="true" OnDeleteCommand="RadGrid1_DeleteCommand"
OnInsertCommand="RadGrid1_InsertCommand">
<MasterTableView DataKeyNames="Id,Completed" CommandItemDisplay="Top">
</MasterTableView>
</telerik:RadGrid>
And this is the entire definition. The columns are generated automatically based on the DataType of the field. Complex functionalities like paging, filtering, grouping, sorting, aggregates and many more are also provided with a single property and without any additional coding on the developer’s part.
Yes, it is charming.
On the outside, it will look like the image below. If Bootstrap is not your thing, you can also choose from around 20 other built-in skins or create your custom one:
You can find the required assemblies to run this grid in the Download section.
5. Access the Database
To set up a valid connection to your database, you will need to use some key identifiers. I prefer to have them directly in the web.config:
<appSettings>
...
<add key="endpoint" value="https://localhost:8081/" />
<add key="authKey" value="C2y6yDjf5/R+ob0N8A7Cgv30VRDJIWEHLM+4QDU5DE2nQ9nDuVTqobD4b8mGGyPMbIZnqyMsEcaGQy67XIw/Jw==" />
<add key="database" value="ToDoList" />
<add key="collection" value="Items" />
</appSettings>
Now, we can get a reference to the database in the code-behind:
private static readonly string DatabaseId = ConfigurationManager.AppSettings["database"];
private static readonly string CollectionId = ConfigurationManager.AppSettings["collection"];
private static DocumentClient client
{
get
{
return new DocumentClient(
new Uri(ConfigurationManager.AppSettings["endpoint"]),
ConfigurationManager.AppSettings["authKey"]);
}
}
For implementing additional methods like CreateDatabaseIfNotExistsAsync and CreateCollectionIfNotExistsAsync, you can check the DocumentDBRepository.cs file and its GitHub code.
6. Bind the Data to the Grid
Once you have a valid connection and access to the database, you can now extract the records from the Collection and bind the grid. Usually, grids can be bound using their DataSource property and the DataBind() method. Since we are using RadGrid in this case, we can make avail of the ultimate NeedDataSource event handler of the grid:
protected void RadGrid1_NeedDataSource(object sender, GridNeedDataSourceEventArgs e)
{
IQueryable<Item> source = client.CreateDocumentQuery<Item>(
UriFactory.CreateDocumentCollectionUri(DatabaseId, CollectionId));
RadGrid1.DataSource = source;
}
The amazing thing about it is that you don’t have to worry about actions like paging, filtering, sorting, grouping, their corresponding events, and when to rebind the grid. The NeedDataSource event does everything automatically under the hood and all that is left for you is to lean back and enjoy the functionality.
7. Inserting
Inserting is the most straightforward operation to modify the database. The process simply includes extracting the new values and adding a new record (Document) to the data source:
protected void RadGrid1_InsertCommand(object sender, GridCommandEventArgs e)
{
GridEditableItem item = e.Item as GridEditableItem;
Hashtable newValues = new Hashtable();
item.ExtractValues(newValues);
Item newItem = new Item()
{
Name = (string)newValues["Name"],
Description = (string)newValues["Description"],
Completed = (bool)newValues["Completed"]
};
client.CreateDocumentAsync(UriFactory.CreateDocumentCollectionUri(
DatabaseId, CollectionId), newItem).Wait();
}
For create and update operations on documents, the partition key is optional. When absent, the client library will extract the partition key from the document before sending the request to the server. Reference
8. Deleting
Usually deleting a record (Document) requires only its unique data key value to remove it from the database. In this case the partition key part is also required so the Azure Cosmos DB knows in which bucket the item is located:
protected void RadGrid1_DeleteCommand(object sender, GridCommandEventArgs e)
{
GridDataItem item = (GridDataItem)e.Item;
string dataKeyID = item.GetDataKeyValue("Id").ToString();
bool partitionKeyID = (bool)item.GetDataKeyValue("Completed");
RequestOptions requestOptions = new RequestOptions()
{
PartitionKey = new PartitionKey(partitionKeyID)
};
client.DeleteDocumentAsync(UriFactory.CreateDocumentUri(
DatabaseId, CollectionId, dataKeyID), requestOptions).Wait();
}
9. Updating
Now for updating, I will separate the section into 2 parts:
- When there is no need to change the partition key of the record. In this case you can use the replace method and find and modify the record directly.
- When you want to change the partition key, too. Changing the partition key of an item (Document) is not supported and you need to first delete it and then re-create it in another partition/bucket.
protected void RadGrid1_UpdateCommand(object sender, GridCommandEventArgs e)
{
GridEditableItem item = (GridEditableItem)e.Item;
string dataKeyID = item.GetDataKeyValue("Id").ToString();
bool partitionKeyID = (bool)item.GetDataKeyValue("Completed");
bool newPartitionKeyID = ((CheckBox)item["Completed"].Controls[0]).Checked;
Hashtable newValues = new Hashtable();
item.ExtractValues(newValues);
Item updatedItem = new Item()
{
Name = (string)newValues["Name"],
Description = (string)newValues["Description"],
Completed = (bool)newValues["Completed"]
};
if (partitionKeyID != newPartitionKeyID)
{
RequestOptions requestOptions = new RequestOptions()
{
PartitionKey = new PartitionKey(partitionKeyID)
};
client.DeleteDocumentAsync(UriFactory.CreateDocumentUri(DatabaseId, CollectionId, dataKeyID), requestOptions).Wait();
client.CreateDocumentAsync(UriFactory.CreateDocumentCollectionUri(DatabaseId, CollectionId), updatedItem).Wait();
}
else
{
updatedItem.Id = dataKeyID;
client.ReplaceDocumentAsync(UriFactory.CreateDocumentUri(
DatabaseId, CollectionId, dataKeyID), updatedItem).Wait();
}
}
10. Download and Run the Ready Project
Now comes the sweet part – you have the sample ready to download and run. All you need to change is the configuration of your own Azure keys as demonstrated in the Access the Database step. If you want to play some more with the Telerik tools, you can use the assemblies in the Bin folder of the project or get the installer from the Telerik Download page.


