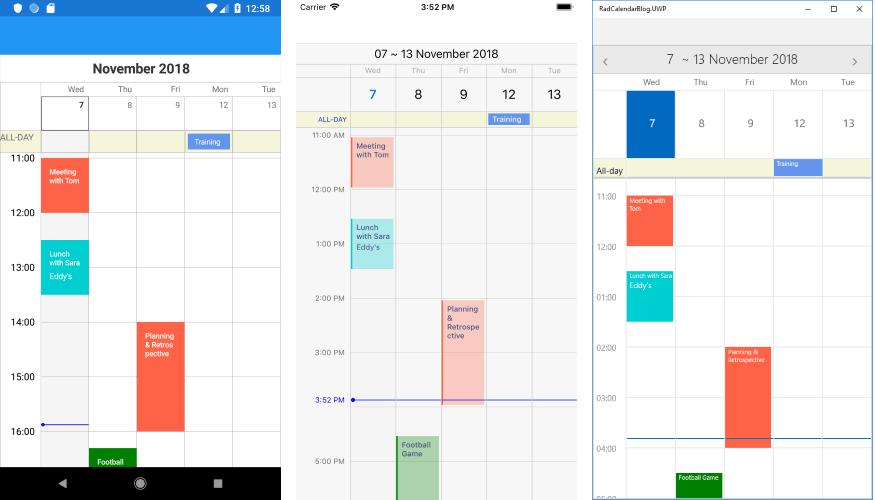
The Calendar in our UI for Xamarin suite is now enhanced with new Scheduling capabilities, allowing you to create a detailed view of a schedule for a specific number of days.
The key to productive meetings is to plan them well beforehand. Having the proper tool to quickly display and manage appointments is an important part of the planning process. Taking this into account, we have recently enhanced the Calendar component in our Telerik UI for Xamarin suite with Scheduling capabilities, and I am eager to tell you all the details regarding the new functionality.

With R3 2018 release of Telerik UI for Xamarin, RadCalendar comes with a new MultiDay view mode which enables you to create a detailed view of the schedule for a specific day or a couple of days. Even more, you will have full control over the way the appointments are visualized through various configuration options. Let’s check it out right away.
Setting up RadCalendar with MultiDay ViewMode
Currently, the ViewMode of RadCalendar can be changed only after the native Calendar control is rendered, which is why we’d need to hook to the NativeControlLoaded event and switch the view mode inside its handler:
<telerikInput:RadCalendar x:Name="calendar"NativeControlLoaded="CalendarLoaded" />and here is the event handler:
private void CalendarLoaded(object sender, EventArgs e)

{
    (sender as RadCalendar).TrySetViewMode(CalendarViewMode.MultiDay);

}
We’re planning to improve the way this works and allow you to directly set/bind the ViewMode property of the control. So, expect more news on this in the upcoming R1 2019 release.
Adjusting the Timeline per Your Preferences
As the main function of the MultiDay view is to help users manage their appointments in a quick and intuitive way, we’ve made sure to provide a few useful configuration settings such as:
- Day Start and End times
- Option to show only the work week
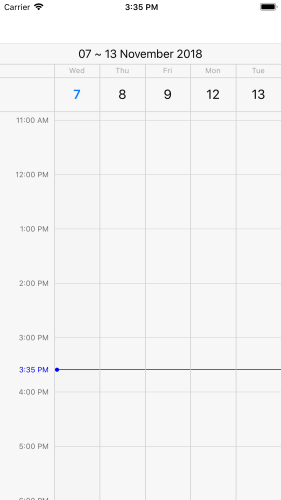
- Time indicator marking the current time
- Custom time intervals inside the timeline
All of these can be easily applied through MultiDayViewSettings property of RadCalendar.
In addition, you can play with a variety of options for customizing the look & feel of the Multiday view, so that it matches the rest of your app. You can apply different background and text colors to the AllDay area, all-day appointments, regular appointments, timeline, and more. For a full list of the available settings I recommend checking out the MultiDayView topic from Calendar & Scheduling documentation.
The next snippet demonstrates how you can utilize some of the provided configuration options. Note that the styling settings are applied through the MultiDayViewStyle property of the control:
<telerikInput:RadCalendar x:Name="calendar"
                NativeControlLoaded="CalendarLoaded">
    <telerikInput:RadCalendar.MultiDayViewSettings>
        <telerikInput:MultiDayViewSettings VisibleDays="5"
                DayStartTime="9:00:00"
                DayEndTime="18:00:00"
                TimelineInterval="1:00"
                IsWeekendVisible="false"
                IsCurrentTimeIndicatorVisible="true" />
    </telerikInput:RadCalendar.MultiDayViewSettings>
    <telerikInput:RadCalendar.MultiDayViewStyle>
        <telerikInput:MultiDayViewStyle
                AllDayAreaBackgroundColor="Beige"
                AllDayAppointmentBackgroundColor="CornflowerBlue"
                AllDayAppointmentTextColor="White"
                CurrentTimeIndicatorColor="Blue"
                AppointmentFontSize="11"
                AllDayAppointmentFontSize="11" />
    </telerikInput:RadCalendar.MultiDayViewStyle>
</telerikInput:RadCalendar>
The screenshot below shows RadCalendar with the above settings applied on an iOS simulator:

Displaying Meetings
After configuring the MultiDay view mode timeline, we are ready to add our appointments to the Calendar.
RadCalendar works with IAppointment objects, so we'll need to create an Appointment class that implements the IAppointment interface:
public class Appointment : IAppointment

{
    public DateTime StartDate { get; set; }
    public Color Color { get; set; }
    public DateTime EndDate { get; set; }
    public string Title { get; set; }
    public bool IsAllDay { get; set; }
    public string Detail { get; set; }

}
Then, we’ll create and add appointments to a collection of Appointment objects that should be assigned to the AppointmentsSource of the Calendar. Here are a few sample appointments:
var date = DateTime.Today;

calendar.AppointmentsSource = new ObservableItemCollection<Appointment>{
    new Appointment {
        Title = "Meeting with Tom",
        StartDate = date.AddHours(11),
        EndDate = date.AddHours(12),
        Color = Color.Tomato
    },
    new Appointment {
        Title = "Lunch with Sara",
        Detail = "Eddy's",
        StartDate = date.AddHours(12).AddMinutes(30),
        EndDate = date.AddHours(13).AddMinutes(30),
        Color = Color.DarkTurquoise
    },
    new Appointment {
        Title = "Birthday",
        StartDate = date.AddDays(2).AddHours(2).AddMinutes(30),
        EndDate = date.AddDays(2).AddHours(3),
        IsAllDay = true
    }

};
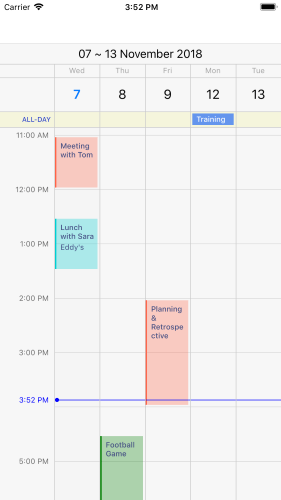
And now you can see all the appointments visualized in the timeline:

Scheduling Meetings
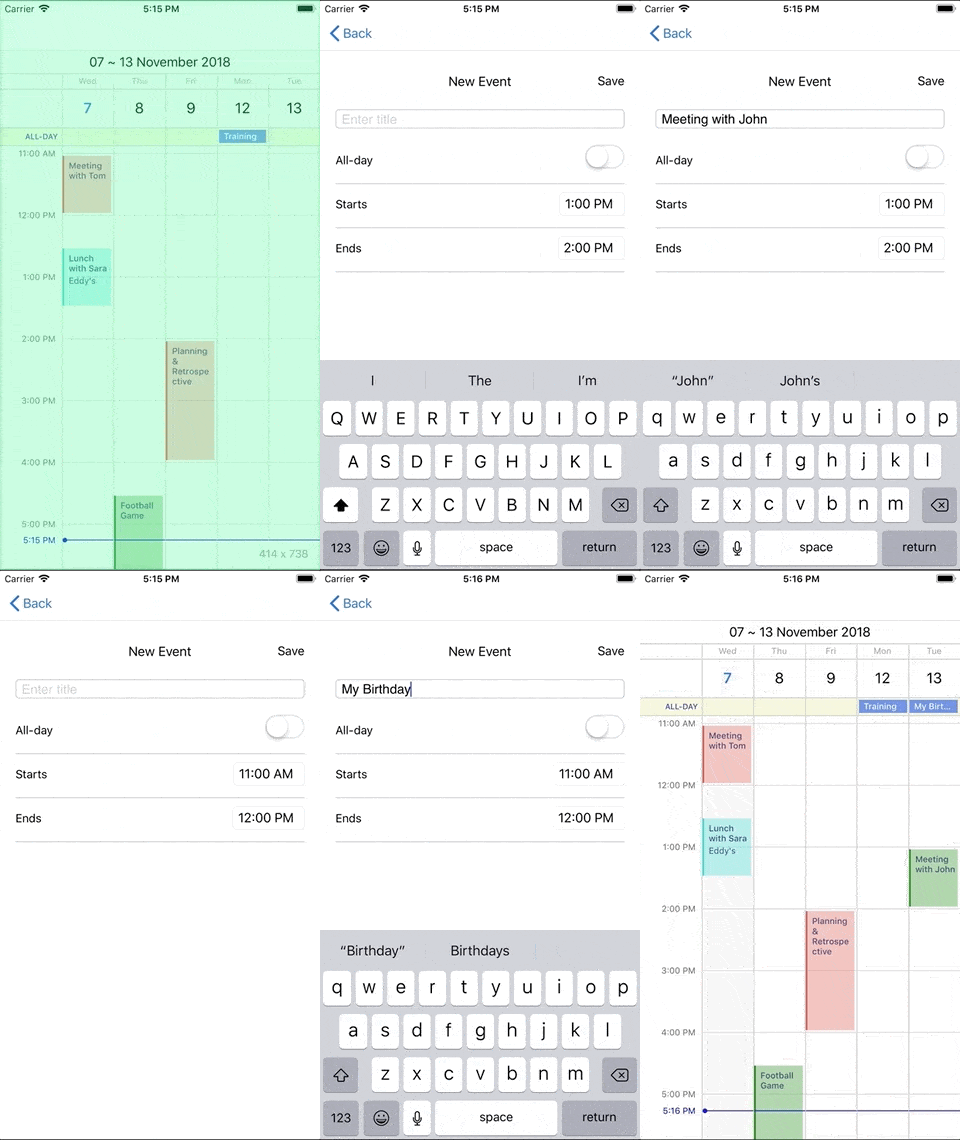
Most likely you will not only need to display meetings, but also provide users with the ability to schedule meetings. This can be accomplished by hooking to the TimeSlotTapped event of the Calendar and pushing a new page for adding a new appointment.
The following XAML code example shows a basic form with a few input controls for scheduling a meeting:
<StackLayout Padding="10, 20, 10, 0" HorizontalOptions="FillAndExpand">
    <Grid Padding="10, 0, 10, 0" Margin="0, 10, 0, 0">
        <Label Text="New Event" FontSize="18"
                        HorizontalOptions="Center"
                        VerticalOptions="Center" />
        <Label Text="Save" FontSize="16"
                        HorizontalOptions="End"
                        VerticalOptions="Center">
            <Label.GestureRecognizers>
                <TapGestureRecognizer Command="{Binding AddCommand}" />
            </Label.GestureRecognizers>
        </Label>
    </Grid>
    <StackLayout Padding="10, 20, 10, 0">
        <telerikInput:RadEntry Text="{Binding AppointmentTitle}"
                        WatermarkText="Enter title"
                        Margin="0, 0, 0, 15"  />
        <telerikPrimitives:RadBorder BorderColor="#C8C7CC" BorderThickness="0, 0, 0, 1">
            <Grid Margin="0, 0, 0, 10" HeightRequest="40">
                <Label Text="All-day" FontSize="17" VerticalOptions="Center" />
                <Switch IsToggled="{Binding IsAllDay}" HorizontalOptions="End" />
            </Grid>
        </telerikPrimitives:RadBorder>

        <telerikPrimitives:RadBorder BorderColor="#C8C7CC" BorderThickness="0, 0, 0, 1">
            <Grid Margin="0, 0, 0, 10" HeightRequest="40">
                <Label Text="Starts" FontSize="17" VerticalOptions="Center" />
                <TimePicker Time="{Binding StartTime}"
                        HorizontalOptions="End" VerticalOptions="Center" />
            </Grid>
        </telerikPrimitives:RadBorder>

        <telerikPrimitives:RadBorder BorderColor="#C8C7CC" BorderThickness="0, 0, 0, 1">
            <Grid Margin="0, 0, 0, 10" HeightRequest="40">
                <Label Text="Ends" FontSize="17"  VerticalOptions="Center" />
                <TimePicker Time="{Binding EndTime}"
                        HorizontalOptions="End"
                        VerticalOptions="Center" />
            </Grid>
        </telerikPrimitives:RadBorder>
    </StackLayout>
</StackLayout>
We’ll have to create a ViewModel class containing all the bound values and define that ViewModel as BindingContext of the page with the above form. Here is a sample AddAppointmentViewModel class:
public class AddAppointmentViewModel

{
    private ICollection<Appointment> appointments;
    public AddAppointmentViewModel(ICollection<Appointment> appointments, DateTime startDate, DateTime endDate)
    {
        this.AddCommand = new Command(this.Add);

        this.appointments = appointments;
        this.StartTime = startDate.TimeOfDay;
        this.EndTime = endDate.TimeOfDay;
        this.StartDate = startDate;
        this.EndDate = endDate;
    }
    public ICommand AddCommand { get; }
    public string AppointmentTitle { get; set; }
    public bool IsAllDay { get; set; }
    public DateTime StartDate { get; set; }
    public DateTime EndDate { get; set; }
    public TimeSpan StartTime { get; set; }
    public TimeSpan EndTime { get; set; }

    private void Add()
    {
        var newAppointment = new Appointment
        {
            Title = this.AppointmentTitle,
            StartDate = this.StartDate.Date.AddTicks(this.StartTime.Ticks),
            EndDate = this.EndDate.Date.AddTicks(this.EndTime.Ticks),
            IsAllDay = this.IsAllDay,
            Color = Color.Green
        };
        this.appointments.Add(newAppointment);
        App.Current.MainPage.Navigation.PopAsync();
    }

}
All that is left is to call the page containing the AddAppointment form on Calendar TimeSlot tapped action:
calendar.TimeSlotTapped += CalendarTimeSlotTapped;


private void CalendarTimeSlotTapped(object sender, TimeSlotTapEventArgs e)

{
    var appointments = (sender as RadCalendar).AppointmentsSource as ObservableItemCollection<Appointment>;
    var addAppointmentViewModel = new AddAppointmentViewModel(appointments, e.StartTime, e.EndTime);
    this.Navigation.PushAsync(new AddAppointmentPage(addAppointmentViewModel));

}
Once your code is complete, you can run the app and schedule new meetings.

You can also find various demos showing the scheduling features of RadCalendar in the Telerik UI for Xamarin Samples Application.
What's Next
For the upcoming R1 2019 release of Telerik UI for Xamarin we’re planning to add more features to the scheduling functionality of RadCalendar such as:
- Recurrent events support
- Built-in UI for creating and editing appointments
As always, we'd love to hear your feedback. If you find anything missing that you'd like to see in a future version of the Calendar & Scheduling component, feel free to submit your feedback to our public feedback portal.
If this is the first time you're hearing about Telerik UI for Xamarin, you can find more information about it on our website or dive right into a free 30-day trial today.
Thanks and happy coding!