A step-by-step guide to use nested forms within the latest version of Angular.
Recently, I was working on a portal that needed to use an array within an array. For that, I decided to use the nested form structure, and it worked very well for me. I thought this might be helpful for a lot of other people too, so I decided to share about nested forms because they can be used in any scenario.
What is a Nested Form?
In simple words, nested forms are forms within a form. Using nested forms, we can create an array of objects within a single field and we can have an array of these fields.
Hence, the nested form helps us manage large form groups and divides it into small groups.
For example:
- A company decides to issue a form to collect data from users.
- The users should add all the cities in which they have lived, so the users should be able to create a text box dynamically for each city they add.
- Within the Cities, the users may have multiple address lines, so the users should also be able to add new text boxes for the address lines dynamically.
- Here Cities itself is a form array, and, within that form array, the address is nested form array.
Let’s see how we can achieve this scenario using Angular 6.
We’ll go step by step and start writing the code in parallel to achieve our goal.
Demo Application
For the demo application, we will create nested forms by which we will be able to add new Cities and, within those cities, new address lines.
So basically, we are going to build this:
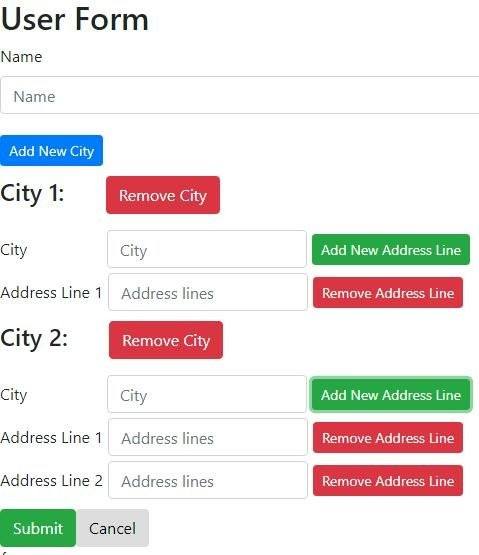
As you can see here, after this assignment, we will be able to dynamically add Cities and the address lines within a city. So, let us start.
Form Creation and the Default Data
First of all, we will decide the structure of our nested array, and once the structure is ready, we will try to set the default data in the form.
Our array structure looks like this:
data = { cities: [ { city: "", addressLines: [ { addressLine: "", } ] } ]}Here, the city is an array and the addressLines is the array within the Cities array.
Our form group would look like below:
this.myForm = this.fb.group({name: [''],cities: this.fb.array([])})We are using the Form builder(fb) to build our form. Here the Cities array will be filled with the City name and the AddressLine array.
Now, if we try to set the default data then our methods would look like below:
Set the Cities
setCities() {let control = <FormArray>this.myForm.controls.cities;this.data.cities.forEach(x =>{control.push(this.fb.group({city: x.city,addressLines: this.setAddressLines(x) }))})}Here:
- We are fetching the Cities control and we are pushing the City name and the array of Address Lines.
- setAddressLines function is called to fill the data of the Address lines.
- The above code will set the cities.
Set the Address Lines
setAddressLines(x) {let arr =new FormArray([])x.addressLines.forEach(y => {arr.push(this.fb.group({addressLine: y.addressLine}))})return arr;}Here:
- We have the instance of the parent City, so we are pushing new Address Lines within that parent City.
- The above code will set the Address lines.
The HTML for the Default Data
Once our default data is pushed, let us see how our HTML looks. We have pushed the data into the Form arrays in the component, so in HTML we will iterate through this array to show the Address Lines and the Cities.
For the AddressLines Array
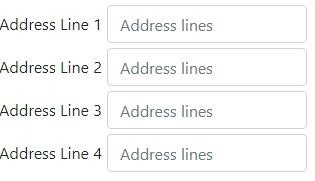
<divformArrayName="addressLines"> <divstyle="margin-top:5px; margin-bottom:5px;"*ngFor="let lines of city.get('addressLines').controls; let j=index"> <div[formGroupName]="j"> <divclass="form-group"> <labelstyle="margin-right:5px;" class="col-form-label"for="emailId">Address Line {{j + 1}}</label> <inputformControlName="addressLine" class="form-control" style="margin-right:5px;" type="email" placeholder="Adress lines" id="address" name="address" /> </div> </div> </div> </div>Here, we are looping through the addressLines array so that new AddressLines would be generated as you can see below:
For the Cities Array
Once we have written the HTML for the address lines, let us add the HTML for the Cities array.
<divformArrayName="addressLines"> <divstyle="margin-top:5px; margin-bottom:5px;"*ngFor="let lines of city.get('addressLines').controls; let j=index"> <div[formGroupName]="j"> <divclass="form-group"> <labelstyle="margin-right:5px;" class="col-form-label"for="emailId">Address Line {{j + 1}}</label> <inputformControlName="addressLine" class="form-control" style="margin-right:5px;" type="email" placeholder="Adress lines" id="address" name="address" /> </div> </div> </div> </div>Here:
- We are looping through the Cities array.
- The Address Lines array is part of the Cities array.
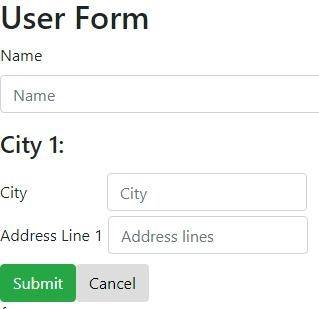
The result looks the like below:
Add Cities and the Address Lines Dynamically
Our basic nested form is ready, but a very important part is missing – adding the values in the array dynamically.
Add New City Dynamically
Let us add a button on whose click event we will push new Cities array.
HTML
<buttonstyle="margin-top:5px; margin-bottom:5px;"type="button"class="btn btn-primary btn-sm"(click)="addNewCity()">
<spanclass="glyphicon glyphicon-plus"aria-hidden="true"></span> Add New City
</button>Component
addNewCity() {let control =<FormArray>this.myForm.controls.cities;control.push(this.fb.group({city: [''],addressLines: this.fb.array([])}))}Here:
- On button click, addNewCity() would be called.
- New Cities array control would be pushed to the existing City array.
- We are not pushing anything in the Address lines on the creation of the Cities, but we will add a button to add new address lines later.
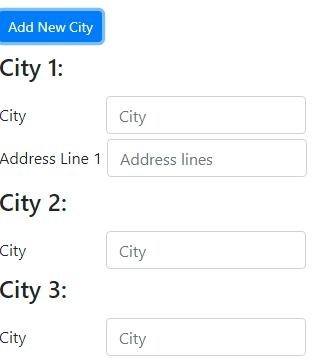
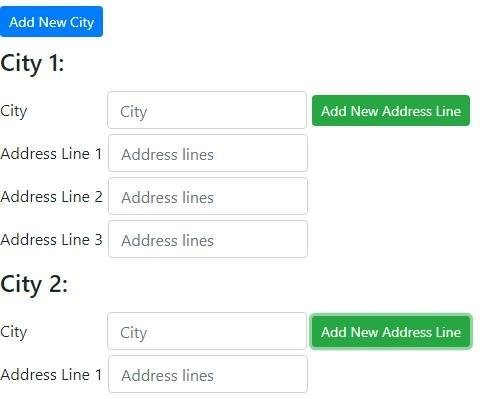
Now, we can add new cities as you can see below:
Add New Address Lines
As I just mentioned above, we will add a button within the City that will allow us to add the address lines within the cities.
Here, we will have to make sure that the address lines are added for the correct cities. For example, if you click on AddressLine button under City 2, then that address line should be added under City 2. For this, we will have to give the reference of the city array.
HTML
<buttonstyle="margin-right:5px;"type="button"class="btn btn-success btn-sm"(click)="addNewAddressLine(city.controls.addressLines)"><spanclass="glyphicon glyphicon-plus"aria-hidden="true"></span> Add New Address Line</button>As you can see, I am passing the city.controls.addressLines, which will make sure that the address lines are added under the expected city
Component
addNewAddressLine(control) {control.push(this.fb.group({addressLine: ['']}))}Here:
- On button click, addNewAddressLine would be called along with the parent city control reference.
- AddressLines would be pushed within the parent city.
Now, we can add new Address lines, as you can see below:
Remove Cities and the Address Lines
At this point, we can add new cities and the address lines within the cities.
The next step is to be able to remove the dynamically created city or the address line.
Remove the City
To remove the city, we need to pass the index of the cities array to the method.
HTML
<buttonstyle="margin-left:35px;"type="button"class="btn btn-danger"(click)="deleteCity(i)"><spanclass="glyphicon glyphicon-minus"aria-hidden="true"></span> Remove City</button>Component:
deleteCity(index) {let control =<FormArray>this.myForm.controls.cities;control.removeAt(index)}Here:
- deleteCity will be called on the button click along with the index.
- Specific array element will be removed from the FormArray of the cities.
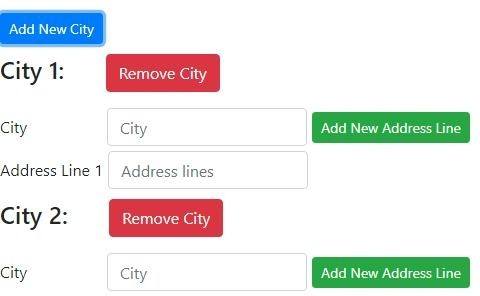
Now, we can remove the city from the Cities array dynamically:
Remove the Address Lines
The next step is to remove the address lines from the specific cities.
As we have used the parent(city) control reference while adding a new address line within a city, we will again use the parent’s control to remove the address line from the specific city.
HTML
<buttonstyle="margin-right:5px;"type="button"class="btn btn-danger btn-sm"(click)="deleteAddressLine(city.controls.addressLines, j)"><spanclass="glyphicon glyphicon-minus"aria-hidden="true">Remove Address Line</span></button>Here, we are passing the parent city's reference of the address lines along with the current index.
Component
deleteAddressLine(control, index) {control.removeAt(index)}Here:
- deleteAddressLine would be called on the button click along with the current control and the current index.
- The Address line would be removed from specific parent city.
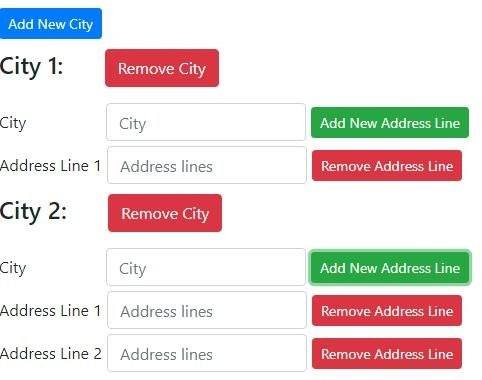
Now, we can remove the address line from a city:
That is it. Our nested form is ready.
The Complete Array
Let us see how our array will look once the text boxes are filled.
For example, we have filled in the details as below:
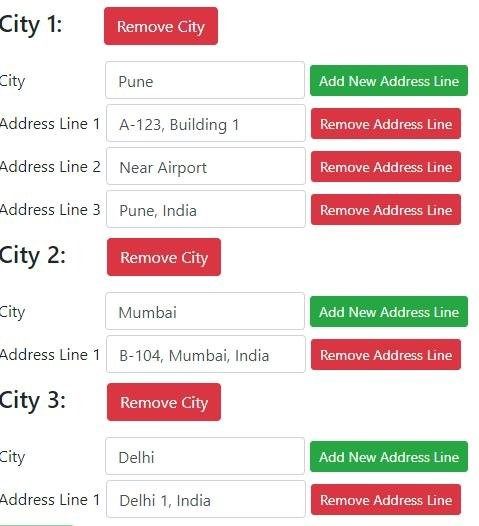
The array will look like the below:
"cities": [ { "city": "Pune", "addressLines": [ { "addressLine": "A-123, Building 1" }, { "addressLine": "Near Airport" }, { "addressLine": "Pune, India" } ] }, { "city": "Mumbai", "addressLines": [ { "addressLine": "B-104, Mumbai, India" } ] }, { "city": "Delhi", "addressLines": [ { "addressLine": "Delhi 1, India" } ] } ]The demo application is here and the code for the same is here.
Hope this helps! How are you using nested forms in your projects? Feel free to share in the comments below.
Want to learn more about Angular? Check out our All Things Angular page that has a wide range of info and pointers to Angular information – from hot topics and up-to-date info to how to get started and creating a compelling UI.