Learn how you can easily verify the reliability and integrity of your APIs using coded steps inside Telerik Test Studio.
Through its easy-to-use features, intuitive UI and coded steps capabilitiesProgress Test Studio for APIs is a very powerful tool for API tests and can be a nice addition to the established Test Studio web testing.Coded steps significantly improve the capability of the application to handle complex test scenarios. In this blog post I will explain how to use them in detail.
Overview
Make sure to take a look at the Code Features section in our documentation. It provides extensive information on coded steps and their related features. In this post we will discuss building a simple end-to-end example to help you get started with coded steps and give you a broader perspective of their capabilities.
You can also take a look at the sample project that can be created in Progress Test Studio for APIs. Part of its test cases show example usages of coded steps (like how to generate a random username, building a simple data-driven test and how to reuse helper code classes).
Test Studio for APIs supports two coding languages: C# and Visual Basic. For the purpose of this article, we will be using C#. Apart from the syntax differences though, there are no differences in the way coded features are used in the application. This is why you can easily port the examples, provided here, to Visual Basic if that is your preference.
Why Coded Steps?
Test Studio for APIs is built from the ground up with the intention to provide an easy-to-use interface for building quick and robust test cases. You can use Set Variable Steps with source-path expressions and various value conversions to extract data from HTTP requests. The verification steps provide a powerful UI for building complex verifications. Conditions, Goto and Wait steps provide the means for building a custom control flow of your tests.
All of the above features will allow you to build complex test projects without writing any code. Still, no UI could cover the endless possibilities of use cases that you might need to implement in your projects. When it comes to building some specific test logic, where the UI might not suffice, coded steps fill in to cover everything else.
Getting Started
Two of the questions that we have received by users so far are: "How can I generate a random username?" and "How can I get the total count of items, returned as a JSON array?" These are some good use cases that we can use for our example in this article. To show them in action, we can build a test case that gets all users, stores their total count at the moment, creates a new user with a random username, and finally gets all users again and verifies that their count has increased by one.
First of all, let's create a test project to work with. Click on File > New Project and create a new API Project. Let's name it CodedStepsDemo. This will create a default test case with a HTTP request in it. This test is created whenever you create a new project to help you get started. Usually, we would delete it and create our own tests, but in this case, the HTTP request step in the default test fits our needs perfectly.
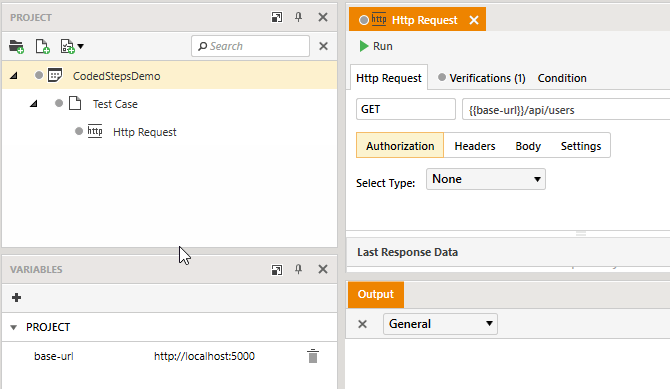
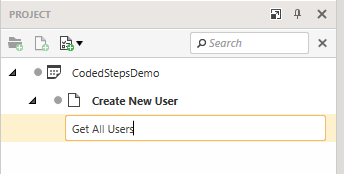
Just rename the test case to "Create New User" and the HTTP step to "Get All Users."
In this example, we will be making our HTTP requests against a demo application that comes built-in with Test Studio for APIs. It is a simple web service application that stores users and allows adding, modifying and deleting users. To start it, simply click on the Run Demo Application button in the toolbar.

This will start a simple web service, listening on http://localhost:5000.
This first HTTP request step does just what we need as a start - gets all existing users from the demo application. You can execute it and see that it returns a JSON collection with all users currently registered in the application.
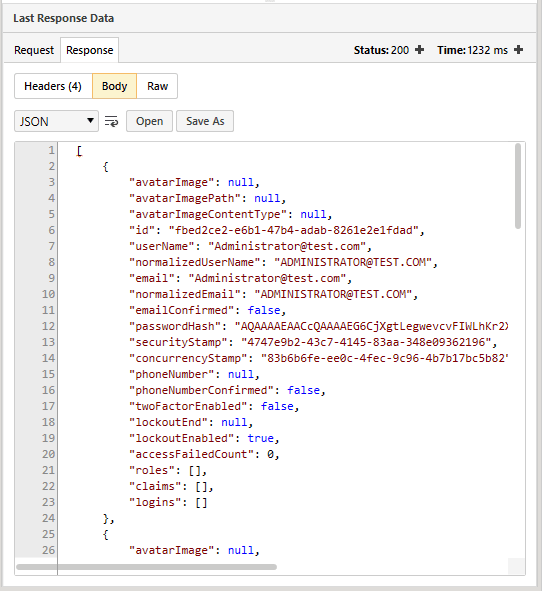
We could use a Set Variable Step with a JSONPath expression to extract any part of the response that we might need for the next steps. You cannot get the total count of items in the JSON collection just with a JSONPath expression though (Test Studio for APIs uses JSON.Net to parse JSONPath expressions, and at the time of writing this article, JSON.Net does not support that.) This is why we will need a separate coded step in order to get the array count.
Creating the First Coded Step
To create your first coded step, right-click on the test case in the Project Explorer and select Add Step > Coded Step.
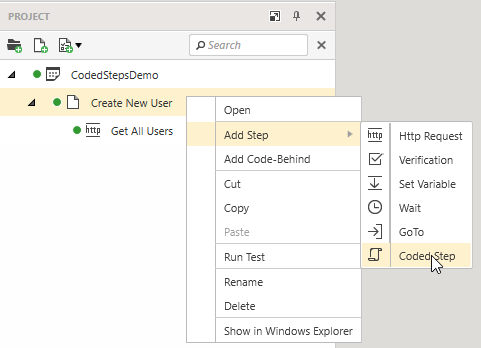
Since this is the first coded item that you create in this project, you will be prompted to select the Coding Languagefor the project. Setting the coding language is a one-time operation and cannot be changed later. We'll leave the selection at C# and click OK.
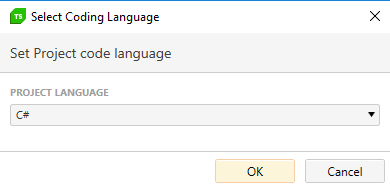
One more thing that will happen while creating this coded step is that a code-behind file will be created and associated with the test case (because this is the first coded step added to this test case). Let's leave the coded step behind for a while and check on what happens in the test's code-behind. Click on the "Open Code-Behind" button - either next to the test case in the Project Explorer, or the one inside the coded step.

The test's code-behind file is created with a public class, named according to the name of the test case itself (but excluding invalid characters).
To help you get started, a default method "TestMethod" is generated with some hints.
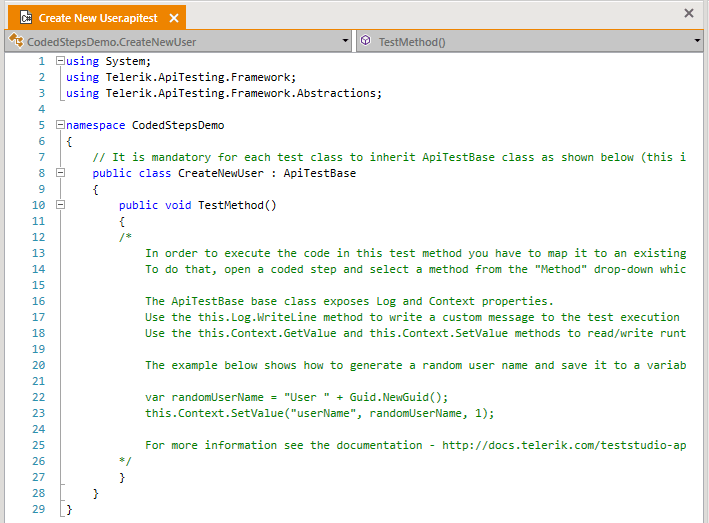
Rename the default test method with a more friendly name, e.g. "StoreAllUsersCount" and remove the hint comments to make room for your code.
Access Context Variables from Code
Next, we need to access the response body of the last HTTP request in our code. The base class that all code-behind classes implement is ApiTestBase. It exposes a Context property of type IContext and provides the methods that allow us to access the variables in the current context: SetValue() and GetValue() (Read more about the Context property in our documentation).
public void StoreAllUsersCount()
{
  var body = this.Context.GetValue("Body");
}
Using an External Library
We need to parse the JSON content of the response body. We can use Json.NET for that, but we need to add an assembly reference to its .dll file in our project. You can download Json.NET as a .zip file from here and extract the .zip file on your machine. From the extracted directory, you can copy the ".\lib\net45\Newtonsoft.Json.dll" file and move it to the desired folder that you plan to refer to the assembly from.
You can add the assembly file inside your test project's folder or any directory on your machine. You could also install it in your Global Assembly Cache (GAC). Wherever you decide to store the assembly file, the steps to add a reference to it are the same:
1. Open your test project. Right click on your project root item and select Properties or click on the Edit Project Properties button in the toolbar.

2. In the References section, click on the Add Reference(s) button and navigate to the folder where the assembly file is located. Select the assembly file and click Open. For simplicity, I will place the Newtonsoft.Json.dll file in the root of my test project.
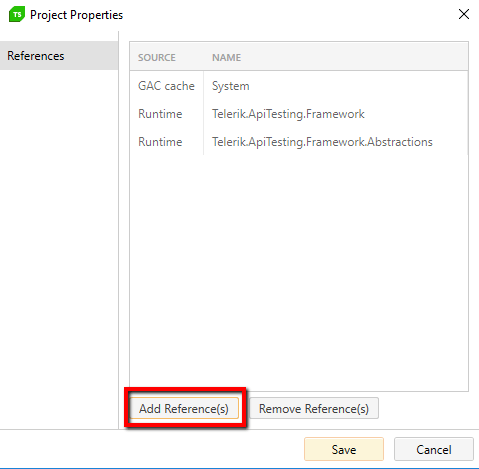
3. The new assembly will appear in the list of referenced assemblies. Click Save to save the changes and close the Properties dialog.
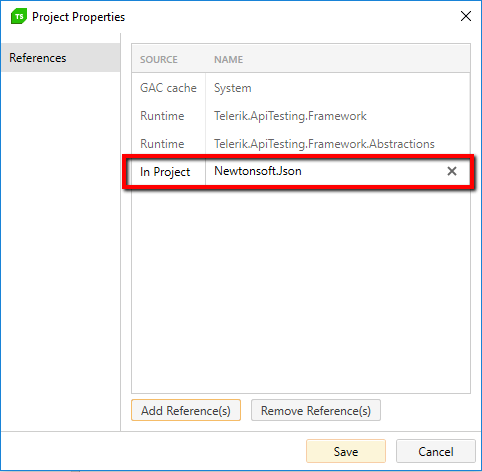
Note that keeping external assemblies in your project directory and adding them under source control along the rest of the project files might not be a good idea, because this will increase the overall size of your source-control repository. On the other hand, if you rely on the assemblies to be available in the Global Assembly Cache or in any folder on the machine, you will have to make sure that they are available on every machine where you might distribute and run your tests. You could solve this problem, by restoring referenced assemblies, using NuGet, but I will leave this as a topic for a future blog post.
Now that we have added the assembly reference, we can use Json.NET in our code-behind file, to parse the response body and get the total count of users.
Reusing Standalone Code Items
Since we will need the same code again later for another coded step, we should add it as a reusable method. We could do that in a private method in our code-behind class, but for the sake of the demonstration, I will create it in a separate code item file. Code items are separate code files that are not related to a particular test case. This makes them useful for separating reusable code logic (like helper methods) that could be accessed from every code-behind class.
I'll create a separate folder in the project, called Utilities, where I would store all reusable helper code items that are not context-specific to a particular test case or test suite (folder). To create a new code item, just right-click on a folder (or the project root) and select Add Code Item.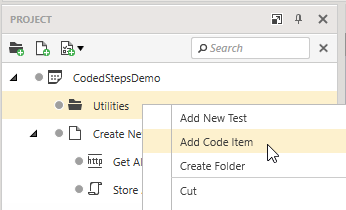
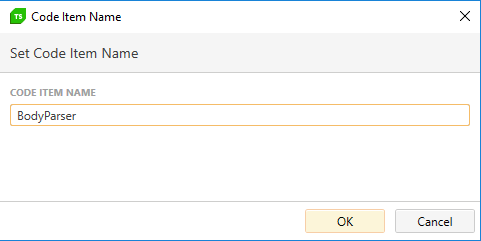
Give the new code item a name (e.g. BodyParser).
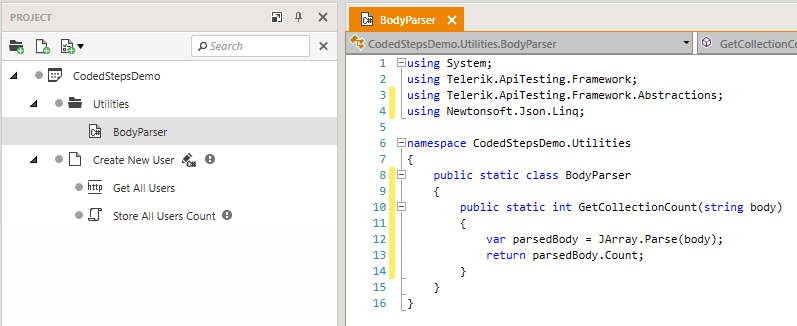
In the new code item, add a using Newtonsoft.Json.Linq; directive, make the generated class static and add a public static method called "GetCollectionCount".
using System;
using Telerik.ApiTesting.Framework;
using Telerik.ApiTesting.Framework.Abstractions;
using Newtonsoft.Json.Linq;

namespace CodedStepsDemo.Utilities
{
  public static class BodyParser
  {
    public static int GetCollectionCount(string body)
    {
      var parsedBody = JArray.Parse(body);
      return parsedBody.Count;
    }
  }
}
Once we have the BodyParser class created, we can reuse it from the test's code-behind class. Just make sure to add a using directive matching the namespace of the code item's namespace (CodedStepsDemo.Utilities in this case).
using System;
using Telerik.ApiTesting.Framework;
using Telerik.ApiTesting.Framework.Abstractions;
using CodedStepsDemo.Utilities;

namespace CodedStepsDemo
{
  public class CreateNewUser : ApiTestBase
  {
    public void StoreAllUsersCount()
    {
      var body = this.Context.GetValue("Body");
      var usersCount = BodyParser.GetCollectionCount(body.ToString());

      this.Context.SetValue("initialUsersCount", usersCount, 0);
    }
  }
}
We will use the Context.SetValue method to store the result to a runtime variable named initialUsersCount. Note the last argument in the SetValue method call: this.Context.SetValue("initialUsersCount", usersCount, 0);. The "0" argument sets the context of the stored variable to the current test case. If you use "1" instead, that will save the variable in the root project scope and it will be accessible by all test cases. Currently, we need the variable in the current test only, so we will use "0" so that we do not pollute the root scope with unnecessary variables. (You can even omit the "0" completely, as it is the default value of this parameter.)
Now that we have the code-behind method ready, we can open the coded step and select the new method.

Handling Code Errors
For the sake of brevity in the examples in this article, I have not included error handling of the sample code. With the current implementation, if the received response body is not the expected JSON array string (e.g. if the test server returns an unexpected result), its parsing will fail and JSON.Net will throw a JsonReaderException exception. Since the exception is not handled in our GetCollectionCount method, it will be propagated upwards and the test case will fail with an error like this in the Output pane:
12:00:46.497 [ERROR] [FAILED] | | 'Coded Step 'StoreAllUsersCount'' [44 ms] [3Xx0gPbpRLmGho8yvE7ITX] 'Error reading JArray from JsonReader. Current JsonReader item is not an array: StartObject. Path '', line 1, position 1.'
In terms of test execution, unhandled exceptions in the test code get handled by the execution engine of Progress Test Studio for APIs. This means that if a coded step throws an exception, it will be properly marked as failed and the test execution will continue with the next test case. You will be able to see the exception message in the test output. In many cases this would be enough for you to detect where the problem with your tests lies. (See this documentation article for some hints on how you can debug your coded tests.)
Still, unhandled exceptions in your code might not always be descriptive enough for you to track the root cause of a failing test. This is why you could approach your coded items' code the same way you would approach any application code that you would be writing and add proper error handling. In the case of the GetCollectionCount method above, you could wrap your code in a try-catch clause and throw your own exception when needed.
using System;
using Telerik.ApiTesting.Framework;
using Telerik.ApiTesting.Framework.Abstractions;
using Newtonsoft.Json.Linq;

namespace CodedStepsDemo.Utilities
{
  public static class BodyParser
  {
    public static int GetCollectionCount(string body)
    {
      try
      {
        var parsedBody = JArray.Parse(body);
        return parsedBody.Count;
      }
      catch (Exception ex)
      {
        throw new Exception("Could not retrieve collection count from 'Body'. Message: " + ex.Message);
      }
    }
  }
}
This way you would get the following message in the test output, which is a bit more descriptive:
12:03:09.984 [ERROR] [FAILED] | | 'Coded Step 'StoreAllUsersCount'' [39 ms] [3Xx0gPbpRLmGho8yvE7ITX] 'Could not retrieve collection count from 'Body'. Message: Error reading JArray from JsonReader. Current JsonReader item is not an array: StartObject. Path '', line 1, position 1.'Generating a Random Username
The next step we need is to create a new user. We could just create the new user with a hard-coded username, but if you execute that test twice without clearing the state of the application under test, you will get an error that the user already exists. In some test scenarios that will be the desired behavior and you will always rely on starting your tests over a pre-configured environment (e.g. resetting your database every time to a "golden data set"). In other cases though, resetting the state of the database might not be appropriate. This is when you will need to generate a unique username (or project name, or any value that you might need to be unique). This is where coded steps can be useful in Progress Test Studio for APIs.
To generate a unique user name, we will create another coded step in the test case. Let's name it "Generate Random Username". In the coded step, click on the Method drop-down and select <New Test Method>.

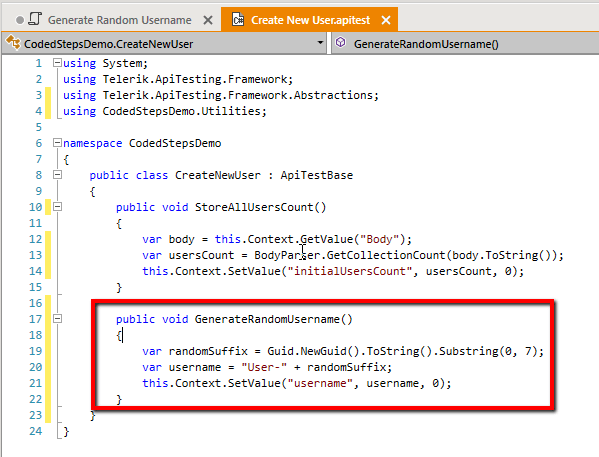
This will automatically create a new empty method in the code-behind file. You can just rename it (e.g. to "GenerateRandomUsername") and add the appropriate logic inside its body.
public void GenerateRandomUsername()
{
  var randomSuffix = Guid.NewGuid().ToString().Substring(0, 7);
  var username = "User-" + randomSuffix;
  this.Context.SetValue("username", username, 0);
}
Next, get back to the Generate Random Username coded step and select GenerateRandomUsername as a value in its drop-down.

We can use the username variable in a new http request step to create the new user. Create a new http request step named Create New User with the following properties:
- Method:POST
- URL:{{base-url}}/api/users
- Headers:Content-Type: application/json
- Body:{ "userName": "{{username}}", "email": "{{username}}@test.com" }
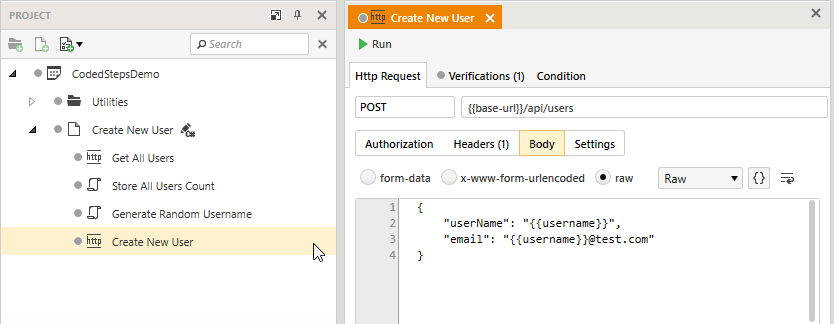
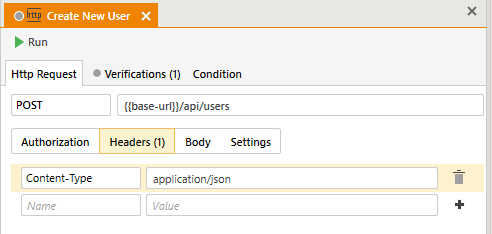
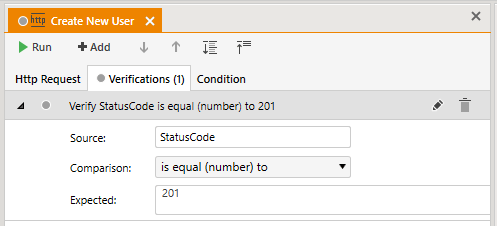
You could add a verification for status code to that request too:
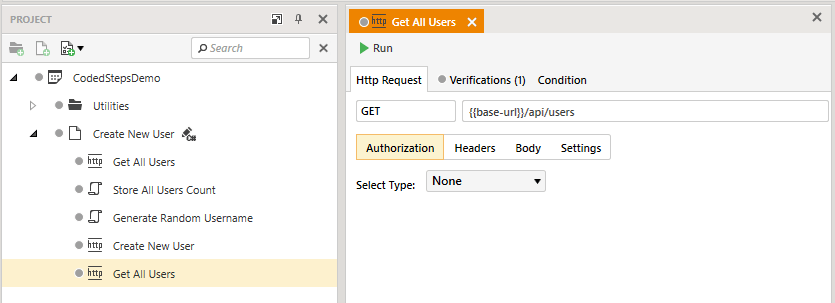
After the Create New User step, we need to add one more GET request to retrieve the updated list of users. To do that, we can just copy-paste the first Get All Users test.
Finally, we need one last coded step, to parse the latest response's body and compare the new users count with the initial count.
In the test's code-behind file, add a new method named AssertUserCountIsIncremented that retrieves the users count based of the last response's body, gets the already stored "initialUsersCount" variable and verifies that there is one user added.
public void AssertUserCountIsIncremented()
{
  var body = this.Context.GetValue("Body");
  var updatedUsersCount = BodyParser.GetCollectionCount(body.ToString());

  var initialUsersCount = (int)this.Context.GetValue("initialUsersCount");

  Assert.AreEqual(initialUsersCount + 1, updatedUsersCount, "Users count is not properly incremented.");
}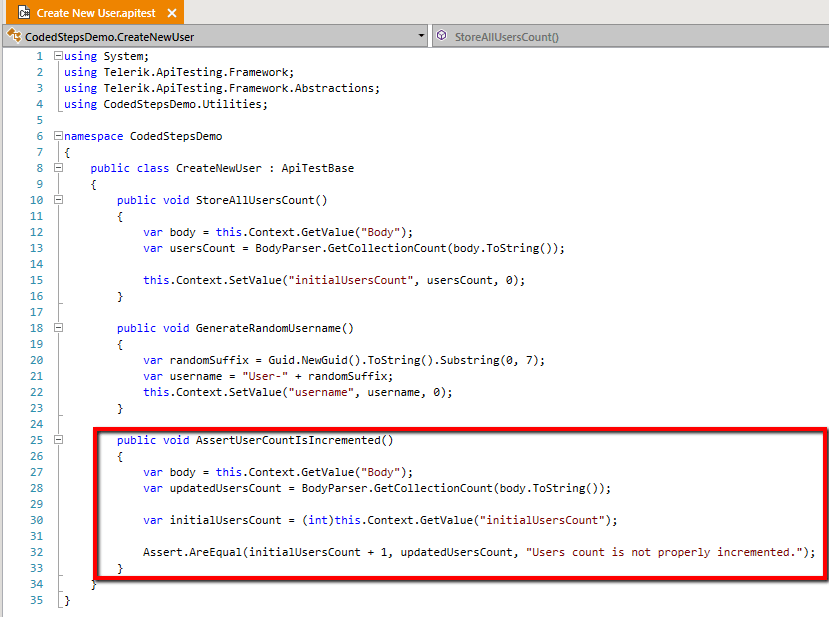
Notice the Assert statement at the end of the AssertUserCountIsIncremented method. Progress Test Studio for APIs provides a simple Assert framework that can be used to make verifications in your code files. If an Assert statement fails, the corresponding test step and test case will fail with the appropriate message.
Select the AssertUserCountIsIncremented method in the last coded step and the test case is complete and ready for execution.
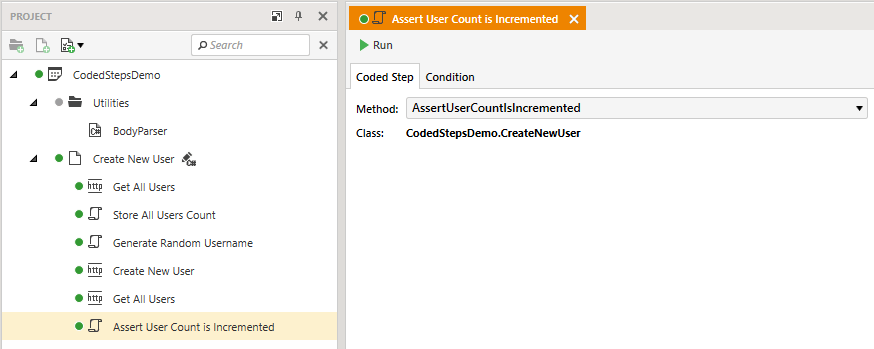
Summary
In this article we created a simple test case that uses coded steps to generate random data and parse JSON response content. We demonstrated how you can access the test context to store or retrieve variables. We also created a reusable code item that can be used by multiple tests and showed how to use them in the code-behind code of a test case. You can download the project with the blog's examples right here. I hope this will help you get started using coded steps in Progress Test Studio for APIs.
Please, do not hesitate to share your feedback or feature requests with us on our Feedback Portal.
Test Studio for APIs is available as part of Test Studio Ultimate. Give it a try for free today.