Have you heard the BIG news? Visual Studio for Mac was announced just a little before Microsoft Connect(); and it is already available for download from here. What exciting times are coming! We were very excited, just like you, to try it out, together with Telerik UI for Xamarin.
First, I should say that, as a guy acquainted with both Visual Studio (for Windows) and Xamarin, I found the fact that Visual Studio for Mac actually resembles Xamarin Studio very appealing. So, you get both the easy-to-start experience coming from working in an already known environment and the confidence that this environment will continue to evolve and grow. I should also say that I am thrilled by the ability of the new version to show design-time for Forms. Custom native controls seem to be unsupported in the Preview version out-of-the-box, but I expect this to get improvements too.
Let’s now get straight to the point. What I will do now is first create a new project and then add the Telerik UI for Xamarin references using the NuGet server that we provide. Then, I will add our Calendar control and will run the app.
Create and Run an App in Visual Studio for Mac with UI for Xamarin
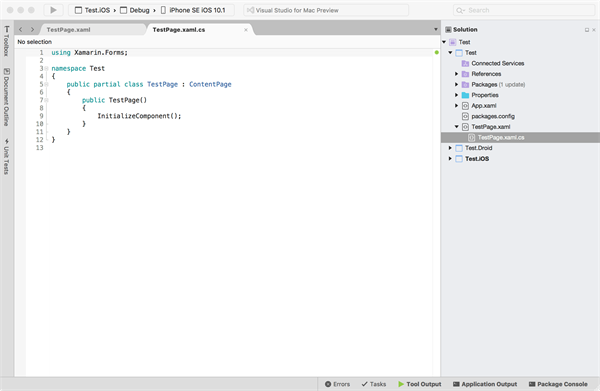
- Open Visual Studio for Mac and create a new Forms app
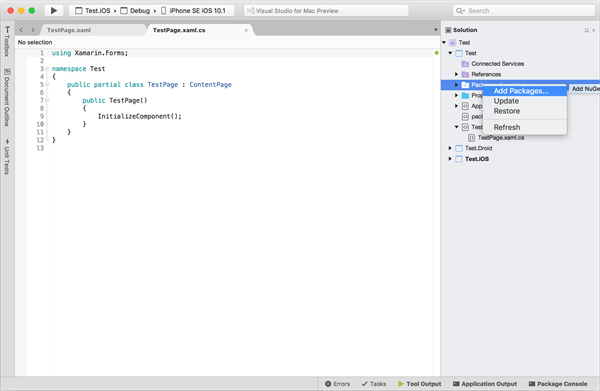
- Right-click the Packages folder of the portable class library project and select Add Packages
- From the menu at top-left in the Add Packages window, select Configure Sources
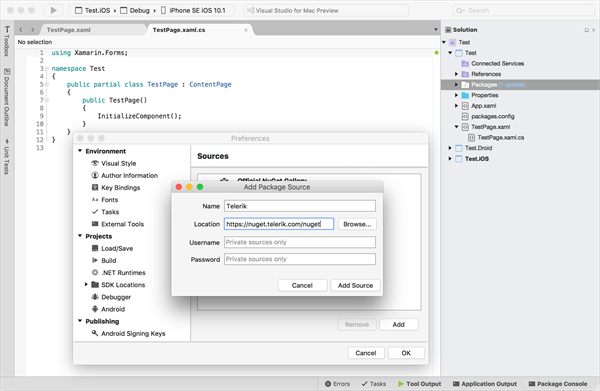
- From the Preferences window that appears, click Add and fill in the Name (e.x. Telerik) and the NuGet address (https://nuget.telerik.com/nuget) for the Telerik NuGet server. Then click Add Source.
- Now, from the Add Packages window, choose the Telerik NuGet item that you just created and enter your Telerik.com credentials. Note that if you already have Xamarin Studio with the Telerik NuGet source added, you may get the following message: Password encryption is not supported on .NET Core for this platform. The following feed uses an encrypted password: ‘Telerik NuGet Package’. You can use a clear text password as a workaround.
What you need to do is delete the Telerik NuGet feed from Xamarin Studio, as Visual Studio is trying to access it and it can’t for the aforementioned reason. - After the credentials are accepted, search for “Xamarin” using the search box at top-right to reach our Telerik UI for Xamarin packages (available depending on your license). Add the package you are entitled to.
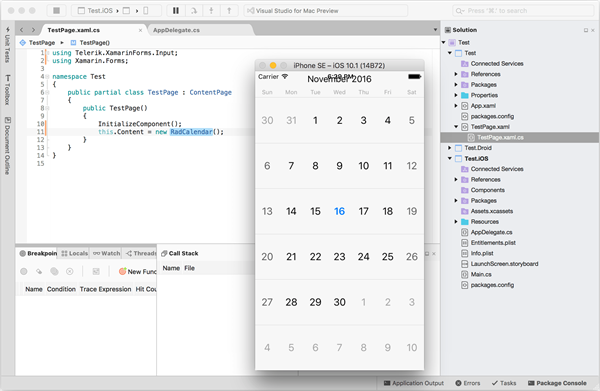
- In your main page of the portable class library, just add the following:
this.Content =newRadCalendar(); - In the AppDelegate of the iOS project, you need to add a an attribute and a new instance for the CalendarRenderer:
usingSystem;usingSystem.Collections.Generic;usingSystem.Linq;usingFoundation;usingTelerik.XamarinForms.Common.iOS;usingUIKit;usingXamarin.Forms;[assembly: ExportRenderer(typeof(Telerik.XamarinForms.Input.RadCalendar),typeof(Telerik.XamarinForms.InputRenderer.iOS.CalendarRenderer))]namespaceTest.iOS{[Register("AppDelegate")]publicpartialclassAppDelegate : global::Xamarin.Forms.Platform.iOS.FormsApplicationDelegate{publicoverrideboolFinishedLaunching(UIApplication app, NSDictionary options){newTelerik.XamarinForms.InputRenderer.iOS.CalendarRenderer();global::Xamarin.Forms.Forms.Init();TelerikForms.Init();LoadApplication(newApp());returnbase.FinishedLaunching(app, options);}}} - In the MainActivity of the Android project, you should do the same thing:
usingSystem;usingAndroid.App;usingAndroid.Content;usingAndroid.Content.PM;usingAndroid.Runtime;usingAndroid.Views;usingAndroid.Widget;usingAndroid.OS;usingXamarin.Forms;[assembly: ExportRenderer(typeof(Telerik.XamarinForms.Input.RadCalendar),typeof(Telerik.XamarinForms.InputRenderer.Android.CalendarRenderer))]namespaceTest.Droid{[Activity(Label ="Test.Droid", Icon ="@drawable/icon", Theme ="@style/MyTheme", MainLauncher =true, ConfigurationChanges = ConfigChanges.ScreenSize | ConfigChanges.Orientation)]publicclassMainActivity : global::Xamarin.Forms.Platform.Android.FormsAppCompatActivity{protectedoverridevoidOnCreate(Bundle bundle){TabLayoutResource = Resource.Layout.Tabbar;ToolbarResource = Resource.Layout.Toolbar;base.OnCreate(bundle);global::Xamarin.Forms.Forms.Init(this, bundle);LoadApplication(newApp());}}} - Finally, just run the project for your favorite platform:
![visualstudio-for-mac-xamarin-calendar visualstudio-for-mac-xamarin-calendar]()


